24-Hour Flash Sale Coming on Wednesday!

Stampin’ Up! has announced a 24-hour flash sale on Wednesday, October 23rd from 12:01AM MT until 11:50PM MT.  Selected stamps will be sold at 15% off, so if you have any sets on your wish list now is the perfect time to purchase them at a discount, as SU seldom offers a sale on current stamp sets!  Click here to download a PDF list of stamp sets that are included in the sale.

Here are additional details:

  • All selected stamp sets can be applied to Starter Kits.
  • Discount applies to select stamp sets only when purchased individually during the 24-hour promotion period.
  • Bundles featuring stamp sets from the promotion will not be discounted.
  • If you purchased a stamp set prior to the sale, we will not be offering exchanges or credits.
  • In the event that we run out of any item offered, promotional pricing will be honored on items backordered, up to the point it reaches the backorder limit. Once an item reaches the backorder limit and is not orderable, it will no longer be available during the promotion and will not be available to order until additional inventory arrives in your market.

You can place your orders on my online store or by contacting me directly at rhondastamps@verizon.net if you’d like me to place the order for you.

Thanks for stopping by today!

 Product List  

Slice of Happiness

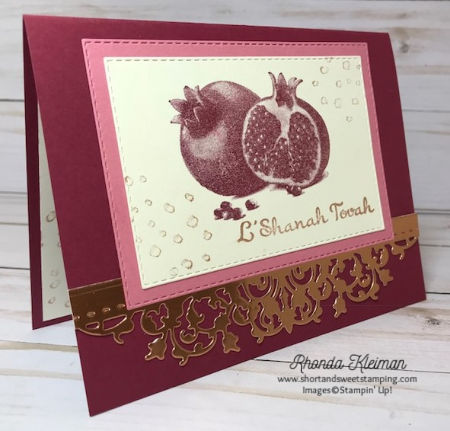
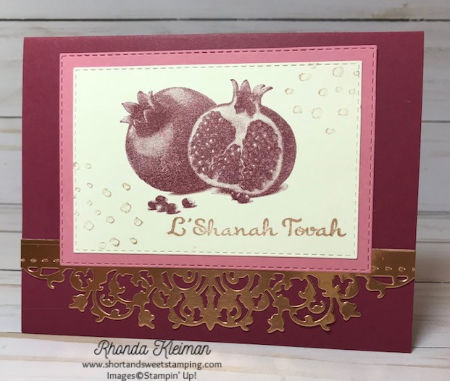
Today I’m featuring a card I made to send to my friends and relatives for the Jewish New Year, Rosh Hashanah. It has been many years since Stampin’ Up! has had a Jewish holiday stamp set, except for a few occasional Hanukkah greetings, so every year I take on the challenge of using SU products to create my holiday cards. It is amazing what you can come up with! When I received the 2019-2020 Annual Catalog, as soon as I spotted the pomegranate image in the new Slice of Happiness stamp set pictured on page 129, I knew it would be perfect for my cards. The pomegranate is a symbol that is frequently used in Jewish imagery as it signifies fruitfulness, knowledge, learning, wisdom and has special meaning for Rosh Hashanah because it is said that the pomegranate has 613 seeds, which is the exact number of commandments that are found in the Torah so it is customary to eat the fruit on this holiday. While I created this as a holiday card, you can substitute any greeting to the front and inside of the card and use it for another occasion. One note: I used a set of Jewish holiday greetings from Papertrey Ink that were designed specifically for this holiday.

Here is how I made the card.

Cut piece of Merry Merlot cardstock at 5 1/2″ x 11″ and fold in half.

Cut piece of Rococo Rose cardstock at 3 1/2″ x 4 3/4″and die cut with the 5th largest die from the Stitched Rectangle die set. Cut piece of Very Vanilla cardstock at 3″ x 4 1/2″ and die cut with the 6th largest Stitched Rectangle die.

Stamp pomegranate image with Merry Merlot ink. Stamp dewdrops with Delicata Celestial Copper ink in opposite corners of the rectangle . Adhere this piece to the Rococo Rose piece.

For the decorative border cut a piece of copper foil at 1 1/2″ x 6″ and run it through your die cutting machine with the floral die from the Delicate Lace die set. Use a light layer of liquid glue to adhere to bottom front of card. Snip off ends at each side of the die cut piece. Center the image above the foil piece and adhere to card front.

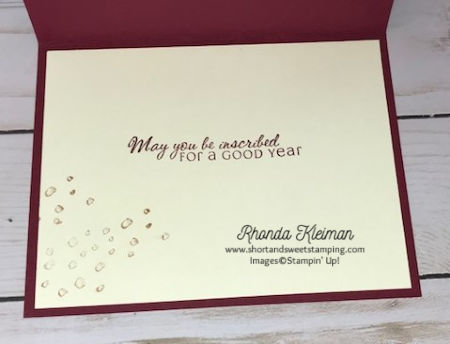
For the inside of the card cut a piece of Very Vanilla cardstock at 4″ x 5 1/4″. Stamp greeting. Stamp dewdrops at bottom left of piece with the Delicata Celestial Copper ink. Adhere to card.

Thanks for stopping by today!


 Product List  

Healing Vibes

Hello and for those of you in the U.S. Happy Labor Day! Today I’m participating for the first time in Kylie Bertucci’s International Stampin’ Up! Blog Highlights. Readers get to vote on their top five favorites in the gallery and the top 10 ten winners will get to participate in an International Blog Hop later this month. The theme is encouragement and I hope you like my card.

I chose to work with Healing Hugs, a stamp set in the Distinktive line of photo-realistic stamps. I love the sentiments as well as the type fonts in this set. A group of women that stamp with me a few times a year recently asked to make some get well and sympathy cards and this was one of the cards we made. As it turns out, I needed two cards shortly after we made them so they came in handy.

Here is how I made the card:

  • Cut a piece of Rococo Rose cardstock at 5 1/2″ x 8 1/2″ and fold in half.
  • Cut a piece of the handwriting paper from the Pressed Petals Designer Series Paper at 4 1/8″ x 5 3/8″ and adhere to card base.
  • Cut a piece of Whisper White cardstock at 3″ x 4 1/2″. Stamp flowers with Merry Merlot and Rococo Rose inks, slightly overlapping them. Stamp leaves with Pear Pizzazz ink. Stamp cross-hatch design with Soft Suede ink. Adhere to a piece of Merry Merlot cardstock cut at 3 1/8″ x 4 5/8″. Adhere to card.
  • On a scrap piece of Whisper White cardstock stamp sentiment with Soft Suede ink. Cut with the stitched label die from the Smooth Sailing dies. You can use any other similar dies or punches. Add a small Rococo Rose faceted dot. Adhere to card with Stampin’ Dimensionals.

Please vote for my card by clicking here: http://bit.ly/InternationalHighlightsSept2019VoteForMe. To give a vote click on the heart in the top right hand side of the picture when the hearts appear.

Thanks for stopping by today!

 Product List  

Noble Peacock Trio

Hello! Today I have a trio of cards I made for a recent class I gave using the gorgeous Noble Peacock Suite of products pictured on pages 24-26 in the annual catalog. I previously posted a fourth card here.

The first card is 4 1/4″ square. Card base is cut at 4 1/4″ x 8 1/2″ from a piece of Old Olive Noble Peacock Specialty DSP. Cut piece of Old Olive cardstock at 3 1/4″ square and run through Subtle 3D embossing folder to give the piece some texture. Attach to card base with dimensionals. Cut two peacock feathers from a piece of copper foil using the Detailed Peacock Dies and adhere to the textured piece. Stamp greeting from the Floral Essence set in Old Olive ink on scrap of Very Vanilla cardstock and cut with a rectangle from the Stitched Rectangle Dies. Attach to card with dimensionals. Add green Noble Peacock rhinestones to the feathers.

For the next card cut piece of Blueberry Bushel cardstock at 4 1/4″ x 11″ and fold in half. Cut piece of Blueberry Bushel paper from the Noble Peacock Specialty DSP at 4 1/8″ x 5 3/8″ and adhere to card base. Cut two pieces of cardstock, Highland Heather at 3 1/2″ x 5″ and Whisper White at 2 3/4″ x 4 3/4″ and run through the Beads & Baubles embossing folder. Adhere Highland Heather piece with Snail Tape and the Whisper White with dimensionals. For the peacock cut a piece of Shimmery White cardstock at 3″ x 5″ and using sponge daubers, first add a patch of Blueberry Bushel ink across the piece, followed by Pretty Peacock and then Highland Heather until the piece is covered entirely. Cut a piece of an adhesive sheet and adhere to the back. SU no longer sells these sheets so if you do not have them you can use the fine tip adhesive or other glue of your choice. Cut out with the filigree peacock die from the Detailed Peacock Dies. Cut three leaves from the die set with Pretty Peacock cardstock and trim the stems. Peel adhesive backing off the peacock and lightly glue leaves to the back of the peacock. Adhere peacock to the Whisper White embossed piece. Stamp greeting in Highland Heather ink, cut with one of the small Stitched Nested Labels, attach with dimensionals and add purple rhinestone to the greeting.

For the last card I wanted to use my favorite Designer Series paper, Perennial Essence. I thought that some of the blue and green papers would work well with the peacock image and I love how it looks! Cut piece of Bermuda Bay cardstock at 5 1/2″ x 8 1/2″ and fold in half. Cut one piece of DSP at 4″ x 5 1’4″ and adhere to card base. Cut two pieces of Old Olive cardstock, one at 3″ x 3 1/2″ and the other at 2 3/4″ x 3 1/4″. Cut piece of DSP at 2 7/8″ x 3 3/8″ and adhere to larger piece of Old Olive cardstock. Tie piece of reversible ribbon around this piece and adhere to card. Cut piece of Whisper White cardstock at 3 1/8″ x 2 5/8″. Stamp top part of peacock in Old Olive ink on left side. Stamp tail feathers around peacock in Bermuda Bay ink. Adhere to smaller piece of Old Olive cardstock and then adhere to card. Stamp greeting in Bermuda Bay ink and die cut or punch out circle. Cut Bermuda Bay circle with die from the Stitched Shapes Dies and adhere to greeting. Adhere to peacock image with dimensionals.

Last chance for the $99 Starter Kit! August 31st is the last day for you to take advantage of this great deal!

  • Pay $99 to sign up and choose $155 worth of Stampin’ Up! products for your kit. In addition to the Annual Catalog you can also select products from the 2019 Holiday Catalog. This is $56 in free products, which is $30 more than usual and shipping is FREE!
  • After signing up you will receive a $10 coupon code that can be used on orders you place through October.
  • Enjoy a 20% discount on all orders.
  • Crafters and hobby stampers are welcome!  Become a happy shopper – you do not have to host parties, sell or be a business builder!  Enjoy all benefits through January 31, 2020.  There are no obligations and no penalty to drop! 
  • Click here to sign up.

Thanks for stopping by today!

 Product List  


Daisy Duo

Hello! Today’s card features the new Daisy Lane stamp set, Daisy Delight stamp set and coordinating punches. I paired them up with Perennial Essence, my favorite Designer Series Paper in the new annual catalog. This was an easy card to put together.

Here is how I made the card.

  • Card base – cut piece of Crushed Curry cardstock at 5 1/2″ x 8 1/2″ and fold in half.
  • Cut piece of Perennial Essence Designer Series Paper at 4″ x 5 1/4″ and adhere to card base.
  • Cut piece of So Saffron cardstock at 1″ x 5 1/4″. Stamp “friend” greeting from the Daisy Lane stamp set in Crushed Curry ink. I also made a few thank you cards and used the “thank you” greeting from the Daisy Delight stamp set.
  • To make the flowers, stamp the larger daisy image from the Daisy Lane stamp set two times on piece of So Saffron from the Perennial Essence Vellum Cardstock and punch out with the large daisy punch. Curl petals up with a bone folder. Adhere pieces together with liquid glue at center of flowers. Stamp two of the small daisies in Crushed Curry ink on piece of Whisper White cardstock and punch out with the medium daisy punch. Curl petals and adhere with liquid glue. Adhere the two sets of flowers together at center.
  • To finish off the card, using Old Olive cardstock, cut four leaves from the Lovely Flowers Dies. Adhere leaves to left of stamped greeting, two above and two below. Adhere daisies with Stampin’ Dimensional. Adhere Gold Faceted Gem to center of daisies.

It’s time to redeem bonus days coupons you earned in July. The deadline is August 31st. You should have received an email from Stampin’ Up! with a bonus code that you must use when placing your online order. If you need any assistance please let me know.

Two weeks remain for you to take advantage of this great deal on the Starter Kit! Spend $99 and select $155 worth of products, which is an additional $30 more than the regular cost of the kit. You will also get free shipping and a $10 coupon that can be redeemed on a future order. Now is an ideal time to join Stampin’ Up!, especially if you are planning on placing a large order from the upcoming 2019 Holiday Catalog. You will always get a 20-25% discount on your purchases. Should you decide to drop by January 2020 there will be no penalty and you will enjoy your discount and all other benefits and resources until that time.

Here’s a sneak peek of the catalog cover image.

My pre-order finally arrived so I will begin posting preview projects later this week.

Thanks for stopping by today!

 Product List  
Daisy Punch
[143713]
$18.00

Floral Essence – Kylie’s Training Blog Hop

Hello and welcome to Kylie’s Demonstrator Training Blog Hop! I’m part of a group of amazingly talented Stampin’ Up! demonstrators from around the world that participate in Kylie’s program for building our businesses.

Today’s card is made with products from the gorgeous Perennial Essence Suite. I was asked by a friend to create a special birthday card for a friend of hers. After going to several card shops she couldn’t find what she was looking for so this is what I came up with after discussing what she wanted on the card. I gave her several choices and was hoping she would pick my favorite one – and she did!

This is how I made the card:

  • Card base – Petal Pink cardstock cut at 5 1/2″ x 8 1/2″ and fold in half.
  • Cut piece of Perennial Essence Designer Series Paper at 4″ x 5 1/4″. Adhere piece of Organdy Striped Ribbon to paper and adhere to card base. Cut another piece of ribbon, tie in bow and adhere with a Mini Glue Dot.
  • Cut piece of Whisper White cardstock at 2 1/2″ x 3 1/2″. Stamp largest flower image from the Floral Essence stamp set all over with Petal Pink ink. Stamp the beautiful day sentiment from the Love What You Do stamp set over the flowers using Balmy Blue ink. Adhere to card.
  • Stamp medium flower twice on piece of Whisper White cardstock with Balmy Breeze ink and then stamp the center of one of the flowers with Crushed Curry ink. Stamp small flower twice with Blueberry Bushel ink and stamp both flower centers with Crushed Curry Ink. Fussy cut all four flowers. Adhere the two larger flowers together. Arrange flowers at bottom left corner of card and adhere.

Click on the links below to hop to the other blogs. Thanks for stopping by today!


 Product List  
Paper Snips
[103579]
$10.00

Royal Peacock

Hello! Today I’m featuring a card made with products from the stunning Noble Peacock Suite pictured on pages 24-26 in the 2019-2020 Annual Catalog. I was immediately attracted to the rich jewel tones shown in the samples on these pages.

Here is how I made this card.

  • Card base – cut piece of Pretty Peacock cardstock at 4 1/4″ x 11″ and fold in half.
  • Cut piece of the Pretty Peacock paper from the Noble Peacock Specialty Designer Series paper at 4 1/8″ x 5 3/8″ and adhere to card base.
  • Cut piece of Old Olive cardstock at 4″ x 5 1/4″. Emboss with the Beads & Baubbles Embossing Folder. Cut piece of 3/8″ Reversible Ribbon and tie a bow around the embossed cardstock.
  • Stamp the peacock image on piece of Whisper White cardstock with Pretty Peacock ink. Color upper body of peacock with the light Pretty Peacock Stampin’ Blend and the upper feathers with the light Old Olive Stampin’ Blend. Stamp feather image over the bottom part of the peacock with Old Olive ink.
  • Cut with the coordinating die from the Detailed Peacock Die set. Cut piece of Pretty Peacock cardstock with the largest scalloped oval from the Layering Ovals dies. Adhere peacock to the oval.
  • Stamp Happy Birthday greeting from Beauiful Bouquet stamp set on Whisper White cardstock with Pretty Peacock ink. Cut with smallest oval die from the Layering Ovals die set.
  • Adhere peacock to card and then adhere greeting. Add some bling to the feathers with a few rhinestones from the Noble Peacock Rhinestone embellishments.

Inside of card – cut a piece of Whisper White cardstock at 4″ x 5 1/4″. Stamp the crown image with Pretty Peacock ink at lower left corner and color with light Old Olive Stampin’ Blend. Stamp greeting with Pretty Peacock ink. I chose the greeting from the Forever Lovely stamp set.

Place an online order with me between $50-$149 and use this code to receive a free gift. This month’s gift is a package of Mini Stampin’ Dimensionals. DO NOT use this code if your order is $150 or more because you will qualify for Stampin’ Rewards.

Thanks for stopping by today!

 Product List