Hand-Penned Fun Fold-Kylie’s Training Blog Hop

Hello! Welcome to Kylie Bertucci’s Demonstrator Training Blog Hop for July. I’m part of a group of Stampin’ Up! demonstrators from around the world that participate in Kylie’s program for building our businesses. The theme for this year is thank you cards that we make as a way to show appreciation to our customers and teams. Please be sure to click on the names in the list at the end of this post to hop around and view the beautiful projects created by so many talented stampers.

Today’s card is a fun fold that features the Hand-Penned Suite. It is one of four cards we will be making in one of my classes this week. The Hand-Penned Designer Series Paper is so soft and pretty and I love the color palette.
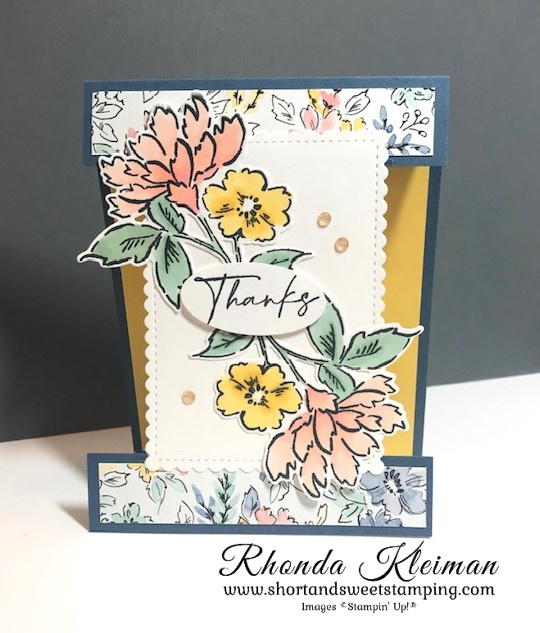
Here is how I made the card.

  • Card base – cut piece of Misty Moonlight cardstock at 4 1/4″ x 11″, score at 5 1/2″, fold and crease with a bone folder. Cut the card front 1″ from the fold line. Cut a 1″ x 4 1/4″ strip from the Misty Moonlight piece that was cut off.
  • Cut two strips of DSP at 3/4″ x 4″ and adhere to the 1″ Misty Moonlight strips. Cut a piece of Daffodil Delight cardstock at 4″ x 5 1/4″ and adhere to card base.
  • Cut a piece of Basic White cardstock with the largest die from the Stitched So Sweetly die set.
  • Stamp two of the floral images from the Hand-Penned Petals stamp set with Tuxedo Black Memento ink on piece of Basic White cardstock. Color the flowers with Stampin’ Blends. I used Mint Macaron dark and light blends for the leaves, Daffodil Delight dark and light blends for the small flower and for the large flower I used Petal Pink dark and light blends and Flirty Flamingo light blend. When finished coloring, cut both flowers out with the coordinating die from the Penned Flowers Dies.
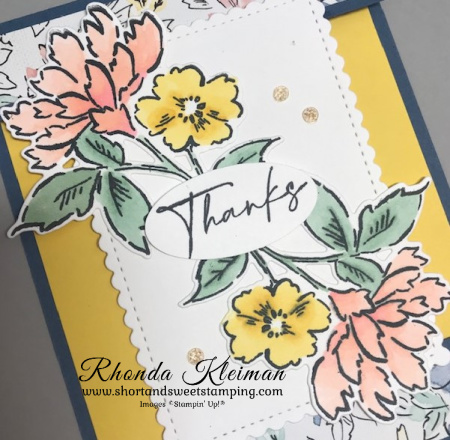
  • Adhere flowers to the Basic White scalloped piece with liquid glue. Place one flower in one direction and the other flower in the opposite direction, making sure not to put glue on the parts of the flowers that will hang off the edges of the Basic White piece. Leave a space in between the flowers in order to add the greeting.
  • Stamp the greeting with Tuxedo Black ink on scrap piece of Basic White cardstock and punch out with the Oval Punch or other punch or die that will fit the space. Adhere with Stampin’ Dimensionals.
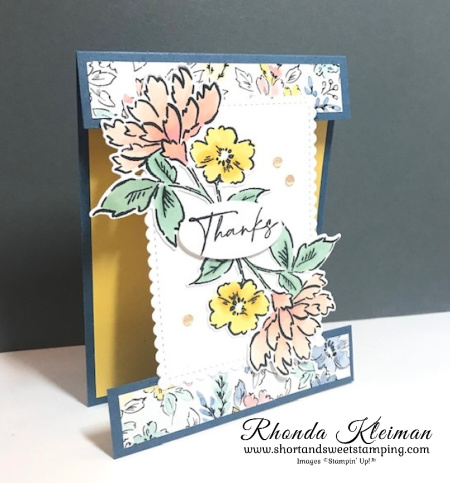
  • Adhere top of art piece to bottom edge of the 1″ folded card base. Adhere the other 1″ strip to the bottom of the piece.
  • Embellish card with three Pale Papaya Genial Gems.
Thanks for stopping by today!

Place an online order between $50 and $149 and use this host code for June. You will receive a free gift from me the following month.  If your order is $150 or more DO NOT use the host code. You will qualify for Stampin’ Rewards.

Product List

Chanukah Greetings

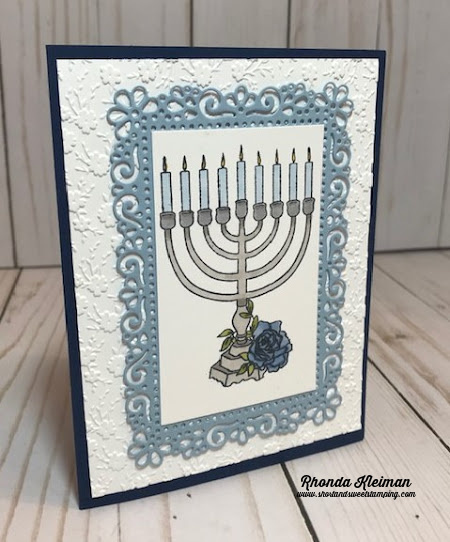
Hello! Happy Chanukah to my Jewish customers, friends and family! I’m playing catch-up with my blog posts so I’m posting this later then I had planned, but there are still a few days left before the holiday ends on Thursday evening!

This is one of the rare times that I am posting a project that doesn’t use a stamp set from Stampin’ Up! We haven’t had a new Chanukah stamp set in many years and I’ve used all of my old sets so many times that I needed a “pick me up!” so purchased this set, Love and Light, from Altenew. It comes with a coordinating die, but I didn’t use it for this card. Everything else on this card is from Stampin’ Up!

Here is how I made the card.

  • Card base – cut a piece of Night of Navy cardstock at 5 1/2″ x 8 1/2″, score at 4 1/4″, fold and crease with a bone folder.
  • Cut a piece of Whisper White cardstock at 4″ x 5 1/4″. Run through your embossing & die cutting machine with the Ornate Floral 3D embossing folder. Adhere to card base.
  • Cut piece of Seaside Spray cardstock at 3 1/2″ x 5″. Use the second largest of the wider dies in the Ornate Layers die set and run through your embossing & die cutting machine.
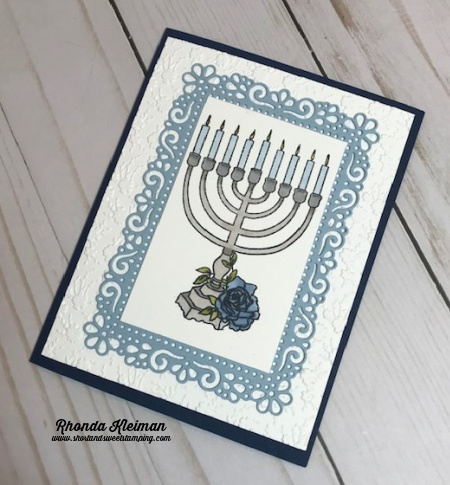
  • Cut piece of Whisper White cardstock at 2 3/4″ x 3 5/8″. Stamp image with Memento Black Ink. Color image with Stampin’ Blends. I used dark and light Gray Granite and light Smoky Slate for the menorah, light Seaside Spray for the candles, dark Daffodil Delight for the flames, light Misty Moonlight and dark Seaside Spray for the rose and dark and light Old Olive for the leaves. Adhere to ornate frame and adhere frame to card front.

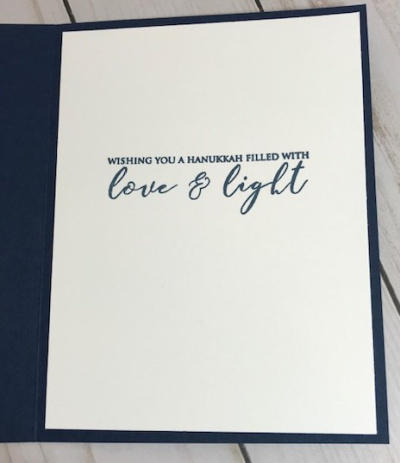
Cut piece of Whisper White cardstock at 4″ x 5 1/4″. Stamp greeting with Misty Moonlight ink. Adhere to inside of card.

Give this idea a try by changing up the stamped image!

Thanks for stopping by today!

 Product List  

Stampin’ Up!’s Year-End Closeout Sale runs through January 4, 2021. You’ll get deep discounts, some as much as 50% off, on your favorite products from the August–December 2020 Mini Catalog, also known as the Holiday Catalog.  If you’ve been waiting to make last-minute purchases from this catalog, now is the time, as availability is only while supplies last.  Please note that all of the bundles in the Holiday Catalog will be retired, however some stamp sets with coordinating dies or punches that are currently sold as bundles at 10% off will be carrying over and will be sold as individual items. 

Click here to view a list of retiring items.

Click here to view a list of products that will be carrying over.

You can purchase these items through my online store.

Hallows Night Magic – Another Card Idea

Hello! Here’s another card I created with the Hallows Night Magic Bundle. It was fun and easy to put it together. Here is how I made the card.

  • Card base – cut piece of Basic Black cardstock at 5 1/2″ x 8 1/2″, score at 4 1/4″ and crease with a bone folder.
  • Cut piece of Whisper White cardstock at 3 1/4″ x 5″.
  • Select three different papers from the Magic in this Night Designer Series Paper and cut at 1 1/2″ x 3″. Adhere to Whisper White cardstock and adhere piece to card front.
  • Stamp label image from the Hallows Night Magic stamp set on scrap piece of Whisper White cardstock with Tuxedo Black Memento ink. Color the flowers with Pumpkin Pie and Cajun Craze Stampin’ Blends and color the leaves with Old Olive Stampin’ Blends. Stamp greeting with black ink. Run through die cutting machine with the smaller label die from the Halloween Magic dies.
  • Die cut larger label from scrap piece of Basic Black cardstock and adhere to stamped label piece.
  • Cut piece of Glittered Organdy Ribbon at 6″, trim ends at an angle and adhere across the center of the card front. I used Scotch Tape to hold it down in the center. Adhere label over the ribbon.
  • Cut piece of Whisper White cardstock at 4″ x 5 1/4″. Stamp greeting with black ink. Cut strip of Basic Black cardstock at 1 1/2″ x 4 3/4″ and run it through the die cutting machine using the filigree edge die. Adhere to bottom of the cardstock. Adhere piece to inside of card.

Thanks for stopping by today!

There are just a few days left for the 15% discount on Designer Series Paper!

 Product List  
 

Fancy Phrases Birthday Cards

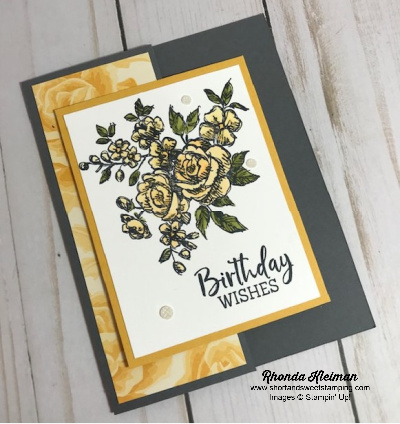
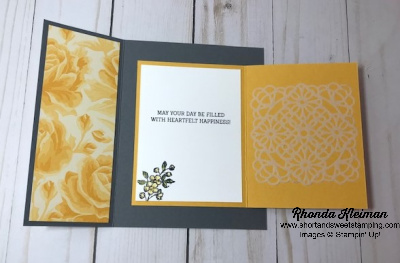
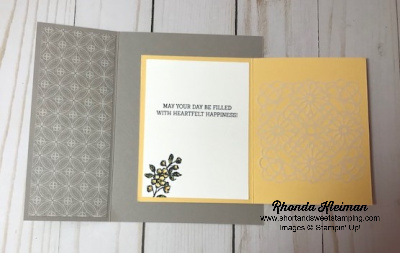
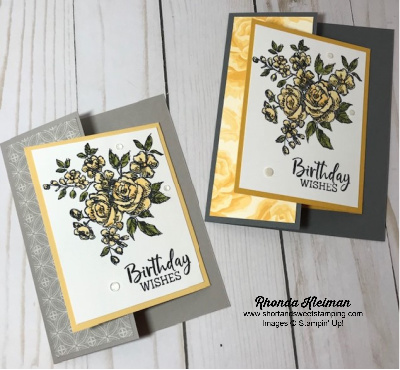
Hello! I made a few birthday cards to send out this month and thought it was the perfect time to break out Fancy Phrases, a new set in the 2020-2021 Annual Catalog. The floral images are lovely and if you like to color, you will enjoy using your Stampin’ Blends or watercoloring. I also like the variety of greetings and type fonts included in this set. I used an easy fun fold that I think shows off the colored image beautifully.

One of my favorite color combinations is gray and yellow and I haven’t used it in awhile so I decided to make two cards, each with different shades from the two color families.

The first card uses Basic Gray and Bumble Bee.

The second card uses Gray Granite and So Saffron for a softer look.

Here is how I made the cards.

  • First card base: Cut piece of Basic Gray or Gray Granite cardstock at 5 1/2″ x 6 1/2″. Score at 2 1/4″, fold and crease sharply with a bone folder. Second card base: Cut piece of Bumblebee or So Saffron cardstock at 4 1/4″ x 6 1/2″, score at 3 1/4″, fold and crease sharply with a bone folder.
  • Cut two pieces of the large Bumblebee floral paper from the Flowers from Every Season Designer Series Paper or two pieces of a Gray Granite paper from the Peony Garden Designer Series Paper at 2″ x 5 1/4″. Adhere to front and inside flap of the larger card base.
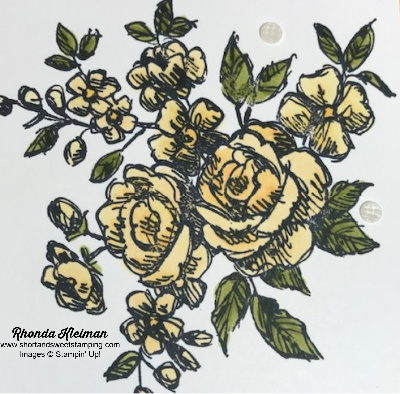
  • Cut two pieces of Whisper White cardstock at 3″ x 4″. Stamp the large floral image with Tuxedo Black Memento ink and stamp the birthday greeting Basic Gray ink. For the inside of the card stamp another greeting with Basic Gray ink and stamp the smaller flower with the Memento ink in the bottom left corner of the card. I used the Stamparatus for the large image and greeting in order to position it perfectly.
  • Color the images. I used the light and dark So Saffron and Mango Melody Stampin’ Blends for the flowers and light and dark Old Olive Stampin’ Blends for the leaves.
  • Adhere the colored in images to the smaller yellow card bases. Make sure that the opening is to the left side before adhering to the larger gray card bases in order to have them overlap the front of the card when folded. The front flap of the larger card bases will be tucked into the opening of the smaller card bases.
  • Embellish the card front with a few pearlescent white Elegant Faceted Gems. On the inside of the smaller yellow card bases I adhered square vellum doilies for an extra-added touch.

To my readers, I will be taking a week-10-day hiatus from blogging. In addition to my Stampin’ Up! business I have an information consulting business and was recently asked to give a presentation to a local women’s business group I belong to on September 8. I’ve done many presentations over the years but this is on a new topic so I have to start from scratch. All of my energies need to be focused there. I will still be making new cards during this time and look forward to sharing them with you when I return. I will also be re-organizing my craft room-it’s time to pack away retired products to make room for all of my new goodies!

If you received bonus coupons this past July, don’t forget to redeem them by August 31st! When shopping online, once you are on the check-out page, enter the coupon codes you should have received in an email from Stampin’ Up!

Thanks for stopping by today!

 Product List  

Prized Peony-Kylie’s Training Blog Hop

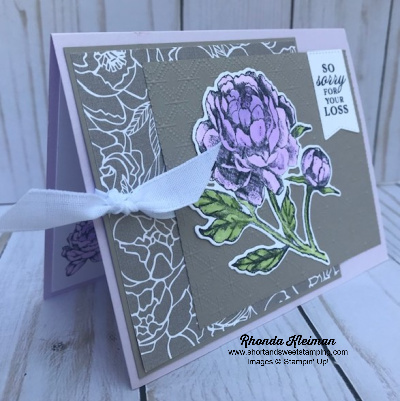
Hello! Welcome to Kylie Bertucci’s Demonstrator Training Blog Hop for August. I’m part of a group of Stampin’ Up! demonstrators from around the world that participate in Kylie’s program for building our businesses. Please be sure to click on the names in the list at the end of this post to hop around and view the beautiful cards posted by so many talented stampers.

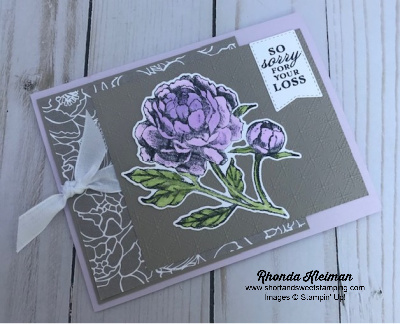
Today I’m sharing a sympathy card I made to send to a friend whose mother recently passed away. It uses products from the beautiful Peony Garden Suite. I made the original card with Petal Pink and then decided to make a few extras with Purple Posy, which I’m showing here. I used a variation on one of my favorite layouts.

Here is how I made the card.

  • Card base – Cut piece of Purple Posy cardstock at 5 1/2″ x 8 1/2″, score and fold in half.
  • First layer – cut piece of Gray Granite cardstock at 4″ x 4″. Cut piece of Gray Granite floral paper from the Peony Garden Designer Series Paper at 3 7/8″ x 3 7/8″. Adhere to cardstock piece.
  • Cut a length of Whisper White Faux Linen Ribbon from the Flowers for Every Season Ribbon Combo Pack and tie around the layered piece. Adhere to card base.
  • For the second layer cut piece of Gray Granite cardstock at 3 1/2″ x 4 1/4″. Run through embossing machine with the Dainty Diamonds 3D Embossing Folder.
  • Stamp large peony image with Tuxedo Black Memento Ink on piece of Whisper White cardstock. Color the flower with Purple Posy and Highland Heather Stampin’ Blends. For the flower I wanted a paler, softer look so didn’t go too heavy with the darker of the blends. Color leaves with Granny Apple Green Stampin’ Blends. Cut out with the coordinating Peony Dies.
  • Stamp greeting with Basic Gray ink on scrap piece of Whisper White cardstock. Cut out with the stitched banner die from the Tasteful Labels Die set.
  • Adhere peony and greeting to embossed piece. Adhere second layer to first layer.
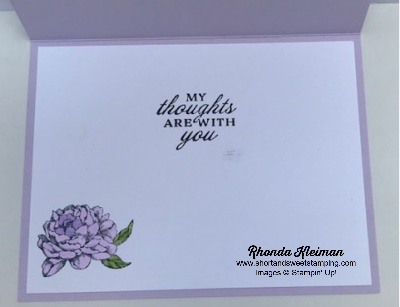
  • Cut piece of Whisper White cardstock at 4″ x 5 1/4″. Stamp greeting with Basic Gray ink. Stamp small peony flower in bottom left of card. Color with Stampin’ Blends. Adhere to inside of card.
  • Stamp small peony flower in bottom corner of envelope and color with Blends. I slid a piece of paper into the envelope before coloring so that the ink didn’t bleed through to the other side of the envelope.

Here are the Petal Pink and Purple Posy cards shown together.

Thanks for stopping by today!


 Product List  
Peony Dies
[152701]
$40.00

Botanical Prints-Kylie’s Training Blog Hop

Hello! Welcome to Kylie Bertucci’s Demonstrator Training Blog Hop for May. I’m part of a group of Stampin’ Up! demonstrators from around the world that participate in Kylie’s program for building our businesses. Please be sure to click on the names in the list at the end of this post to hop around and view the beautiful cards posted by so many talented stampers.

Today’s card features the Botanical Prints Product Medley in the 2020 Mini Catalog. I fell in love with this medley as soon as I saw it in the catalog, ordered it right away and then it sat, untouched until I finally pulled it out over the weekend. I don’t know how I neglected this – obviously got sidetracked somewhere along the way! I made a bunch of these cards to thank customers for their April orders. This lovely set will be retiring on June 2nd and I will be sad to see it go. I used the same layout as the Free as a Bird card I posted last week for Kylie’s International Blog Highlights, as it is a great way to showcase our designer series papers.

Here is how I made the card.

  • Card base – cut piece of Thick Whisper White cardstock at 4 1/4″ x 11″, score at 5 1/2″ and fold in half.
  • Cut piece of Whisper White cardstock at 4″ x 5 1/4″. This will be used as the base to attach the DSP and ribbon.
  • Cut one piece of DSP at 2″ x 5 1/4″ and two contrasting pieces of DSP at 2″ x 2/12″ and 2″ x 2 3/4″ and adhere to card.
  • Cut piece of ribbon at 6″ and adhere to card, covering center seam of the DSP, folding both ends of the ribbon to the back of the card. I used a small piece of tape to hold them in place. Adhere this base to the card base.
  • Stamp floral image on scrap piece of Whisper White cardstock. Stamp greeting with Tuxdeo Black Memento Ink, using the Stamparatus to position it so it is centered properly.
  • Cut oval with the die from Layering Ovals set. Cut piece of Terracotta Tile cardstock with a scalloped die from the Layering Ovals set.
  • Color the image with Stampin’ Blends. I used Old Olive light and dark for the leaves, Cajun Craze light and dark, Pumpkin Pie light for the flowers. Adhere image to the Terracotta Tile oval piece.
  • Adhere oval to center of card. Use several Mini Glue Dots to adhere dragonfly to image.

Thanks for stopping by today!


 Product List  
Stamparatus
[146276]
$49.00
Paper Snips
[103579]
$10.00

Happy Birthday Wishes

Hello! Today’s card features the beautiful Happy Birthday to You stamp set that you can get for FREE with a purchase of $50 during Sale-A-Bration! In addition to the stamp set, you can also purchase the coordinating Birthday Dies that were introduced earlier this month as part of a collection of products that coordinate with Sale-A-Bration and Mini Catalog products, and are available while supplies last.

Purple is one of my favorite colors so I used Purple Posy and Highland Heather for this card. Here is how I made it.

  • Card base – cut piece of Purple Posy cardstock at 5 1/2″ x 8 1/2″, score and fold in half.
  • Cut piece of Purple Posy DSP from the In Color 6″ x 6″ package of Designer Series Paper at 4″ x 5 1/4″ and adhere to card front.
  • Cut piece of Highland Heather cardstock at 3 1/2″ x 4 1/2″ and piece of Whisper White cardstock at 3″ x 4″. Die cut the Highland Heather piece with the largest rectangle die in the Stitched So Sweetly Die set and cut the Whisper White piece with the next-to-largest die. Adhere together and adhere to the card.
  • Stamp the “celebrate” greeting with Tuxedo Black Memento ink on scrap of Whisper White cardstock. Cut with die from the Ornate Frames Dies.
  • Stamp entire cake image with the Tuxedo Black Ink on piece of Whisper White cardstock. Color the cake stand with Smoky Slate Stampin’ Blends. Color the cake with So Saffron Stampin’ Blends. Do not color the flowers.
  • On another piece of Whisper White cardstock stamp just the floral image. Color the flowers with both light and dark Highland Heather and Purple Posy Stampin’ blends. Color the leaves with both the light and dark Granny Apple Green Stampin’ Blends. Color the flower centers with the light Basic Black Stampin’ Blend. I colored the flower at the top with Highland Heather and the two other flowers with the Purple Posy.
  • Cut the entire cake image and the floral image with the coordinating Birthday Dies. Adhere the “celebrate” greeting at an angle on lower right corner of rectangle mats. Add a purple rhinestone from the Noble Peacock Rhinestones.
  • Adhere the full cake image to the scalloped rectangle mats so that the left side of the cake falls slighty off the side. Place Stampin’ Dimensionals all over the floral image and adhere directly over the uncolored floral part of the cake image.

For the inside of the card, stamp the “Happy Birthday” greeting with Tuxedo Black Ink. Ink up the top flower on the cake stamp with Highland Heather ink and stamp in both corners of the piece.

Click here to purchase any of the products used in this card in my online store, or click on the product images below. Thanks for stopping by today!

 Product List