Flower & Field-Kylie’s Training Blog Hop

Hello! Welcome to Kylie Bertucci’s Demonstrator Training Blog Hop for February. I’m part of a group of Stampin’ Up! demonstrators from around the world that participate in Kylie’s program for building our businesses. The theme for this year is thank you cards that we make as a way to show appreciation to our customers. Please be sure to click on the names in the list at the end of this post to hop around and view the beautiful projects posted by so many talented stampers.

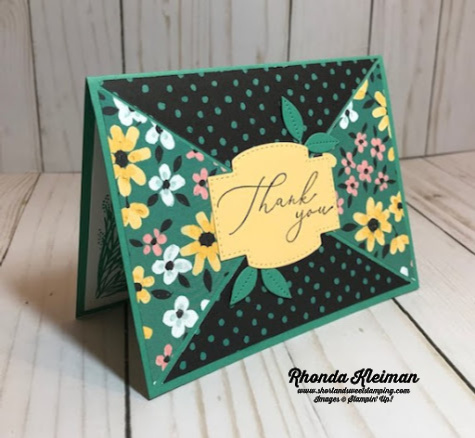
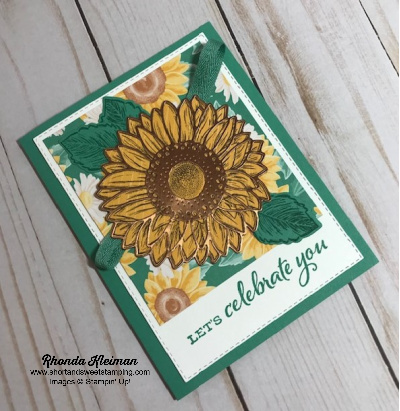
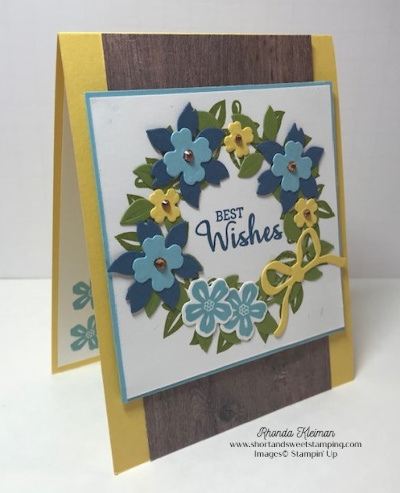
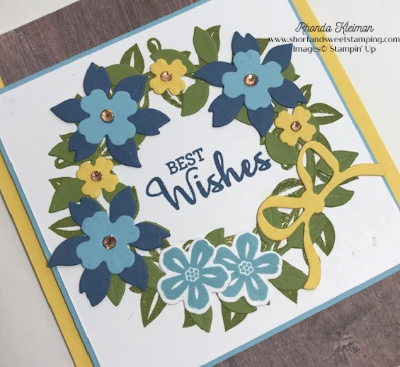
Today’s card showcases the pretty Flower & Field Designer Series Paper, one of the Sale-A-Bration items you can earn for free with a $50 order. This is an easy layout that makes DSP the star of the show.

Here is how I made the card.

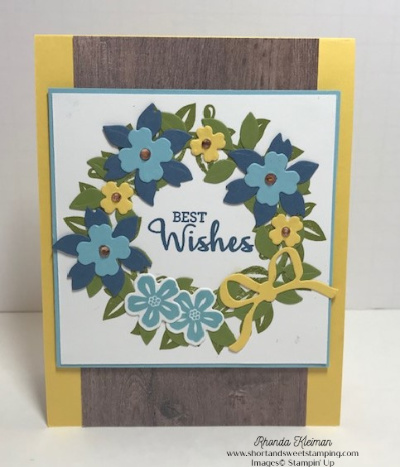
  • Card base – cut a piece of Just Jade cardstock at 5 1/2″ x 8 1/2″, fold in half and crease with a bone folder.
  • Cut a piece of Flower & Field DSP at 4″ x 5 1/4″. Cut in half on the diagonal by lining up opposite corners along the cutting track of the paper trimmer. Once you make the cut, without pulling the two pieces apart, gently turn the piece around so that you are now cutting the two other opposite corners. You have now cut out an “X” and can pull the triangles apart.
  • For this card I decided to use both sides of the DSP, however, you can mix and match with other contrasting pieces of DSP. You would just cut another piece of DSP at 4″ x 5 1/4″ and repeat the cutting process for making the “X.”
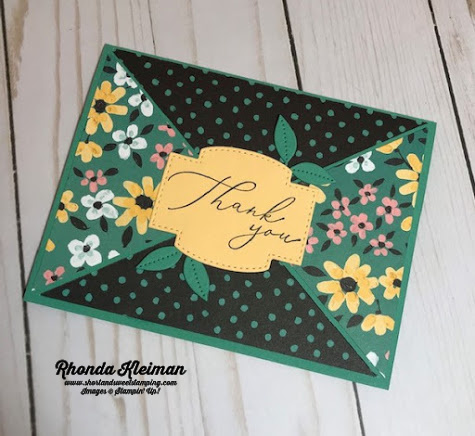
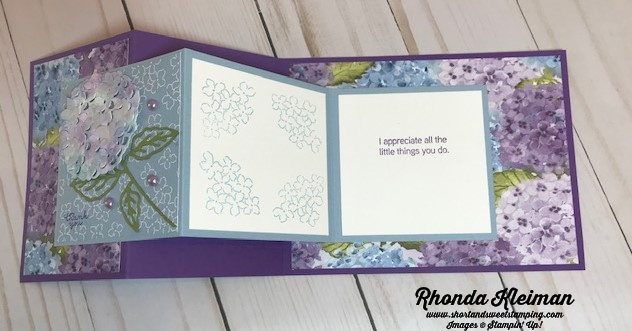
  • Adhere one set of triangles , matching the points in the center of the card front. Adhere the second set of triangles and space them so that some of the card base shows in between.
  • Stamp greeting from the Heal Your Heart stamp set, another Sale-A-Bration item, with Tuxedo Black Memento Ink on scrap piece of So Saffron cardstock. Run through your die cutting & embossing machine with one of the labels from the Stitched So Sweetly Dies.
  • Die cut two sets of the smallest set of leaves from the Pierced Blooms Dies, a fabulous set of dies in the January-June 2021 Mini Catalog. Adhere the leaves to opposite sides of the label with glue dots. Adhere label to center of card front.
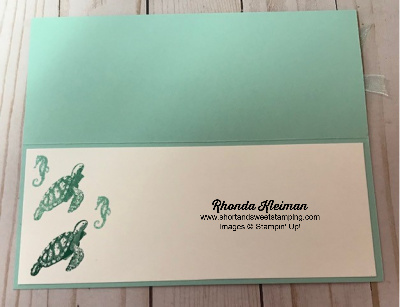
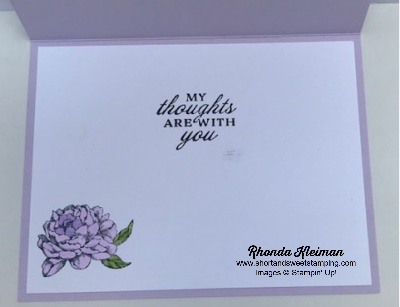
  • Cut a piece of Basic White cardstock at 4″ x 5 1/4″. Stamp the smaller image from the Corner Bouquet stamp set with Just Jade ink in the lower left corner and adhere to inside of card. I chose not to stamp a greeting in order to write a personalized note.

Thanks for stopping by today!

Product List

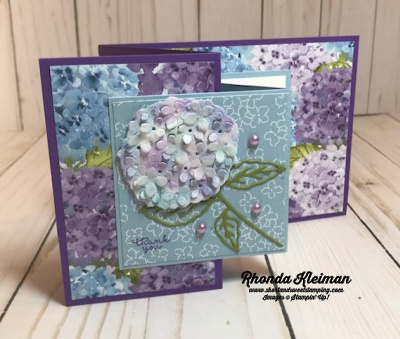
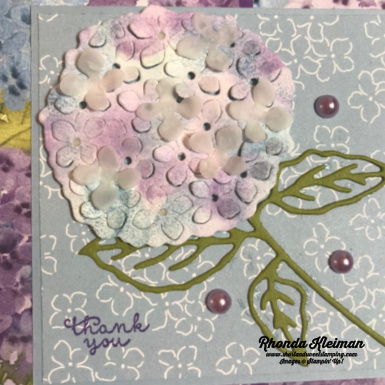
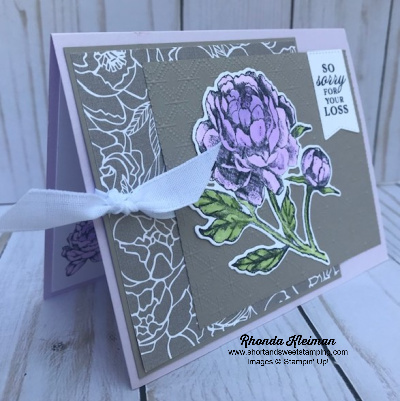
The Bouquet of Hope Paper Pumpkin Kit provides enough supplies to create nine cards and coordinating envelopes. This soft, sympathetic kit includes patterned card bases, die-cut floral elements, ribbon, embellishments, and more! The kit’s exclusive Bouquet of Hope Stamp Set features supportive sentiments centered around comfort, care, hope, and love. Such a versatile stamp set can be used throughout the year! To subscribe to Paper Pumpkin, visit my site by clicking here.

Hydrangea Haven-Kylie’s Training Blog Hop

Hello! Welcome to Kylie Bertucci’s Demonstrator Training Blog Hop for January. I’m part of a group of Stampin’ Up! demonstrators from around the world that participate in Kylie’s program for building our businesses. The theme for this year is thank you, to show appreciation to our customers and team. Please be sure to click on the names in the list at the end of this post to hop around and view the beautiful projects posted by so many talented stampers.

Today’s card features the Hydrangea Hill Suite in the new mini catalog. Purple is one of my favorite colors and it isn’t very often that Stampin’ Up! Designer Series Papers showcase the great purples available in the different color families. I also love flowers so this suite was a winning combination for me and was the first one I purchased as soon as the catalog went live!

I thought that the Double Z Fold would be a nice way to show off the 3D flower. Here is how I made the card.

  • Card base – Cut a piece of Gorgeous Grape cardstock at 4 1/4″ x 11″. Score at 2 3/4″ and 5 1/2″, fold and sharply crease with a bone folder.
  • Designer Series Paper for card base – cut one piece at 4″ x 5 1/4″ and one piece at 2 1/2″ x 4″ and adhere. I used the paper with the smaller all-over hydrangea design.
  • Smaller card base – cut a piece of Seaside Spray cardstock at 3″ x 9″ and score at 3″ and 6″. Fold and crease sharply with a bone folder.
  • Cut piece of the Seaside Spray DSP at 2 7/8″ x 2 7/8″ . Stamp “thank you” from the Hydrangea Haven stamp set with Gorgeous Grape in the bottom left corner.
  • Die cut the leaf and stem piece with Old Olive cardstock using the die from the Hydrangea die set. Cut a piece of an adhesive sheet and adhere to the Old Olive cardstock before running through the die cutting machine. Adhere to Seaside Spray DSP.
  • To make the 3D flower cut a 2 1/2″ square piece of Basic White cardstock. I used three colors of ink: Highland Heather, Misty Moonlight and Seaside Spray and applied them with a blending brush. I started with the Highland Heather, randomly dabbing the color on, making small circles, working from the center and going out to make a large circle. I repeated this step with the Seaside Spray and then filled in with accents of Highland Heather. I did first and second generation inking to produce the shading. I have a set of blender brushes in different sizes that I purchased at a scrapbooking show several years ago and I used one of the smaller brushes since I was working with a small piece. I don’t have our new brushes yet so I’m not sure how well this technique will work with the size of the SU brush. You can also use sponge daubers, which would work nicely for this technique.
  • Once the inking is done run it through your die cutting machine using the solid flower die. To get the raised effect turn the piece to the back and use either the paper piercer end of the Take Your Pick tool or the point of the paper snips to poke the flowers out to the front. To fill the flower out more, cut a strip of Vellum Paper and use the long die with the blossoms to cut them out. Curl them with your fingertip, place a small drop of liquid glue in the center and randomly adhere to the flower. I used five of the blossoms.
  • Adhere piece to the Seaside Spray DSP piece with Stampin’ Dimensionals. Add three of the Highland Heather Pastel Pearls. Adhere the DSP piece to the front of the smaller card base.
  • For the inside of the smaller card base cut two pieces of Basic White cardstock at 2 3/4″ square. Stamp a greeting with Gorgeous Grape ink on one piece and adhere to inside of the card base. Stamp the smaller petal image with Seaside Spray ink in each of the four corners of the other piece and adhere to the middle section of the card base. Adhere smaller card base to the larger card base. When adhering the front make sure to only apply the adhesive to the left half of the piece in order for the card to open.

Thanks for stopping by today!

Dandy Garden Suite-Kylie’s Training Blog Hop

Hello! Welcome to Kylie Bertucci’s Demonstrator Training Blog Hop for December. I’m part of a group of Stampin’ Up! demonstrators from around the world that participate in Kylie’s program for building our businesses. Please be sure to click on the names in the list at the end of this post to hop around and view the beautiful projects posted by so many talented stampers.

Today’s card is a fun fold and is a sneak peek of the Dandy Garden Mega-Suite from the January-June 2021 Mini Catalog that will be available beginning on January 5th . One of the perks of being a Stampin’ Up! demonstrator is that we have been able to pre-order these products since December 1st. I fell in love with this suite because the beautiful images in the stamp sets and Designer Series Papers remind me of the Arts and Crafts decorative and fine arts movement that began in the United Kingdom in the 1860’s, spread across Europe and the United States and lasted until the 1920’s. I’ve always been drawn to the beauty of this movement.

I had this idea in my head for the last two months and had hoped to contribute this project to Kylie and Bruno’s Dragonfly Wishes Mega Bundle Tutorial, however, time got away from me and I couldn’t meet the deadline. I run a consulting business and received project work in November from two different clients, so whenever that happens, Stampin’ Up! has to take a back seat – when it rains it pours!

Here is how I made the card.

  • Card base – cut a piece of Bumblebee cardstock at 4 1/4″ x 11″, score at 5 1/2″, fold and crease with a bone folder.
  • For the fun fold, cut a piece of Mossy Meadow cardstock at 4″ x 10 1/4″. Score at 5 1/4″ and 7 3/4″, fold and crease sharply with a bone folder.
  • Cut piece of the Bumblebee floral design paper from Dandy Garden Designer Series Paper at 3 3/4″ x 5″ and adhere to the front of the Mossy Meadow piece. Cut two pieces of a contrasting DSP at 2 1/4″ x 3 3’4″. Adhere one to the front of the folded flap and the other on the inside of the flap.
  • Stamp the dandelion image from the Garden Wishes stamp set in Memento Black Ink. Color the leaves and stem with dark and light Mossy Meadow Stampin’ Blends. Color the flower with the dark Daffodil Delight Stampin’ blends. Cut out with the coordinating die from the Dandy Wishes dies.
  • Die cut the white stem piece from a piece of Whisper White cardstock. Die cut five each of the large and small thin leaf blades from Mossy Meadow and Old Olive cardstock. Adhere several large Mossy Meadow blades to the smaller Old Olive blades and several large Old Olive blades to the smaller Mossy Meadow blades for contrast.
  • Die cut one bee from the sheet of DSP with bee images using the coordinating bee die from the set.
  • Stamp the thank you greeting from the Dragonfly Garden stamp set. Cut with the second smallest oval die from the Stitched Shapes dies.
  • Adhere the die cut flower to the front folded flap so that the top of the flower is above the fold. Adhere the greeting to the front flap with Stampin’ Dimensionals, partially overlapping the leaves of the flower.
  • Adhere the white flower stem to the Bumblebee DSP with liquid glue, only applying it to the stem and base of the flower, leaving the floral part free for added dimension. Adhere the bee with two Mini Stampin’ Dimensionals.
  • Adhere the five sets of leaf blades to the back of the folded flap with liquid glue. Let them overlap and staggering the height.
  • For the inside of the card cut a piece of Whisper White cardstock at 4″ x 5 1/4″. Stamp greeting from the Dragonfly Garden stamp set with Mossy Meadow ink. Stamp two sets of the small scattered dragonflies with Bumblebee ink.

Thanks for stopping by today!


Stampin’ Up!’s Year-End Closeout Sale continues through January 4, 2021. You’ll get deep discounts, some as much as 50% off, on your favorite products from the August–December 2020 Mini Catalog, also known as the Holiday Catalog.  If you’ve been waiting to make last-minute purchases from this catalog, now is the time, as availability is only while supplies last.  Please note that all of the bundles in the Holiday Catalog will be retired, however some stamp sets with coordinating dies or punches that are currently sold as bundles at 10% off will be carrying over and will be sold as individual items. 

Click here to view a list of retiring items.

Click here to view a list of products that will be carrying over.

You can purchase any of these items through my online store.

Celebrate Sunflowers-Kylie’s Training Blog Hop

Hello! I’m excited to once again be a part of Kylie Bertucci’s Demonstrator Support Program for the 2020-2021 year! I’m part of a group of Stampin’ Up! demonstrators from around the world that participate in Kylie’s program for building our businesses. Welcome to our Demonstrator Training Blog Hop for October. Please be sure to click on the names in the list at the end of this post to hop around and view the beautiful projects posted by so many talented stampers.

Today’s card features the Celebrate Sunflowers bundle, which is part of the beautiful Flowers for Every Season Suite.

Here is how I made the card.

  • Card base – cut piece of Just Jade cardstock at 5 1/2″ x 8 1/2″, score at 4 1/4″, fold and crease with a bone folder.
  • Cut piece of Whisper White cardstock at 4 1/4″ x 5 1/2″ and run through die cutting machine using the largest Stitched Rectangles die.
  • Stamp greeting with Just Jade ink at bottom of the rectangle piece and adhere to card front.
  • Cut piece of Flowers for Every Season DSP at 3 1/2″ x 4″ and adhere to stitched rectangle piece.
  • Select one of the pieces of Bumble Bee papers from the Flowers for Every Season DSP and stamp the large sunflower image from the Celebrate Sunflowers stamp set with Early Espresso ink. Run through die cutting machine with coordinating die from the Sunflowers Dies.
  • Cut piece of Copper Foil at 3 1/2″ square, cut a piece of an adhesive sheet at 3 1/2″ square and adhere to foil piece. Run through die cutting machine with large sunflower die from the Sunflower Dies set. Remove adhesive backing and adhere to the stamped sunflower.
  • Stamp three of the large leaves with Just Jade ink on scrap piece of Just Jade cardstock. Die cut with coordinating leaf die.
  • Cut a 12″ length of Just Jade ribbon and make a loop. Adhere on angle to the DSP. Adhere leaves and then adhere sunflower.
  • Cut piece of Whisper White cardstock at 4″ x 5 1/4″, stamp greeting and adhere to inside of card. I used one of the greetings from the So Sentimental stamp set.

Thanks for stopping by today!


 Product List  

Whale Done-Kylie’s Training Blog Hop

Hello! Welcome to Kylie Bertucci’s Demonstrator Training Blog Hop for September. I’m part of a group of Stampin’ Up! demonstrators from around the world that participate in Kylie’s program for building our businesses. Please be sure to click on the names in the list at the end of this post to hop around and view the beautiful projects posted by so many talented stampers.

Today’s card features products from the Whale of a Time suite. This is one of the cards we will be making in my September Class to Go. As a Pisces, I was immediately attracted to the beautiful ocean life in the DSP and the bright color palette! Slimline cards are all the rage these days, so I decided to give it a go.

Here’s how I made the card.

  • Card base – cut piece of Pool Party cardstock at 7″ x 8 1/2″, score at 3 1/2″, fold and crease with a bone folder.
  • Cut piece of Whisper White cardstock at 3 1/2″ x 8 1/4″ and adhere to card front.
  • Cut piece of Granny Apple Green cardstock at 3 1/8″ x 8 1/8″. Cut piece of Pool Party Sheer ribbon and tie in a knot at right side of cardstock. Adhere to card front.
  • Cut out three different prints from the DSP at 2 1/2″ x 3″.
  • Stamp greeting with Blackberry Bliss ink on scrap piece of Whisper White cardstock. Die cut with the smallest of the narrower dies from the Stitched Rectangular dies.
  • Select a sheet of DSP with whale images and punch out one of the larger images that fits the Whale Builder Punch.
  • I wanted to use papers that all had Pool Party in them in order to tie everything together and thought the the top portion of the DSP I used for the middle piece would work well for the piece on the left. I added texture to the piece by running it through the Seabed 3D embossing folder.
  • Assemble the card front by adhering each of the three pieces of DSP, spacing them evenly across the Granny Apple cardstock layer.
  • Adhere die cut greeting at bottom of the embossed piece. Adhere whale. You can pop it up with dimensionals if you wish. On the center piece of DSP I added two small strips of tear and tape and dumped a bunch of the Whale of a Time sequins on top of them until I had enough sequins sticking to the paper. I used the Pick it Tool to help move the sequins around. I got this great tip from one of Patty Bennett’s blog posts.
  • Cut piece of Whisper White cardstock at 3 1/2″ x 8 1/4″. Stamp the turtle and sea horse images with Just Jade ink. I stamped off a few of the images. Adhere to inside of card.

Thanks for stopping by today!


Stampin’ Up! has a great offer to join this September! You pay $99 for the starter kit and get to pick out $125 in products (and you can opt to select the new Stampin’ Cut and Emboss Machine!). In addition, you will also receive the Queen Anne’s Lace and So Much Love stamp sets for free, plus cardstock pieces to make 16 cards, 16 envelopes, and a pack of Basic Rhinestone Jewels. One pack of cardstock is Coastal Cabana and the other pack is Granny Apple Green – such fun colors! I’d love to have you as part of my team. There is NO obligation to be a business builder – happy discount shoppers are welcome!  Click here to join. Please contact me if you’d like more information.

 Product List  
Paper Snips
[103579]
$10.00

Prized Peony-Kylie’s Training Blog Hop

Hello! Welcome to Kylie Bertucci’s Demonstrator Training Blog Hop for August. I’m part of a group of Stampin’ Up! demonstrators from around the world that participate in Kylie’s program for building our businesses. Please be sure to click on the names in the list at the end of this post to hop around and view the beautiful cards posted by so many talented stampers.

Today I’m sharing a sympathy card I made to send to a friend whose mother recently passed away. It uses products from the beautiful Peony Garden Suite. I made the original card with Petal Pink and then decided to make a few extras with Purple Posy, which I’m showing here. I used a variation on one of my favorite layouts.

Here is how I made the card.

  • Card base – Cut piece of Purple Posy cardstock at 5 1/2″ x 8 1/2″, score and fold in half.
  • First layer – cut piece of Gray Granite cardstock at 4″ x 4″. Cut piece of Gray Granite floral paper from the Peony Garden Designer Series Paper at 3 7/8″ x 3 7/8″. Adhere to cardstock piece.
  • Cut a length of Whisper White Faux Linen Ribbon from the Flowers for Every Season Ribbon Combo Pack and tie around the layered piece. Adhere to card base.
  • For the second layer cut piece of Gray Granite cardstock at 3 1/2″ x 4 1/4″. Run through embossing machine with the Dainty Diamonds 3D Embossing Folder.
  • Stamp large peony image with Tuxedo Black Memento Ink on piece of Whisper White cardstock. Color the flower with Purple Posy and Highland Heather Stampin’ Blends. For the flower I wanted a paler, softer look so didn’t go too heavy with the darker of the blends. Color leaves with Granny Apple Green Stampin’ Blends. Cut out with the coordinating Peony Dies.
  • Stamp greeting with Basic Gray ink on scrap piece of Whisper White cardstock. Cut out with the stitched banner die from the Tasteful Labels Die set.
  • Adhere peony and greeting to embossed piece. Adhere second layer to first layer.
  • Cut piece of Whisper White cardstock at 4″ x 5 1/4″. Stamp greeting with Basic Gray ink. Stamp small peony flower in bottom left of card. Color with Stampin’ Blends. Adhere to inside of card.
  • Stamp small peony flower in bottom corner of envelope and color with Blends. I slid a piece of paper into the envelope before coloring so that the ink didn’t bleed through to the other side of the envelope.

Here are the Petal Pink and Purple Posy cards shown together.

Thanks for stopping by today!


 Product List  
Peony Dies
[152701]
$40.00

Arrange a Wreath-Kylie’s Training Blog Hop

Hello! Welcome to Kylie Bertucci’s Demonstrator Training Blog Hop for July. I’m part of a group of Stampin’ Up! demonstrators from around the world that participate in Kylie’s program for building our businesses. Please be sure to click on the names in the list at the end of this post to hop around and view the beautiful cards posted by so many talented stampers.

Today I’m sharing a card I made with the new Arrange a Wreath bundle. I love that this set is very versatile and can be used for so many different occasions. Without any holidays coming up right now I decided to make something with a summer feel to it and picked blue and yellow for my color palette.

Here is how I made the card.

  • Card base – cut a piece of Daffodil Delight cardstock at 4 1/4″ x 11″, score at 5 1/2″ and fold in half.
  • Cut a piece of one of the woodgrain papers from the In Good Taste Designer Series Papers at 3 1/4″ x 5 1/2″ and adhere to card front.
  • Cut piece of Whisper White cardstock at 3 3/4″ square. Cut piece of Balmy Blue cardstock at 3 7/8″ for the layering piece.
  • Stamp wreath image from the Arrange a Wreath stamp set in Old Olive ink. Stamp greeting with Misty Moonlight ink in center of wreath. Because the wreath image is large I used the Stamparatus to get good ink coverage, and it also helped to line up the greeting.
  • Stamp two flowers with Balmy Blue ink and run through die cutting machine with coordinating dies.
  • Die cut the rest of the pieces for the wreath as follows:
    • Leaf circle – Old Olive cardstock
    • Large flowers – cut three from Misty Moonlight cardstock
    • Medium flowers – cut three from Balmy Blue cardstock
    • Small flowers – cut three from Daffodil Delight cardstock
    • Bow – cut one from Daffodil Delight cardstock
  • Adhere leaf circle on top of stamped wreath image and then arrange the flowers and bow around the wreath. I layered the blue flowers together.
  • Adhere image to Balmy Blue layer and adhere to card front with Stampin’ Dimensionals.
  • For some extra bling I added Champagne Rhinestones to the centers of the flowers, using the smallest size or the yellow flowers and the medium size for the blue flowers.
  • For the inside of the card, cut a piece of Whisper White cardstock at 4″ x 5 1/4″. Stamp a cluster of flowers with Balmy Blue ink at bottom left corner of piece and adhere.

Bonus Days are back once again! From July 1 through August 3rd, for every $50 you spend (before shipping & tax) you will receive a $5 Bonus Day coupon code that can be used from August 4th – 31st.

  • You must have an email address in order to participate because the codes can only be delivered electronically.
  • If you earn multiple coupons in a single order, all of the codes will be sent in one email. If you earn multiple coupons for multiple orders they will be sent in separate emails for each code earned.
  • There is no limit on the number of coupon codes you can earn during this promotion.

Thanks for stopping by today!


 Product List  
Stamparatus
[146276]
$49.00