Click here to view the list of carryover products that will still be available after the Mini Catalog retires
The Clearance Rack has been refreshed and lots of products have been added! Click here to check it out. Remember that availability is only while supplies last!
Place an online order between $50 and $149 and use this host code for December. You will receive a free gift from me the following month. If your order is $150 or more DO NOT use the host code. You will qualify for Stampin’ Rewards.
Thank you for your business this year. May the joy you get from stamping and cardmaking bring joy to those you share your creations with this holiday season.
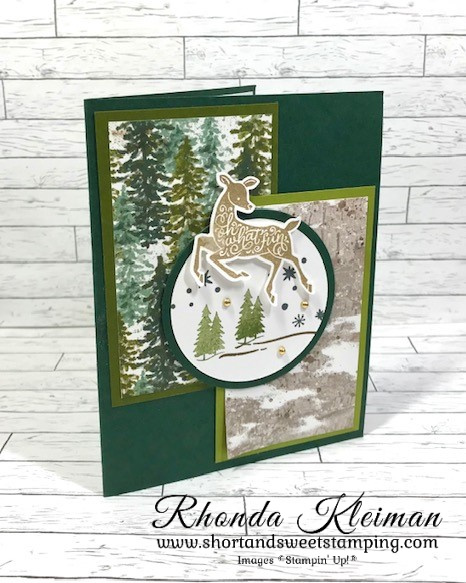
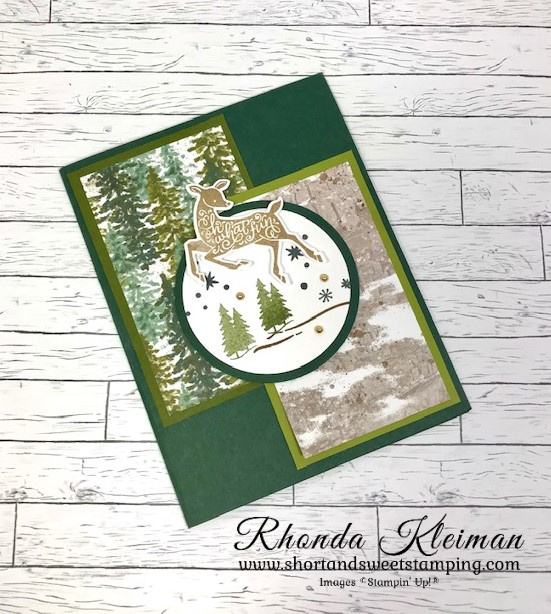
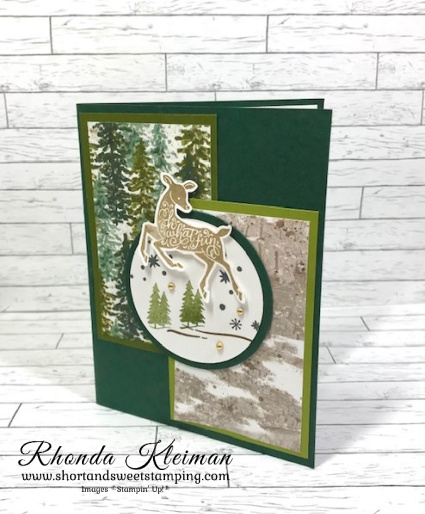
Today’s card features the Peaceful Deer stamp set and coordinating Deer Builder Punch. The stamp set and punch were introduced as a bundle in the 2021 Holiday Mini Catalog and I didn’t purchase it at the time. I was happy to see that it carried over into the current Annual Catalog so I was able to purchase it this year. It is such a nice stamp set, filled with lovely images, and yes, you can create many peaceful scenes with these stamps. We made this card in the Christmas card classes I held last week.
Here is how I made the card.
Card base – cut a piece of Evening Evergreen cardstock at 5 1/2″ x 8 1/2″, score at 4 1/4″, fold and crease with a bone folder.
Cut one piece of Mossy Meadow cardstock and one piece of Old Olive cardstock at 2 1/2″. Cut strips from two different pieces of the Boughs of Holly Designer Series Paper at 2 1/4″ x 3 1/4″ and adhere to the cardstock pieces. Adhere to card front.
Stamp deer with Crumb Cake ink on a scrap piece of Basic White cardstock. Punch out with Deer Builder punch.
Cut a 3″ square piece of Basic White cardstock and run through die cutting machine with the third largest circle from the Layering Circles Dies. Stamp ground with Soft Suede ink. Stamp two of the smallest trees with Mossy Meadow ink, stamping off before stamping onto the cardstock. Stamp the stars with Smoky Slate ink. Cut a 3 1/4″ square of Evening Evergreen cardstock and run through die cutting machine with the second largest circle from the Layering Circles Dies and adhere to stamped piece.
Adhere circle to card front. Adhere deer to the top of the circle with Mini Stampin’ Dimensionals. Add a few gold Festive Pearls for a bit of bling. Add shine to the deer, trees and stars with Wink of Stella.
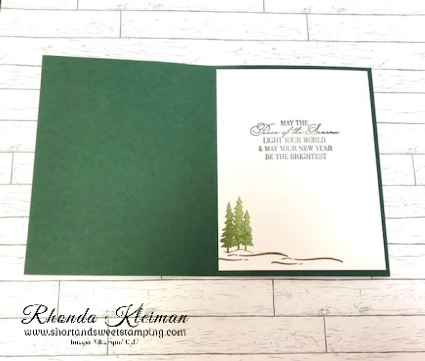
Cut a piece of Basic White cardstock at 4″ x 5 1/4″. Stamp ground twice with Soft Suede ink. Stamp the second largest tree at bottom left with Mossy Meadow ink, stamping off before stamping onto the cardstock. Stamp greeting from the Brightest Glow stamp set with Evening Evergreen ink. Adhere to inside of card.
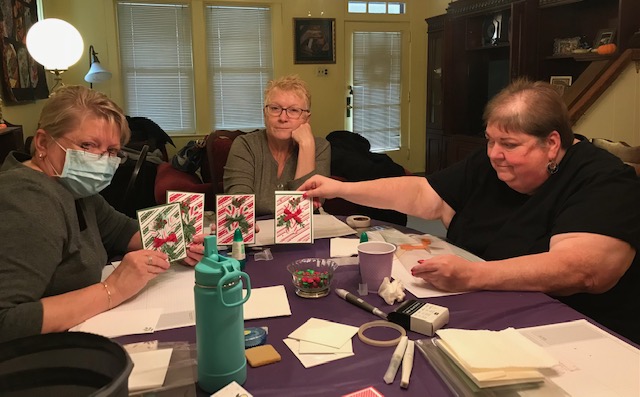
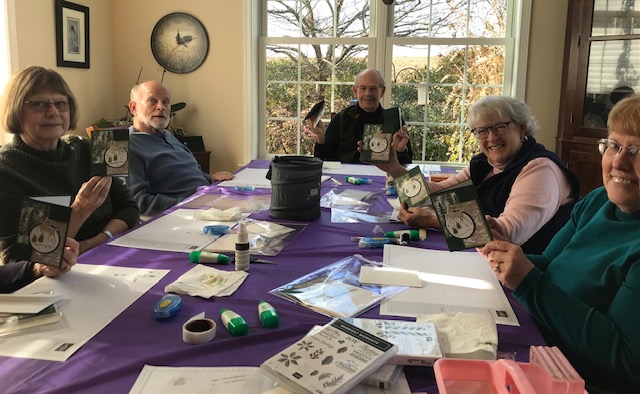
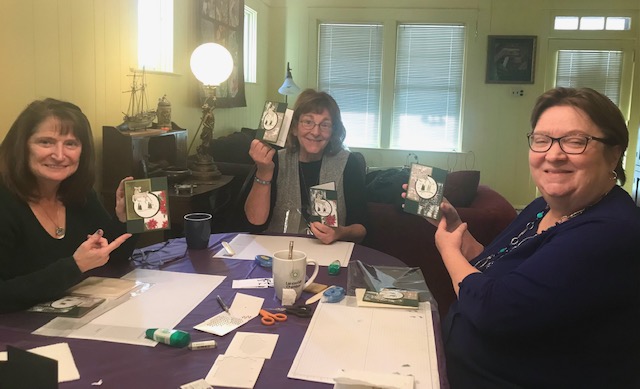
Here are a few pictures from the three classes I held. several people were MIA when I took the photos!
Thanks for stopping by today!
This month, we celebrate the people in your life who mean the world to you with Timeless Greetings—an all-occasion card kit you can use year-round! This unique kit features an elegant pocket watch and globe design in neutral colors, along with heartfelt sentiments that are sure to inspire lasting memories. These cards are perfect for wishing happy birthday, saying thank you or sending a friendship note in style, so make sure to let family and friends know just how special they are! The kit contains enough supplies to create eight cards, two each of four different designs; envelopes; printed card bases, die cuts, embellishments; stamp set and clear block; coordinating colors: Basic Black, Basic Gray, Cajun Craze, Crumb Cake, Evening Evergreen, Soft Suede. Cost of the kit is $21USD, Item #161062. Click here to purchase the kit from my online store.
Create fun gift card holders to help you celebrate your special occasions all year long! Personalize each gift with these reversible boxes and paper bands for a unique design every time. This kit comes with enough supplies for you to make 16 different gift card holders—2 each of 8 designs. It also has an all-occasion stamp set and enough paper pieces to make your craft really pop! Coordinating Stampin’ Up! colors: Balmy Blue, Basic Gray, Blushing Bride, Calypso Coral, Crushed Curry, Garden Green, Tahitian Tide. No matter what the occasion or who the recipient is, this is a coordinated paper craft that everyone will love and appreciate!
Plus, this month you can take your crafting even further with a special add-on! Give a gift card and a personalized card with the Good Things Cards & Envelopes add-on. You get 20 cards (5 each of 4 designs) and 20 coordinating envelopes. Add-ons are live during the subscription period but will only be available while supplies last, so don’t wait!
Place an online order between $50 and $149 and use this host code for November. You will receive a free gift from me the following month. If your order is $150 or more DO NOT use the host code. You will qualify for Stampin’ Rewards.
Stampin’ Up! has announced a Seasonal Sale that starts tomorrow, November 15 and ends on November 18. Save on the following items from the Annual Catalog.
10% off on punches
15% off on stamps
20% off on dies
20% off on embossing folders
20% off on non-specialty Designer Series Paper
Click hereto view a list of all of the sale products and discounted prices.
Now is a great time to stock up on basic supplies or perhaps that stamp set or dies you have on your wish list!
Thanks for stopping by today!
Place an online order between $50 and $149 and use this host code for November. You will receive a free gift from me the following month. If your order is $150 or more DO NOT use the host code. You will qualify for Stampin’ Rewards.
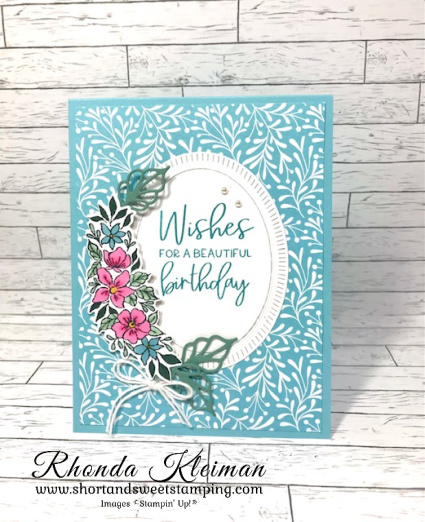
The Fitting Florets Collection is now available! The collection consists of the Framed Florets Bundle, Framed & Festive Stamp Set, Fitting Florets Designer Series Paper and Gold Adhesive Backed Swirls. The Framed Florets Bundle will be carrying over into the January-June 2023 Mini Catalog. The Framed & Festive stamp set, DSP and gold swirls will be available until January 4, 2023 or while supplies last. This is a birthday card I made with the bundle and DSP.
Here is how I made the card.
Card base – cut a piece of Balmy Blue cardstock at 4 1/4″ x 11″, score at 5 1/2″, fold and crease with a bone folder.
Cut a piece of the Fitting Florets DSP at 4″ x 5 1/4″ and adhere to card front.
Cut a piece of Basic White cardstock at 3 1/4″ x 4″. Run through die cutting machine with the smallest oval frame die from the Framed Florets dies. Adhere the outer frame to the card front with liquid glue. Stamp the greeting with Balmy Blue ink on the solid oval piece from the die cut. Adhere inside the frame.
Cut a piece of Basic White cardstock at 1 1/2″ x 3 1/2″ and stamp the long floral image with Memento Black ink. Color the flowers with dark and light Polished Pink, Balmy Blue and Daffodil Delight Stampin’ Blends. Color the leaves with the light Evening Evergreen Stampin’ Blends, dark and light Mint Macaron and Soft Succulent Stampin’ Blends. Run through die cutting machine with coordinating die.
Die cut three leaves from scrap piece of Soft Succulent cardstock. Adhere one leaf at the top of the floral piece and two leaves at the bottom with Mini Glue Dots.
Adhere floral piece to left side of oval with Stampin’ Dimensionals.
Cut two pieces of white twine from the Bakers Twine Essentials Pack and tie in a double bow. Trim ends and adhere to bottom of floral piece with a Mini Glue Dot. Adhere two of the smallest size Basic Pearls above the stamped greeting.
Cut a piece of Basic White cardstock at 4″ x 5 1/4″. Stamp two of the small flower images with Memento Black ink in the top and bottom corners. Color with light and dark Polished Pink Stampin’ Blends. Stamp greeting with Balmy Blue ink. Adhere to inside of card.
Thanks for stopping by today!
Place an online order between $50 and $149 and use this host code for November. You will receive a free gift from me the following month. If your order is $150 or more DO NOT use the host code. You will qualify for Stampin’ Rewards.
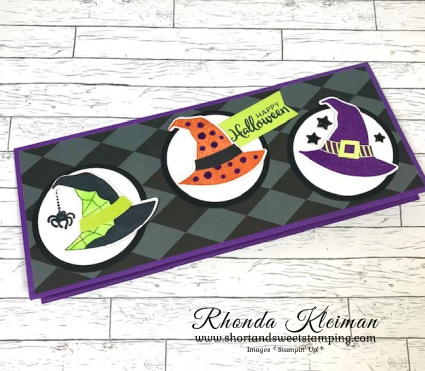
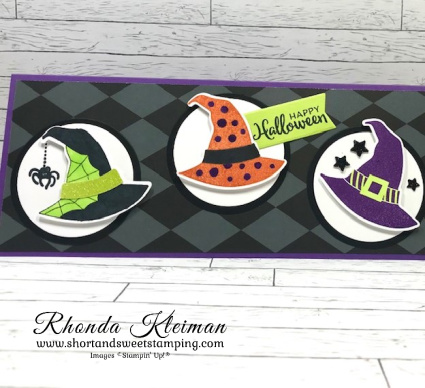
Hello and Happy Halloween! Today’s card features the Bewitching stamp set and coordinating Witches Hat Builder Punch. This is another one of the cards we made in my recent Halloween Card class and everyone loved making it! Sadly, the punch proved to be so popular that it is no longer available.
Here is how I made the card.
Card base: Cut a piece of Gorgeous Grape cardstock at 7″ x 8 1/2″, score at 3 1/2″, fold and crease with a bone folder.
Cut a piece of the Black & White Designs Designer Series Paper with the diamonds at 3 1/4″ x 8 1/4″ and adhere to card front.
Cut three pieces of Basic Black cardstock at 3″ square and run them through a die cutting machine with the 3rd largest circle in the larger set of Layering Circles Dies. Adhere to card front as pictured.
Cut three pieces of Basic White cardstock at 2 1/2″ and run through a die cutting machine with the 3rd largest circle in the smaller set of Layering Circles Dies. Stamp the spiderweb from the Bewitching stamp set on one of the circles. Adhere the circles to the Basic Black circles.
On a scrap piece of Basic White cardstock stamp the spiderweb hat with Memento Black ink, color the spiderweb with Parakeet Party Stampin’ Blends and Basic Black Stampin’ Blends for the rest of the hat. Punch out the hat with the Witches Hat Builder Punch. Cut a scrap piece of Parakeet Party Glimmer Paper from the 2022-2024 In Color paper and punch out the hatband from the punch. Adhere to hat. Adhere hat to circle with Stampin’ Dimensionals.
On a scrap piece of Basic White cardstock, stamp the hat with the polka dots with Pumpkin Pie ink. Color in the dots with a Gorgeous Grape Stampin’ Write marker. Color hatband with Basic Black Stampin’ Blends. Punch out hat and adhere to Basic White circle with Stamin’ Dimensionals.
On a scrap piece of Basic White cardstock, stamp hat with buckle with Gorgeous Grape ink. Color buckle with Parakeet Party Stampin’ Blends. Punch out hat and adhere to Basic White Circle with Stampin’ Dimensionals. Punch out the stars from the hat punch with a scrap piece of Basic Black cardstock. I used a piece of retired Black Glimmer Paper for some extra bling. Adhere with either Mini Glue Dots or liquid glue.
Stamp greeting with Memento Black ink on a scrap piece of Parakeet Party cardstock and run through die cutting machine with the label die from the Scary Silhouettes Dies. Adhere to circle with the Pumpkin Pie hat.
Cut a piece of Basic White cardstock at 3 1/4″ x 8 1/4″. Stamp spider and spiderweb with Memento Black ink. Stamp greeting with Gorgeous Grape ink. I used greetings for the front and inside of the card that are from retired Halloween stamp sets. The spiderweb is also from a retired set. I like to hold onto some of my favorite retired holiday stamp sets because they have some favorite images that I like to bring out from year to year to use on my personal cards.
Wishing you a frightfully, delightful Halloween!
Thanks for stopping by today!
Today is the last day to take advantage of this great offer – when you purchase the Starter Kit you get to pick $155 worth of product for only $99 plus free shipping! You also get a free past Paper Pumpkin kit. Join as a happy discount shopper or as a business – the choice is yours! You might want to consider adding the beautiful new Fitting Florets Collection to the kit! A few other benefits of joining are: enjoy a 20%-25% discount on all orders as an active demonstrator, get to see new catalogs early and place pre-orders, attend in-person and virtual Stampin’ Up! events. I’d love to have you on my team! Click here for further information and to join.
Place an online order between $50 and $149 and use this host code for October. You will receive a free gift from me the following month. If your order is $150 or more DO NOT use the host code. You will qualify for Stampin’ Rewards.
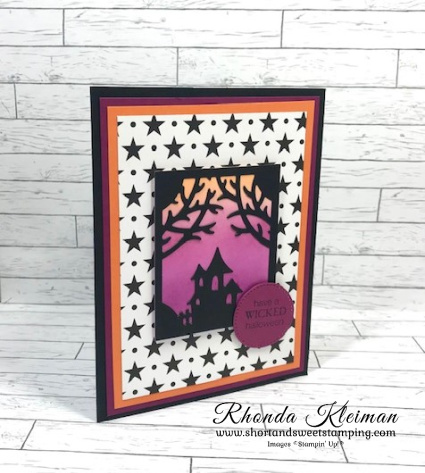
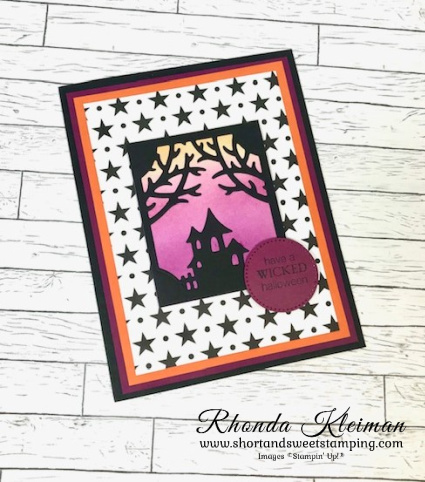
Today’s card features the Scary Silhouettes Dies from the holiday mini catalog. I’ve loved celebrating Halloween ever since I was a small child. I have made Halloween cards for years, but hadn’t offered a class for several years because my customers didn’t seem interested. However, I decided to offer a class this year and I got a great response, so was able to hold two sessions last week. This one of the cards we made and everyone had fun playing with the die cuts!
Here is how I made the card.
Card base – cut a piece of Basic Black cardstock at 5 1/2″ x 8 1/2″, score at 4 1/4″, fold and crease with a bone folder.
Cut a piece of Rich Razzleberry cardstock at 4″ x 5 1/4″. Cut a piece of Pumpkin Pie cardstock at 3 3/4″ x 5″. Cut a piece of the Black & White Designs Designer Series Paper with the stars at 3 1/2″ x 4 3/4″ and adhere to the Pumpkin Pie piece. Adhere to Rich Razzleberry piece and adhere to card front.
Cut a piece of Basic White cardstock at 2 3/8″ x 2 7/8″. Color the piece with blending brushes. Color the top of the piece with Pumpkin Pie ink. Color the middle with Rich Razzleberry and then color the bottom with Blackberry Bliss ink. Go over each color as many times as you need with the blending brushes until you get the depth of color that you like.
Cut a piece of Basic Black cardstock at 2 3/8″ x 2 7/8″ and run it through a die cutting & embossing machine with the tree branch die. Adhere to the piece colored with the blending brushes. Run a scrap piece of Basic Black cardstock through the machine with the haunted house die. Adhere house to bottom of the tree branch piece. Adhere to front of card with Stampin’ Dimensionals.
Run a scrap piece of Rich Razzleberry cardstock through a die cutting machine with the second smallest circle from the Stylish Shapes Dies. Stamp greeting with Memento Black ink. I used a greeting from Wicked Cool, a long-retired stamp set that I kept because it is one of my favorite Stampin’ Up! Halloween stamp sets! Adhere to lower right corner of the tree branch piece with Stampin’ Dimenionals.
Cut a piece of Basic White cardstock at 4″ x 5 1/4″. Stamp with greeting and adhere to inside of card.
Thanks for stopping by today!
Sneak Peek
Stampin’ Up! has released a collection of products, Fitting Florets, that will be available for purchase beginning on November 1. Several of the products will only be available until January 4th, while supplies last: Fitting Florets DSP, Framed & Festive Stamp Sets, Gold Adhesive Backed Swirls. The following products are also available for purchase in the Mini Catalog starting January 2023: Framed Florets Bundle, Framed Florets Stamp Set, and Framed Florets Dies. Add just the right touch of elegance to any occasion, including Christmas and seasonal celebrations, with the sweet Fitting Florets Collection. From color schemes to sentiments and embellishments to dies, these unique products blend together so that your cards and crafts fit whatever occasion you might need. Send birthday wishes, express your gratitude, or spread Christmas cheer—with so many options to mix and match you’ll be set no matter the celebration all year!
Place an online order between $50 and $149 and use this host code for October. You will receive a free gift from me the following month. If your order is $150 or more DO NOT use the host code. You will qualify for Stampin’ Rewards.


")
")


 Designer Series Paper")


")
")

 Designer Series Paper")


")
")


 Designer Series Paper")
 Glimmer Paper")