
Hello!
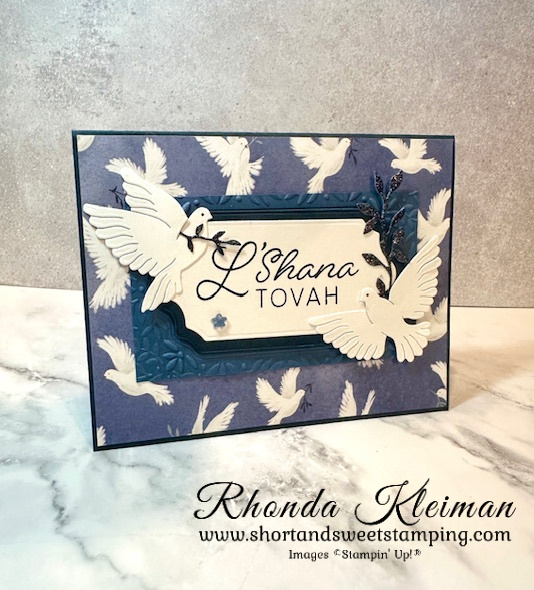
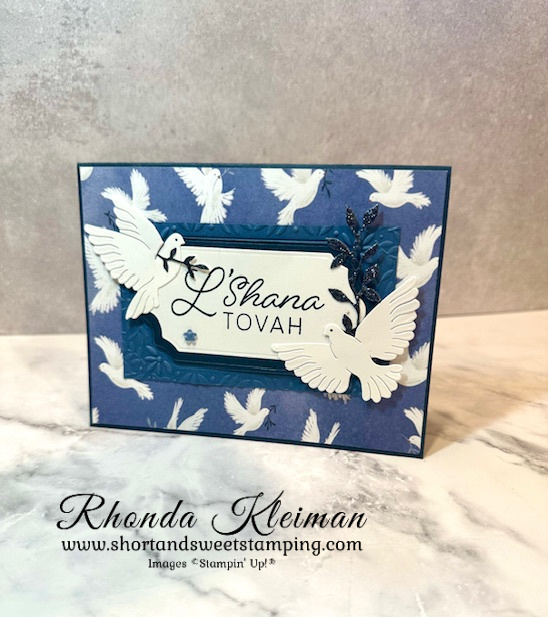
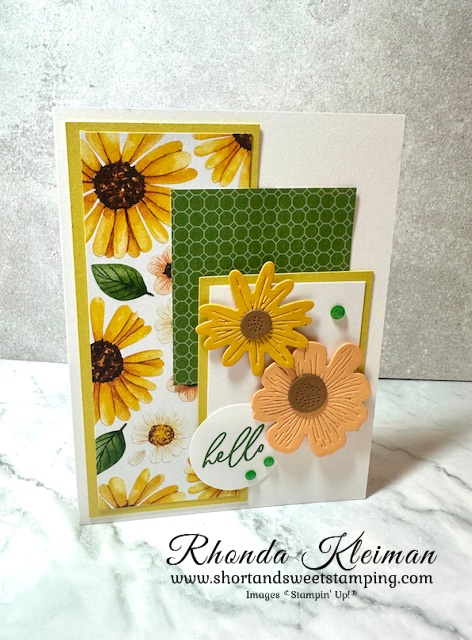
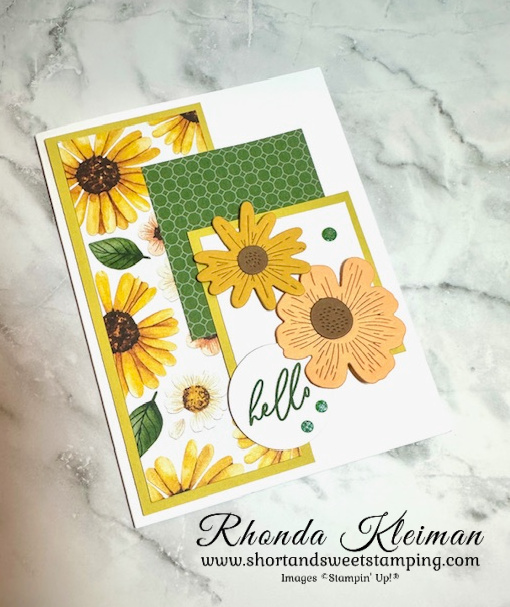
Today’s card features the Peaceful Garden Suite from the September-December 2025 Mini Catalog. Stampin’ Up! demonstrators got to purchase these products back in June to use in a Creativity Now event. I always eagerly await the holiday catalog to see what products I might be able to use for my cards, as it isn’t too often that Stampin’ Up! comes out with stamp sets with Jewish themes. It is amazing how so many products from the catalog can be used for other than Christmas cards! As soon as I saw this suite, with the beautiful Designer Series Papers in various shades of blue, as well as the dies to cut two different doves, I knew it would be perfect for both Jewish New Year cards as well as Hanukkah cards. While the traditional symbols of Rosh Hashanah are apples, honey, pomegranates and shofars, doves are frequently used as they symbolize peace, healing and a better world.
Measurements
- Secret Sea cardstock – cut one piece at 5 1/2″ x 8 1/2″ for card base; one piece at 2 1/2″ x 4 1/4″ for label
- Misty Moonlight cardstock – 2 1/2″ x 4 1/4″
- Basic White cardstock – 4 1/4″ x 4 1/2″ for label and two doves; 4″ x 5 1/4″ for inside of card
- Glimmer paper – one strip dark blue 1″ x 4″; one strip light blue 1″ x 3″
- Peaceful Garden DSP – 4″ x 5 1/4″
Here is how I made the card.
- Fold Secret Sea card base in half. Adhere Designer Series Paper to card front.
- Run piece of Misty Moonlight through embossing machine with the Peaceful Greenery 3D Embossing Folder. This piece is small so you will have to center it around the middle of the design. Adhere to center front of card.
- Run the Secret Sea piece of cardstock for the label through a die cutting machine with the larger of the two label dies from the Peace on Earth die set.
- Run the Basic White cardstock cut at 4 1/2″ x 4 1/2″ through the die cutting machine with the smaller label die and the two doves. Stamp the greeting from the Mazel Tov stamp set (an Online Exclusive set introduced in July 2025) with Secret Sea ink. Adhere to Secret Sea label.

- Adhere the entire label to the center of the embossed Misty Moonlight piece with Stampin’ Dimensionals.
- Run dark blue glimmer paper strip through die cutting machine with the large and small leaf images. Adhere the large leaf to the right side of the label. Adhere the small leaf to the smaller dove. Adhere doves to card front. Use the fine tip of either the Secret Sea Stampin’ Write Marker or Stampin’ Blend to make a dot for the eyes. Adhere one of the Hues of Blue Flowers embellishments in the lower left corner of the label.
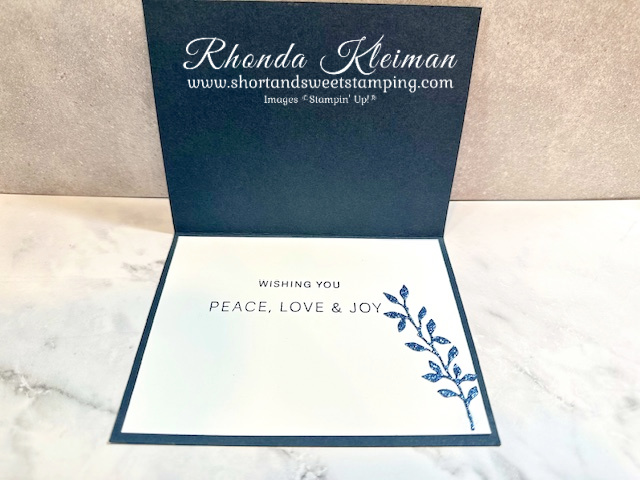
- For the inside of the card, adhere the Wishing You and Peace, Love & Joy greetings from the Peace on Earth stamp set on one acrylic block in order to stamp both at the same time. Stamp with Secret Sea ink.
- Run the lighter blue glimmer paper strip through a die cutting machine with the large leaf die. Adhere to right side of the stamped image.
- Adhere piece to inside of card.
Thanks for stopping by today!

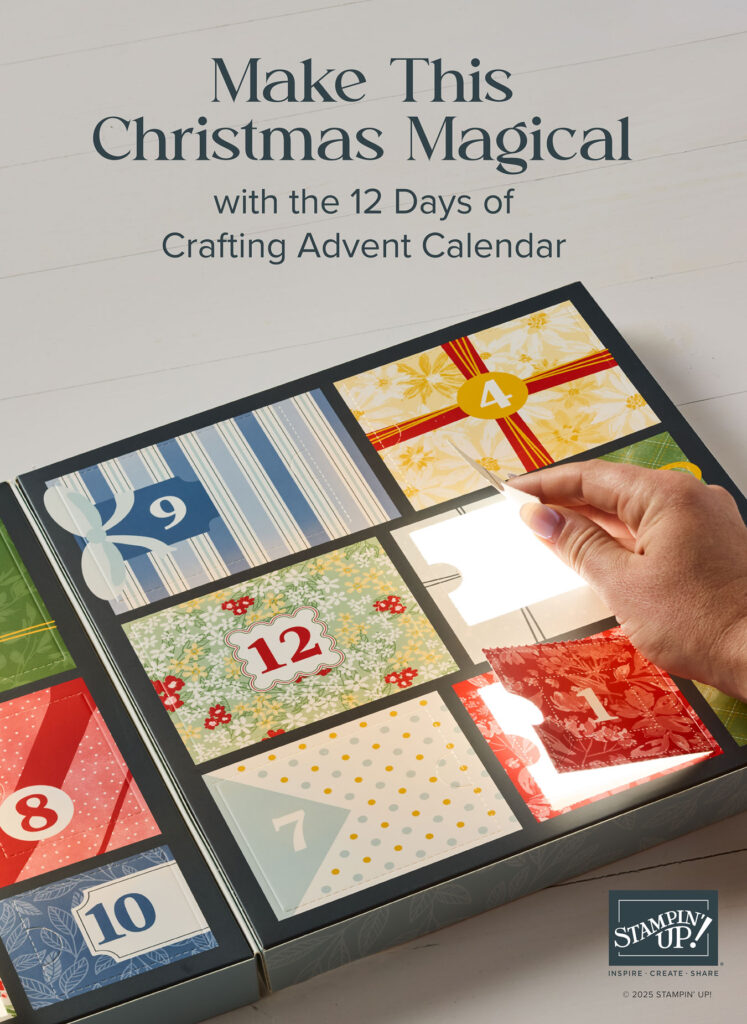
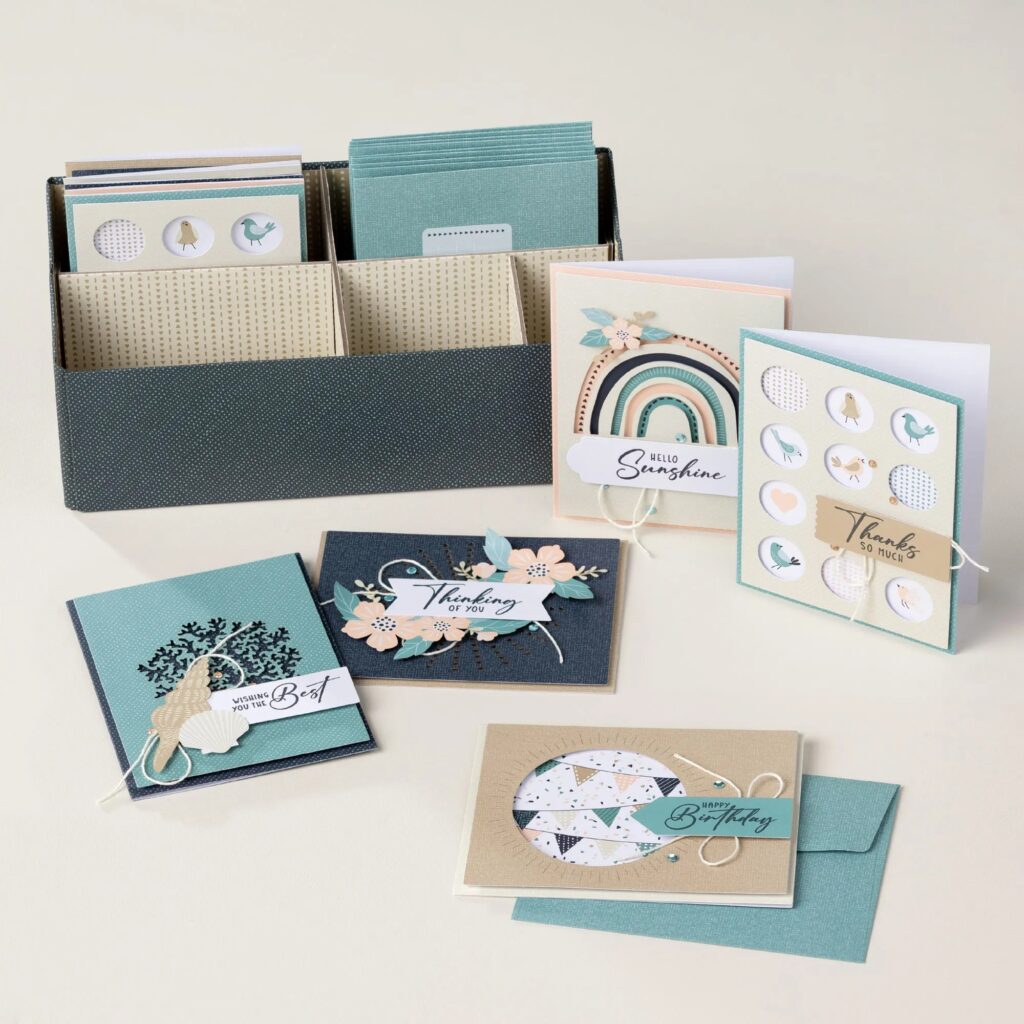
Stampin’ Up! just released this 12 Days of Crafting Advent Calendar for a limited time, as supplies last. You can choose to open one door each day or all at once to reveal 12 products, some of them never seen before, including dies, embellishments and more, as well as a stamp set. These products can be used throughout the year. Purchase one for yourself and gift one for a crafty friend. Item #167335 and Price $99. Visit my online store to purchase the calendar.
Product List ![Peace On Earth Bundle (English) [ 165925 ]](https://assets1.tamsnetwork.com/images/EC042017NF/165925s.jpg "Peace On Earth Bundle (English) [ 165925 ]") | ||
![Peace On Earth Dies [ 165924 ]](https://assets1.tamsnetwork.com/images/EC042017NF/165924s.jpg "Peace On Earth Dies [ 165924 ]") | ||
![Secret Sea 8 1/2" X 11" Cardstock [ 165624 ]](https://assets1.tamsnetwork.com/images/EC042017NF/165624s.jpg "Secret Sea 8 1/2\" X 11\" Cardstock [ 165624 ]") | ||
![Basic White 8 1/2" X 11" Cardstock [ 166780 ]](https://assets1.tamsnetwork.com/images/EC042017NF/166780s.jpg "Basic White 8 1/2\" X 11\" Cardstock [ 166780 ]") | ||
![Hues Of Blue Flowers [ 165930 ]](https://assets1.tamsnetwork.com/images/EC042017NF/165930s.jpg "Hues Of Blue Flowers [ 165930 ]") | ![Stampin' Cut & Emboss Machine [ 149653 ]](https://assets1.tamsnetwork.com/images/EC042017NF/149653s.jpg "Stampin' Cut & Emboss Machine [ 149653 ]") | |
![Paper Trimmer [ 152392 ]](https://assets1.tamsnetwork.com/images/EC042017NF/152392s.jpg "Paper Trimmer [ 152392 ]") | ![Bone Folder [ 102300 ]](https://assets1.tamsnetwork.com/images/EC042017NF/102300s.jpg "Bone Folder [ 102300 ]") | ![Stampin' Seal [ 152813 ]](https://assets1.tamsnetwork.com/images/EC042017NF/152813s.jpg "Stampin' Seal [ 152813 ]") |
![Stampin' Dimensionals [ 104430 ]](https://assets1.tamsnetwork.com/images/EC042017NF/104430s.jpg "Stampin' Dimensionals [ 104430 ]") | ![Multipurpose Liquid Glue [ 110755 ]](https://assets1.tamsnetwork.com/images/EC042017NF/110755s.jpg "Multipurpose Liquid Glue [ 110755 ]") |
![Peaceful Garden Suite Collection (English) [ 165932 ]](https://assets1.tamsnetwork.com/images/EC042017NF/165932s.jpg "Peaceful Garden Suite Collection (English) [ 165932 ]")
![Peace On Earth Photopolymer Stamp Set (English) [ 165918 ]](https://assets1.tamsnetwork.com/images/EC042017NF/165918s.jpg "Peace On Earth Photopolymer Stamp Set (English) [ 165918 ]")
![Mazel Tov Photopolymer Stamp Set (English) [ 166184 ]](https://assets1.tamsnetwork.com/images/EC042017NF/166184s.jpg "Mazel Tov Photopolymer Stamp Set (English) [ 166184 ]")
![Peaceful Greenery 3 D Embossing Folder [ 165928 ]](https://assets1.tamsnetwork.com/images/EC042017NF/165928s.jpg "Peaceful Greenery 3 D Embossing Folder [ 165928 ]")
![Peaceful Garden 12" X 12" (30.5 X 30.5 Cm) Designer Series Paper [ 165917 ]](https://assets1.tamsnetwork.com/images/EC042017NF/165917s.jpg "Peaceful Garden 12\" X 12\" (30.5 X 30.5 Cm) Designer Series Paper [ 165917 ]")
![Peaceful Garden 12" X 12" (30.5 X 30.5 Cm) Glimmer Paper [ 165929 ]](https://assets1.tamsnetwork.com/images/EC042017NF/165929s.jpg "Peaceful Garden 12\" X 12\" (30.5 X 30.5 Cm) Glimmer Paper [ 165929 ]")
![Misty Moonlight 8-1/2" X 11" Cardstock [ 153081 ]](https://assets1.tamsnetwork.com/images/EC042017NF/153081s.jpg "Misty Moonlight 8-1/2\" X 11\" Cardstock [ 153081 ]")
![Secret Sea Classic Stampin' Pad [ 165285 ]](https://assets1.tamsnetwork.com/images/EC042017NF/165285s.jpg "Secret Sea Classic Stampin' Pad [ 165285 ]")
![Secret Sea Stampin’ Blends Combo Pack [ 165289 ]](https://assets1.tamsnetwork.com/images/EC042017NF/165289s.jpg "Secret Sea Stampin’ Blends Combo Pack [ 165289 ]")


![Basic White 8 1/2" X 11" Thick Cardstock [ 159229 ]](https://assets1.tamsnetwork.com/images/EC042017NF/159229s.jpg "Basic White 8 1/2\" X 11\" Thick Cardstock [ 159229 ]")
![Darling Duckling 8 1/2" X 11" Cardstock [ 165622 ]](https://assets1.tamsnetwork.com/images/EC042017NF/165622s.jpg "Darling Duckling 8 1/2\" X 11\" Cardstock [ 165622 ]")
![Crushed Curry 8-1/2" X 11" Cardstock [ 131199 ]](https://assets1.tamsnetwork.com/images/EC042017NF/131199s.jpg "Crushed Curry 8-1/2\" X 11\" Cardstock [ 131199 ]")
![Peach Pie 8 1/2" X 11" Cardstock [ 163799 ]](https://assets1.tamsnetwork.com/images/EC042017NF/163799s.jpg "Peach Pie 8 1/2\" X 11\" Cardstock [ 163799 ]")
![Pecan Pie 8 1/2" X 11" Cardstock [ 161717 ]](https://assets1.tamsnetwork.com/images/EC042017NF/161717s.jpg "Pecan Pie 8 1/2\" X 11\" Cardstock [ 161717 ]")
![Beautiful Butterflies Photopolymer Stamp Set (English) [ 164608 ]](https://assets1.tamsnetwork.com/images/EC042017NF/164608s.jpg "Beautiful Butterflies Photopolymer Stamp Set (English) [ 164608 ]")
![Floral Impressions 12" X 12" (30.5 X 30.5 Cm) Designer Series Paper [ 165603 ]](https://assets1.tamsnetwork.com/images/EC042017NF/165603s.jpg "Floral Impressions 12\" X 12\" (30.5 X 30.5 Cm) Designer Series Paper [ 165603 ]")
![Impressions Abloom Dies [ 165610 ]](https://assets1.tamsnetwork.com/images/EC042017NF/165610s.jpg "Impressions Abloom Dies [ 165610 ]")
![Garden Green Classic Stampin' Pad [ 147089 ]](https://assets1.tamsnetwork.com/images/EC042017NF/147089s.jpg "Garden Green Classic Stampin' Pad [ 147089 ]")


![Notes & Totes Dies [ 165240 ]](https://assets1.tamsnetwork.com/images/EC042017NF/165240s.jpg "Notes & Totes Dies [ 165240 ]")
![Layers Of Beauty Photopolymer Stamp Set (English) [ 163514 ]](https://assets1.tamsnetwork.com/images/EC042017NF/163514s.jpg "Layers Of Beauty Photopolymer Stamp Set (English) [ 163514 ]")
![Strawberry Slush 8 1/2" X 11" Cardstock [ 165625 ]](https://assets1.tamsnetwork.com/images/EC042017NF/165625s.jpg "Strawberry Slush 8 1/2\" X 11\" Cardstock [ 165625 ]")
![Crumb Cake 8-1/2" X 11" Cardstock [ 120953 ]](https://assets1.tamsnetwork.com/images/EC042017NF/120953s.jpg "Crumb Cake 8-1/2\" X 11\" Cardstock [ 120953 ]")
![Basic Beige 8 1/2" X 11" Cardstock [ 164511 ]](https://assets1.tamsnetwork.com/images/EC042017NF/164511s.jpg "Basic Beige 8 1/2\" X 11\" Cardstock [ 164511 ]")
![Country Lace 12" X 12" (30.5 X 30.5 Cm) Designer Series Paper [ 163415 ]](https://assets1.tamsnetwork.com/images/EC042017NF/163415s.jpg "Country Lace 12\" X 12\" (30.5 X 30.5 Cm) Designer Series Paper [ 163415 ]")
![2025–2027 In Color™ 6" X 6" (15.2 X 15.2 Cm) Designer Series Paper [ 165300 ]](https://assets1.tamsnetwork.com/images/EC042017NF/165300s.jpg "2025–2027 In Color™ 6\" X 6\" (15.2 X 15.2 Cm) Designer Series Paper [ 165300 ]")
![Balmy Blue Classic Stampin' Pad [ 147105 ]](https://assets1.tamsnetwork.com/images/EC042017NF/147105s.jpg "Balmy Blue Classic Stampin' Pad [ 147105 ]")
![Lemon Lolly Classic Stampin' Pad [ 161666 ]](https://assets1.tamsnetwork.com/images/EC042017NF/161666s.jpg "Lemon Lolly Classic Stampin' Pad [ 161666 ]")
![Misty Moonlight Classic Stampin' Pad [ 153118 ]](https://assets1.tamsnetwork.com/images/EC042017NF/153118s.jpg "Misty Moonlight Classic Stampin' Pad [ 153118 ]")
![Strawberry Slush Classic Stampin' Pad [ 165286 ]](https://assets1.tamsnetwork.com/images/EC042017NF/165286s.jpg "Strawberry Slush Classic Stampin' Pad [ 165286 ]")
![Strawberry Slush Stampin’ Blends Combo Pack [ 165290 ]](https://assets1.tamsnetwork.com/images/EC042017NF/165290s.jpg "Strawberry Slush Stampin’ Blends Combo Pack [ 165290 ]")
![Strawberry Slush & Pretty In Pink Gems [ 165615 ]](https://assets1.tamsnetwork.com/images/EC042017NF/165615s.jpg "Strawberry Slush & Pretty In Pink Gems [ 165615 ]")
![Blending Brushes [ 153611 ]](https://assets1.tamsnetwork.com/images/EC042017NF/153611s.jpg "Blending Brushes [ 153611 ]")
![Small Blending Brushes [ 160518 ]](https://assets1.tamsnetwork.com/images/EC042017NF/160518s.jpg "Small Blending Brushes [ 160518 ]")
![Paper Snips [ 103579 ]](https://assets1.tamsnetwork.com/images/EC042017NF/103579s.jpg "Paper Snips [ 103579 ]")
![Adhesive Sheets [ 152334 ]](https://assets1.tamsnetwork.com/images/EC042017NF/152334s.jpg "Adhesive Sheets [ 152334 ]")

