Pretty Pumpkins Fun Fold Card

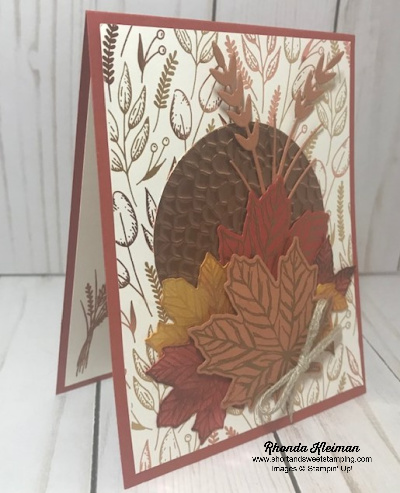
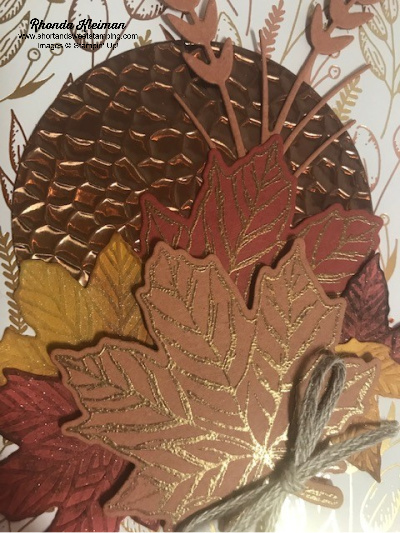
Hello! Today’s project is a fun fold card using the Pretty Pumpkins bundle. The stamp set has great images and sentiments and the coordinating dies are beautiful. It isn’t often that we get Designer Series Papers to match the browns in the Stampin’ Up! color range, so while the colors in the Blackberry Beauty Specialty DSP are predominantly purples, I was excited to see that a few sides of the papers have some wonderful designs in Early Espresso and Cinnamon Cider.

Here is how I made the card.

  • Main card base – Cut a piece of Early Espresso cardstock at 4 1/4″ x 8 1/2″, score at 3″, fold and crease with bone folder. 
  • Smaller card base – Cut a piece of Cinnamon Cider cardstock at 3″ x 8″, score at 4″, fold and crease with bone folder.
  • Cut one piece of the Blackberry Beauty DSP at 4″ x 5 1/4″ and one at 2 3/4″ x 4″. Adhere the smaller piece of DSP to front fold and the larger piece to the inside.
  • Cut a piece of Pumpkin Pie cardstock at 2 1/4″ x 2 1/2″. Cut an adhesive sheet to the size of the cardstock.  Run through die cutting machine using the pumpkin die from the Detailed Pumpkins dies.
  • Cut piece of Very Vanilla cardstock at 2 1/2″ x 3″. Stamp large pumpkin line image with Tuxedo Black Memento ink. Color with a variety of Stampin’ Blends.  I used Stampin’ Blends and colored the stems with light Cinnamon Cider and light and dark Old Olive for the leaves.  For the smallest pumpkin I used dark Pale Papaya and light Pumpkin Pie, for the medium pumpkin I used dark Pumpkin Pie and light Cajun Craze, and for the largest pumpkin I used light and Dark Cajun Craze.  You can also color the image with Stampin’ Write Markers, colored pencils, or use ink pads with blender pens. Run through die cutting machine with coordinating die from the Detailed Pumpkins dies.
  • Cut two pieces of Very Vanilla cardstock at 2 7/8″ x 3 7/8″. Stamp greeting from Pretty Pumpkins stamp set with Early Espresso ink in upper right corner of one the pieces.  Adhere die cut Pumpkin Pie pumpkin and then adhere the colored pumpkin piece, overlapping the die cut pumpkin.  You can adhere with or without Stampin’ Dimensionals.  Adhere to front flap of the smaller Cinnamon Cider card base.
  • Stamp the small pumpkin vine and leaf image with Memento ink on the other piece of the 2 7/8” x 3 7/8” Very Vanilla cardstock and color the leaves with the Old Olive and Cinnamon Cider Stampin’ Blends.  Adhere to inside of the smaller card base.
  • Adhere smaller card to larger card, making sure that the card opening faces to the left.  Adhere a Brushed Metallic Adhesive-Backed Dot to the card front.

Thanks for stopping by today!

The Gifts Galore Paper Pumpkin Kit is available now through November 10. With classic Christmas sentiments, bright and festive colors, a sweet snowman, a tree with all the trimmings, or a playful pile of presents, you’ll have everything you need to make eye-catching treat packages that are sure to spread Christmas cheer. Each Gifts Galore box contains enough supplies to create nine treat packages—three each of three designs—and nine food-safe bags that are adorably styled for easy Christmas gifting. Coordinating colors: Evening Evergreen, Flirty Flamingo, Old Olive, Pool Party, Poppy Parade. There’s plenty of joy to share with Gifts Galore! Visit my Paper Pumpkin website to subscribe to this kit.

Place an online order between $50 and $149 and use this host code for October. You will receive a free gift from me the following month.  If your order is $150 or more DO NOT use the host code. You will qualify for Stampin’ Rewards.

Product List
Paper Snips
[103579]
$10.00

World Cardmaking Day-Blackberry Beauty Card

Hello! Today is World Cardmaking Day! This event was started by the now defunct Card Maker magazine as a way to promote cardmaking and stamping and as a way to jumpstart cardmaking for the holiday season. This event always occurs on the first Saturday of October. I wasn’t able to plan my own event this year, however, I am sharing a card we made in my quarterly club last week. Take some time today to make a card and send a card to spread sunshine and let someone know that you care about them and are thinking of them. To see what others are doing and see some projects that are being posted around the internet, enter hashtag #wcmd2021.

This card features products from the Blackberry Beauty and Harvest Beauty suites and is a quick and easy card to make. Here is how to make the card.

  • Card base – Cut piece of Blackberry Bliss cardstock at 5 1/2″ x 8 1/2″, score at 4 1/4″, fold and crease with a bone folder.
  • Cut piece of Crumb Cardstock at 4″ x 5 1/4″.
  • Cut three different pieces of Blackberry Beauty Designer Series Paper into 1 5/8″ x 4″ strips. Adhere to Crumb Cake piece.
  • Using the Harvest Dies, run the coneflower through the Stampin’ Cut & Emboss Machine with scrap piece of Rich Razzleberry cardstock. Run the stalks through the machine with the Be Dazzling Specialty Paper. This paper is now retired, as it was one of the free Sale-A-Bration items in the promotion that has now ended. Adhere both pieces to the DSP piece with liquid glue. Trim the ends of the stems down to the edge of the bottom of the piece.
  • Adhere piece to card base.
  • Cut a piece of Crumb Cake cardstock at 1″ x 4 1/2″. Stamp greeting from the Beauty of Tomorrow stamp set with Blackberry Bliss ink. Run through die cutting machine with the long label die from the Harvest Dies. Adhere to card front with Stampin’ Dimensionals.
  • Cut piece of Very Vanilla cardstock at 4″ x 5 1/4″. Stamp the bird with Blackberry Bliss ink in one of the corners of the piece and adhere to inside of card.

Thanks for stopping by today!

Place an online order between $50 and $149 and use this host code for October. You will receive a free gift from me the following month.  If your order is $150 or more DO NOT use the host code. You will qualify for Stampin’ Rewards.

Product List
Harvest Dies
[156504]
$38.00
Paper Snips
[103579]
$10.00

Nature’s Harvest with Blending Brush Background

Hello! Today’s card features products from the beautiful new Harvest Meadow Suite in the July-December 2021 Mini Catalog. It uses the Nature’s Harvest stamp set, Harvest Dies and Harvest Meadow Designer Series Paper. This is another one of the cards we made in my class on using blending brushes last week. It is an easy card to put together.

Here is how I made the card.

  • Card base – cut a piece of Calypso Coral cardstock at 4 1/4″ x 11″, score at 5 1/2″, fold and crease with a bone folder.
  • Cut two pieces of paper from the Harvest Meadow DSP pack. Cut the Calypso Coral piece at 2 1/2″ x 5 1/4″ and the Soft Succulent piece at 1 1/2″ x 5 1/4″ and adhere both pieces to card front.
  • Cut a piece of Soft Succulent cardstock at 3 3/4″ x 4 3/4″ and run through your die cutting machine with the 3rd largest Stitched Rectangle die.
  • Cut a piece of Very Vanilla cardstock at 3″ x 4 1/2″ and run through your die cutting machine with the 4th largest Stitched Rectangle die.
  • To do the blended ink background, first apply Bumblebee ink with a blending brush to the top third of the piece. Gradually build the color to the depth you like, a little bit at a time. Next, apply Calypso Coral ink, making this section more narrow than the Bumblebee section. Since Calypso Coral is the main color on the card I wanted to use it as more of an accent in the background piece. Last, apply Soft Succulent ink to the bottom third of the piece, again building up the color to the depth you like.
  • Stamp the coneflower image from the Nature’s Harvest stamp set on the background piece with Tuxedo Black Memento ink.
  • Stamp greeting on scrap piece of Very Vanilla cardstock with the Memento ink and cut out with the small label die from the Harvest Dies set.
  • Wrap a piece of linen thread three times around bottom portion of the blended background piece and secure on the back with a piece of tape. Adhere the greeting over the wrapped thread with Mini Stampin’ Dimensionals.
  • Adhere blended background piece to the Soft Succulent cardstock piece.
  • Adhere the entire piece to the card front with Stampin’ Dimensionals.

Thanks for stopping by today!

Place an online order between $50 and $149 and use this host code for August. You will receive a free gift from me the following month.  If your order is $150 or more DO NOT use the host code. You will qualify for Stampin’ Rewards.

Join Stampin’ Up! now through September 30th. You get to select $125 worth of products for only $99 and will also get a FREE bundle from the Holiday Catalog! The kit ships for free. I’d love to have you join my team. Become a happy discount shopper or build a business – the choice is yours! Click here for the benefits of joining Stampin’ Up!

Here is a list of bundles you can select from.

Experience everything the autumn season has to offer with the Haunts & Harvest Paper Pumpkin Kit! This month’s kit includes enough supplies to create 12 treat boxes—4 each of 3 designs. That means you can take your pick of apple, pumpkins, or jack-o-lantern treat boxes! Plus, the Paper Pumpkin box is designed to easily transform into a vintage wheelbarrow for you to display your harvest! The kit contains enough supplies to create 12 treat packages—4 each of 3 designs. The all-inclusive kit includes printed die-cut boxes, die-cut sheets, adhesive, and more! Finished treat box size: 2-1/2″ x 2″ (6.4 x 5.1 cm). Coordinating colors are Basic Black, Pale Papaya, Poppy Parade, Pumpkin Pie, Soft Succulent. Subscribe now through September10th. The kit will arrive in your mailbox around the 20th of the month. For further information and to subscribe, click here to visit my Paper Pumpkin website.

Product List
Harvest Dies
[156504]
$38.00
Paper Snips
[103579]
$10.00

Snowflake Splendor

Hello! Today’s card features products from the Snowflake Splendor Suite in the August-December 2020 Mini Catalog. The non-traditional colors, paired with all of the beautiful snowflake images, can be used not only for holiday cards but also for general cards with a winter theme.

Here is how I made the card.

  • Card base – cut piece of Misty Moonlight cardstock at 4 1/4″ x 11″, score at 5 1/2″and crease with a bone folder. This is a landscape card.
  • Cut piece of Whisper White cardstock at 4″ x 4″. Cut piece of Snowflake Splendor Designer Series paper at 3 7/8″ x 3 7/8″ and adhere to Whisper White piece.
  • Cut piece of Snowflake Splendor 1/4″ Ribbon at 15″, tie into a knot, or bow if you prefer, around DSP piece and trim ends. Adhere piece to card base.
  • Cut piece of Balmy Blue Glimmer paper at 3 1/4″ x 3 5/8″. Cut piece of Whisper White cardstock at 3 1/8″ x 3 1/2″. Use the largest snowflake die in the So Many Snowflakes Dies set, center it on the cardstock piece and run through the Stampin’ Cut & Emboss Machine.
  • Adhere die cut piece to the gimmer paper with either Tear & Tape or Stampin’ Seal+. Adhere piece to the DSP piece. Add a large Blue Adhesive-Backed Gem to the center of the snowflake.
  • Cut piece of Whisper White cardstock at 4″ x 5 1/4″. Select one of the greetings from the Snowflake Wishes stamp set and stamp with Night of Navy ink. Stamp one of the smaller snowflake images in opposite corners with Misty Moonlight ink. Adhere to inside of card.

Thanks for stopping by today!

Celebrate with curvy stamps, dies, and more! Designed for a variety of special occasions, the Quite Curvy Variety Bundle includes everything you need to create one-of-a-kind crafts. Don’t let stress steal your spirit—get ahead and order this exclusive bundle for a festive and frenzy-free season!  You can also purchase the Quite Curvy Bundle or the Curvy Christmas Stamp Set separately.  The Quite Curvy Bundle will be in the upcoming January-June 2021 Mini Catalog.  The Quite Curvy Variety Bundle, Curvy Christmas stamp set and the Classic Christmas 6×6 Designer Series Papers will only be available now through January 4th.

Quite Curvy Photopolymer Stamp Set – 154430  $17.00USD
Curvy Dies – 154319  $29.00USD
Quite Curvy Bundle – 156228   $41.25USD
Curvy Christmas Photopolymer Stamp Set – 155364  $21.00USD
Classic Christmas 6×6 Designer Series Paper – 155969  $11.50USD
Quite Curvy Variety Bundle – 158396  $70.50USD

 Product List  

Gather Together Fall Card

Hello! Today’s card features the Gathered Together bundle in the August-December Mini Catalog. I was so happy to see that this bundle, which was in the 2019 holiday catalog, was brought back as a returning favorite! I went back to a card I created last year for Kylie Bertucci’s monthly blog hop because I love the layout. I changed up this year’s card by using the Gilded Autumn Specialty Designer Series Paper; one of the dies from the Autumn Essentials Dies, a new set in the Mini Catalog; and Cinnamon Cider cardstock, which is one of the new InColors. You can see my original card in this blog post.

I recently participated in a group of 82 Stampin’ Up! demonstrators from around the world that contributed amazing projects to a MEGA tutorial bundle using autumn-themed products from the 2020 August-December Mini Catalog and decided to make this card for the tutorial.   These projects are exclusive and will not be publicly posted online. Each project includes full color photos, step-by-step instructions, measurements in both metric and imperial, and supply lists.  There are three ways to get this awesome tutorial bundle:

  • If you placed an order with me from January through August you should have received it from me for FREE in a separate message I sent out recently.
  • If you place an order with me from September until the end of December 2020 either in my online store or by having me place an order for you, you will receive it for FREE once the order has been placed.
  • If you’d like to purchase the tutorial it is available for $21.  Please contact me at rhondastamps@verizon.net and I will send you an invoice for payment.

Since I’m unable to post a picture of the card in the tutorial I made another card and changed up the paper and some of the colors.

Here is how I made the card:

  • Card base: Cajun Craze cardstock cut at 4 1/2″ x 11″, score at 5 1/2″, fold and crease with a bone folder.
  • Cut a piece of the Gilded Autumn Specialty Designer Series Paper at 4″ x 5 1/4″ and adhere to card base.
  • Emboss a piece of Copper Foil with the Hammered Metal 3D Embossing Folder and then die cut using largest circle in the Layering Circles Dies. Adhere to card.
  • Stamp large leaf image from the Gathered Leaves stamp set on scrap pieces of Cinnamon Cider and Cajun Craze cardstock with Versamark ink.  Sprinkle gold embossing powder over each leaf and heat emboss. Use the largest leaf in the Gathered Leaves Dies to cut the embossed leaves.
  • Use the next-to largest and smallest leaf dies in the Gathered Leaves Dies to cut one Crushed Curry and One Cajun Craze leaf in each size.
  • Accent the veins in the leaves by adding touches of Early Espresso ink on the Cajun Craze leaves and Soft Suede ink on the Crushed Curry leaves with sponge daubers. 
  • Add some glimmer by spritzing some Champagne Mist Shimmer Paint over the leaves.  Add a few drops of the paint into a Stampin’ Spritzer and then fill the spritzer with 70% Rubbing Alcohol and shake to mix it together before spritzing.  Let dry before adding to card.
  • Die cut one each of the long, curved leaf dies from the Autumn Essentials Dies from scrap piece of Cinnamon Cider cardstock.
  • Start building the collage.  First, adhere the long Cinnamon Cider leaves leaves as pictured.  Use multipurpose liquid glue on the stems but keep the leaves free of glue to give a bit of dimension at the top of the card. Next, adhere the large Cajun Craze leaf.  This serves as the base for adding the rest of the leaves. 
  • Adhere the smaller Cajun Craze and Crushed Curry leaves, overlapping them, to the right side of the large Cajun Craze leaf.  Adhere the larger Cajun Craze and Crushed Curry leaves on the left side, again overlapping them.
  • Adhere the large Cinnamon Cider leaf with Stampin’ Dimensionals on top of the collage.  Cut a length of Braided Linen Trim and tie in a small bow. Adhere with a Mini Glue Dot.
  • For inside of card cut piece of Very Vanilla cardstock at 4″ x 5 1/4″. Stamp sentiment with Cajun Craze ink. Stamp wheat sheaf image in lower left corner with Cinnamon Cider ink.

Thanks for stopping by today!

There are just a few days remaining to take advantage of this great offer to join Stampin’ Up! You pay $99 for the starter kit and get to pick out $125 in products (and you can opt to select the new Stampin’ Cut and Emboss Machine!). In addition, you will also receive the Queen Anne’s Lace and So Much Love stamp sets for free, plus cardstock pieces to make 16 cards, 16 envelopes, and a pack of Basic Rhinestone Jewels.

 Product List  

Arrange A Wreath-Autumn

Hello! What was supposed to be a one-week break turned out to be a two-week hiatus from blogging due to time sensitive commitments I had with my primary business. Now that they are completed, I’m back to blogging once again. I must admit that it was nice to take a little break!

Today’s card is one of five cards featuring the Arrange a Wreath bundle that were in my August class to go kits and this is one I created with an autumn theme. I just love Cinnamon Cider, one of this year’s new InColors. It is such a rich, warm color. I haven’t made a square card in quite some time so I decided to make one measuring 4 1/4″ square.

  • Card base – cut piece of Cinnamon Cider cardstock at 4 1/4″ x 8 1/2″, score at 4 1/4″, fold and crease with a bone folder.
  • Cut piece of Cinnamon Cider cardstock at 4 1/4″ x 4 1/4″ and run through embossing machine with the Pinewood Planks 3D embossing folder. Adhere to card front.
  • Cut piece of coordinating Plaid Tidings Designer Series Paper at 2 1/2″ x 4 1/4″ and adhere to card front.
  • Cut piece of Cinnamon Cider cardstock at 3 3/4″ x 3 3/4″. Use the sprig wreath die from the Wreath Builder die set and run through die cutting machine.
  • Cut piece of Shaded Spruce cardstock at 3 3/4″ x 3 3/4″. Use the leaf wreath die and run through the die cutting machine.
  • Adhere the sprig wreath to the card front. Adhere the leaf wreath over the sprig wreath, popping it up with Mini Stampin’ Dimensionals.
  • Die cut three of the large flowers, two from Cajun Craze cardstock and one from Mango Melody. Stamp the dot image three times on scrap piece of Cinnamon Cider cardstock and die cut. Adhere to centers of the three flowers.
  • Stamp wood crate image with Cinnamon Cider ink on scrap piece of Whisper White cardstock. Stamp greeting onto the crate with Early Espresso ink and fussy cut around the image.
  • Arrange flowers on right side of wreath, adhering with Mini Stampin’ Dimensionals. Adhere crate with Mini Stampin’ Dimensionals on other side of wreath.
  • Cut piece of Whisper White cardstock at 4″ x 4″, stamp with a greeting of your choice or leave blank, and adhere to inside of card.

Stampin’ Up! has a great offer to join this September! You pay $99 for the starter kit and get to pick out $125 in products (and you can opt to select the new Stampin’ Cut and Emboss Machine!). In addition, you will also receive these items for FREE: Queen Anne’s Lace stamp set, So Much Love stamp set, cardstock pieces to make 16 cards, 16 envelopes, and a pack of Basic Rhinestone Jewels. One pack of 8 cardstock is Coastal Cabana and the other pack is Granny Apple Green – such fun colors! Here are some sample cards created by Stampin’ Up! artists. I’d love to have you as part of my team. There is NO obligation to be a business builder – happy discount shoppers are welcome!  Please contact me if you’d like more information. Click here to join.

Thanks for stopping by today!

 Product List  
Paper Snips
[103579]
$10.00

Gather Together Double Z-Fold Card

Today I’m sharing a double Z-fold card featuring the Gather Together bundle in the Holiday Catalog. This was another one of the cards we made at my stamping club earlier this month. I CASEd this idea from Susan LeVasseur, WOW NOLA Creations and also changed up some of the card dimensions.

Here is how I made the card.

  • Card base – cut a piece of Pretty Peacock cardstock at 4 1/4″ x 11″. Score at 2 3/4″ and 5 1/2″ and fold. For the smaller Z-fold base cut a piece of Mango Melody cardstock at 3″ x 9.”  Score at 3″ and 6″ and fold.
  • Select one of the papers from the Come to Gather Designer Series Paper. Cut one piece at 4″ x 5 1/4″ and two pieces at 2 1/2″ x 4″ and adhere them to the card base.
  • Cut three pieces of Very Vanilla cardstock at 2 3/4″. On the first piece stamp the speckles with Pretty Peacock ink around all four sides. Stamp the wheat sheaf with Crushed Curry Ink on the second piece. Stamp the greeting of your choice with Pretty Peacock ink. Adhere pieces to Mango Melody base. Adhere this base to the larger card base. For the front flap only apply glue on one half of the Mango Melody base in order for the card to open and close properly.
  • Stamp one leaf with Early Espresso ink on a piece of Early Espresso cardstock. Stamp another leaf with Crushed Curry ink on piece of Crushed Curry cardstock. Cut with coordinating die from the Gathered Leaves die set. Cut two Gold Foil leaves using the medium and large leaf embossing dies. Spray Early Espresso leaf with Champagne Mist Shimmer Paint. To use this paint add 70% rubbing alcohol to a Stampin’ Spritzer, filling halfway. Add 3-5 drops of the Shimmer Paint and shake it up so that the paint mixes thoroughly with the alcohol. Sponge Celestial Copper Metallic Ink on tips of the Crushed Curry leaf, Arrange leaves and adhere to front of card.
  • Tie a bow with a thread of your choice. I used a gold thread that has been retired. Attach with a Mini Glue Dot to the base of the Early Espresso leaf.

I really enjoyed creating this card and hope you like it! Please feel free to leave me a comment.

Thanks for stopping by today!

 Product List