Softly Sophisticated Fun Fold

Hello!

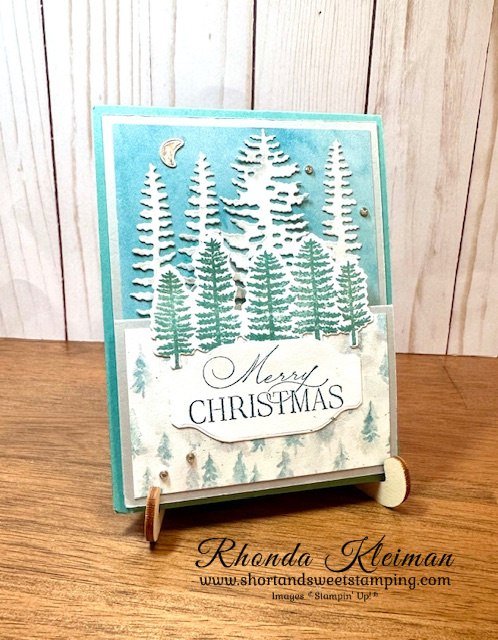
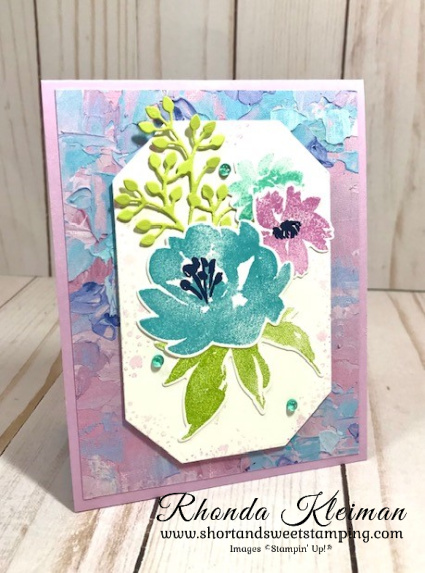
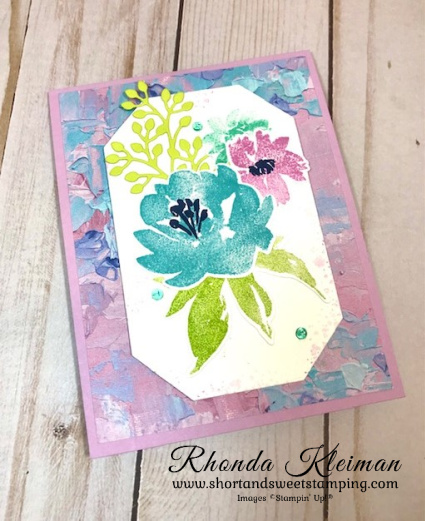
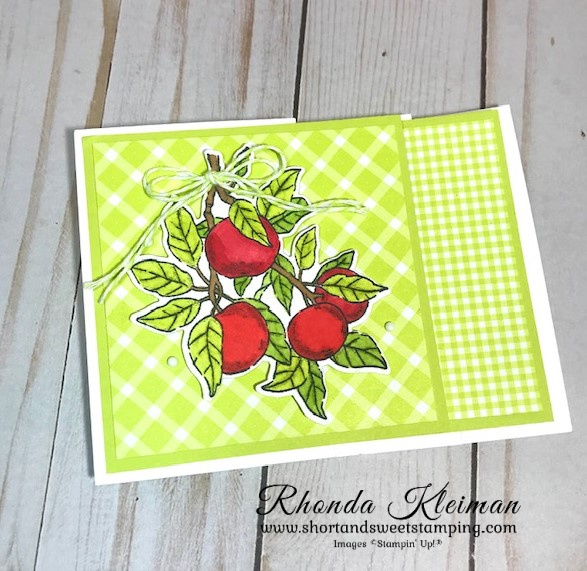
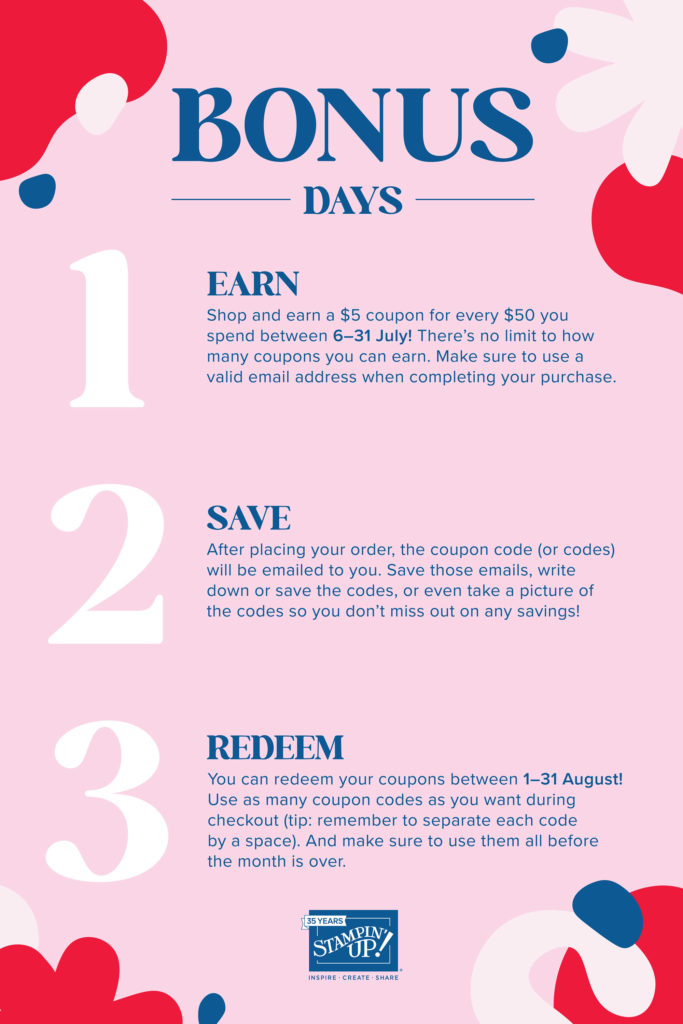
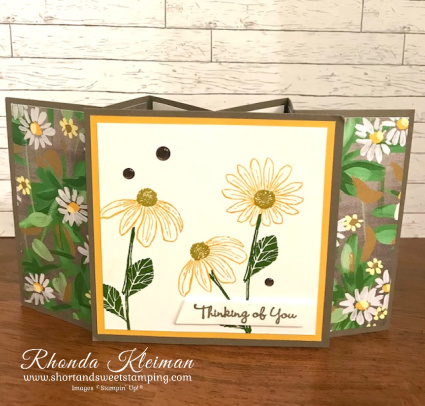
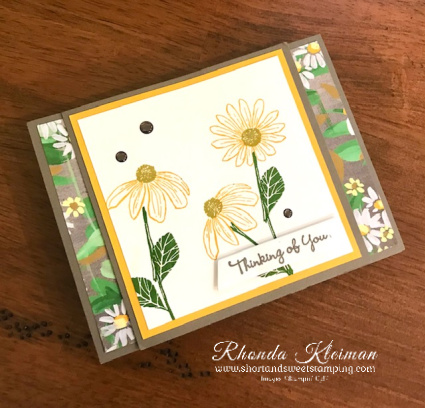
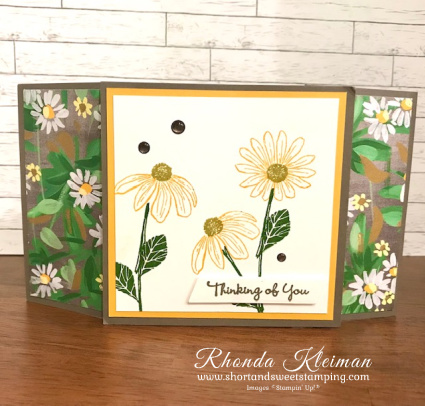
Today’s card features several new Sale-A-Bration products. Sale-A-Bration runs through February 29. For every $50 or $100 purchase you make you get to select exclusive free items. I used the Softly Sophisticated Bundle which includes a stamp set and an embossing folder, free with a $100 purchase. I also used the Flight & Airy Designer Series Paper, free with a $50 purchase. I have used this fun fold many times because it is a nice way to feature smaller stamped images as well as embossing folders.

Here is how I made the card.

  • Card base – cut a piece of Pretty Peacock cardstock at 5 1/2″ x 8 1/2″. Score at 4 1/4″, fold and crease with a bone folder. Cut off a 1 1/2″ piece from the front side of the cardstock and trim it down to 1 1/2″ x 5 1/4″. You will use this strip for the embossing.
  • Cut a piece of DSP at 2 1/2″ x 5 1/4″ and adhere to card front.
  • Run the 1 1/2″ strip through a die cutting & embossing machine with the Softly Sophisticated embossing folder.
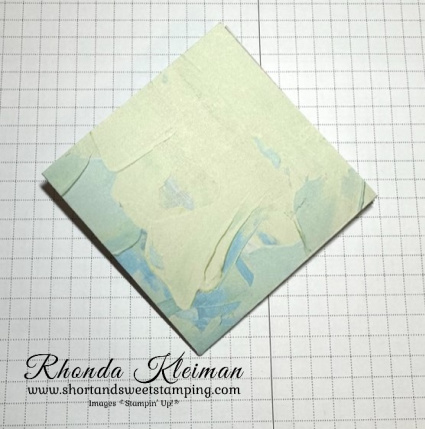
  • Cut a piece of Basic White cardstock at 4″ x 5 1/4″. Adhere the embossed piece to the right edge.
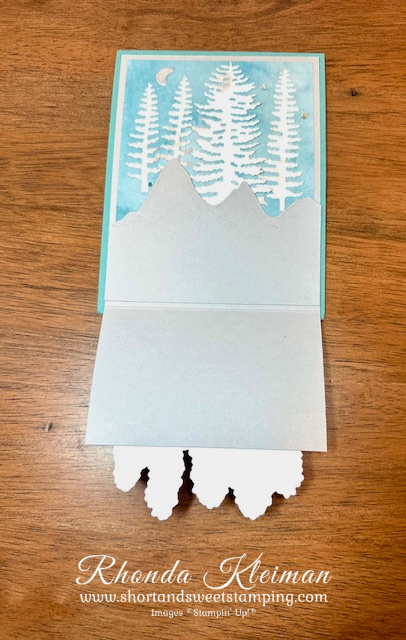
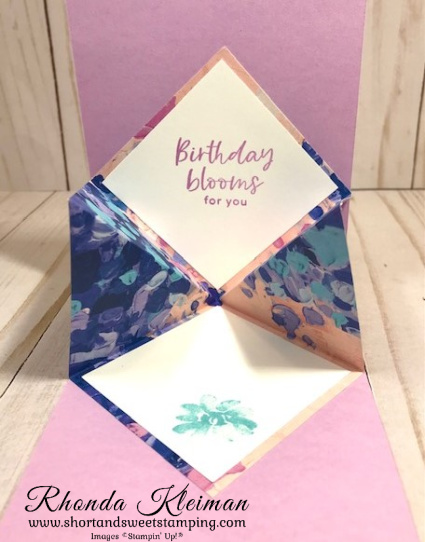
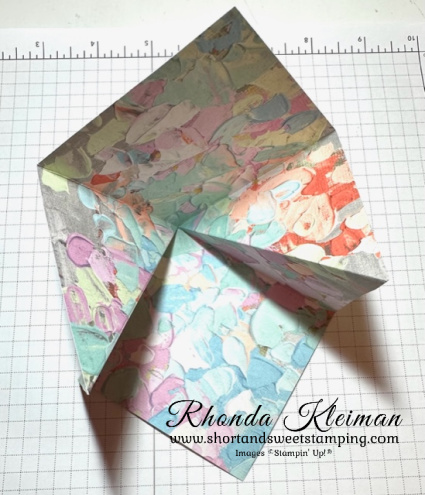
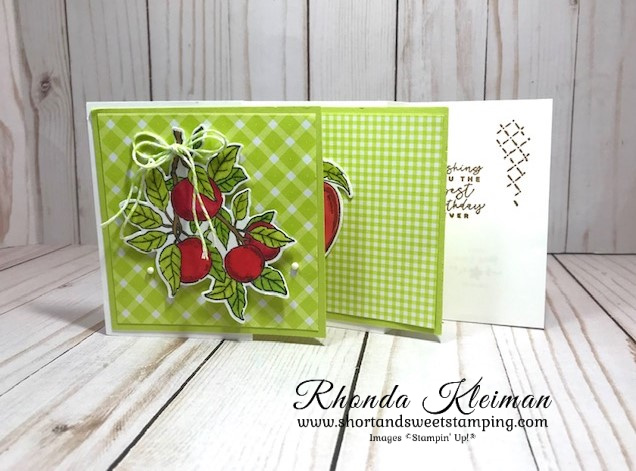
  • Cut a piece of Lost Lagoon cardstock at 3 1/2″ x 3″ and score at 1/2″ with the long side at the top of your trimmer. Fold on score line and give a sharp crease with a bone folder. Run a line of liquid glue or adhesive along the 1/2″ side. Center this piece in the middle on the back side of the Basic White cardstock piece and adhere.
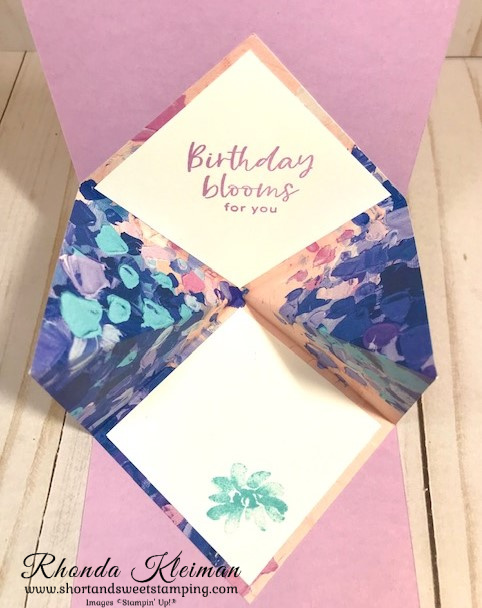
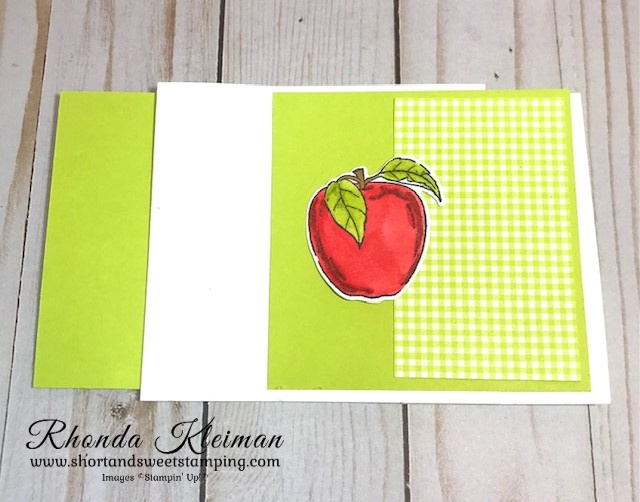
  • Cut a piece of Basic White cardstock at 2 3/4″ square. Stamp the leaf image with Parakeet Party ink. Stamp the flowers with Lost Lagoon ink. I decided to stamp a few speckled images to fill in some of the blank white spaces so I used a stamp from the Queen Bee stamp set and stamped with Pretty Peacock ink. Stamp the birthday greeting from the Go To Greetings stamp set with Pretty Peacock ink. Adhere to the Lost Lagoon front flap.
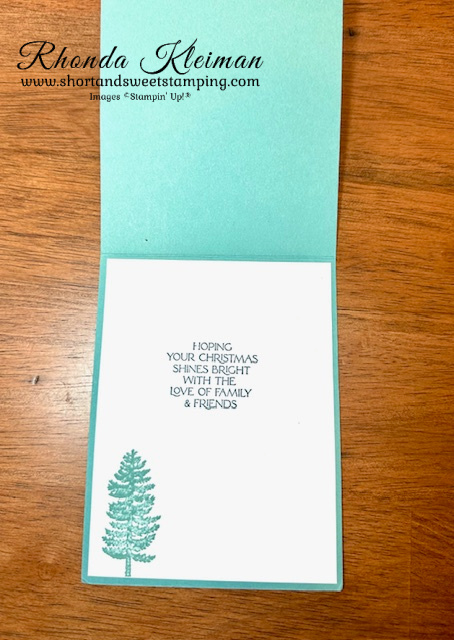
  • For the inside greeting I used one of the greetings from the Layering Leaves stamp set and stamped with Pretty Peacock ink. I stamped a leaf image from this set with Parakeet Party ink in the lower left corner. Adhere to inside of card and close the card so that the flap overlaps the front of the card.
  • Add a bit of bling to the front of the card. I used a few of the green sequins from the Adhesive Backed Glitter Sequins which were in the September-December 2023 Mini Catalog. They are now retired.

Thanks for stopping by today!

During Sale-A-Bration, when you join Stampin’ Up! you can choose $125 of products for only $99, which includes shipping. You get to choose from two FREE bonus options – either this Glass Mat Studio (a $60 value) or your choice of an additional $30 in FREE products. The Glass Mat Studio has been creating quite a buzz!

The Stampin’ Glass Mat Studio is a paper crafter’s dream! The heavy-duty glass mat comes printed with a ruler and grid lines for easy measuring, while the large surface space gives ample room for spreading out while paper crafting. The safety-tempered glass has a heat and scratch resistant surface that wipes clean with the included cloth and water—no chemicals needed. The reusable cloth also cleans ink off your stamps! The nonslip, heat resistant, waterproof silicone mat features four palette squares for mixing custom ink colors or for holding small ink spots in place while crafting. Each component can be used separately or you can use all three items together for a multipurpose paper crafting studio that’s both functional and elegant.

The Stampin’ Glass Mat Studio includes:

GLASS MAT
* 5 mm thick
* 17″ x 14″ (43.2 x 35.6 cm)
* Safety-tempered
* Heat and scratch resistant
* Wipes clean with water or alcohol

SILICONE MAT
* 8-3/8″ x 6″ (21.3 x 15.2 cm)
* Multiuse, nonslip
* Waterproof, heat resistant
* 4 palette squares for custom-color mixing or holding Stampin’ Spots
* Product color: white CLEANING CLOTH
* 8-1/4″ x 8-1/4″ (21 x 21 cm)
* Durable, reusable
* Lint free
* Cleans stamps and other surfaces with only water
* Product color: dark gray

Place an online order between $50 and $149 and use this host code for January. You will receive a free gift from me the following month.  If your order is $150 or more DO NOT use the host code. You will qualify for Stampin’ Rewards.

Product List

Forever Forest Z Fold Card

Hello!

Today’s card features the Forever Forest Bundle and Winter Meadows Designer Series Paper from the 2023 Holiday Mini Catalog. This is my last post featuring products from this catalog, which will be retired as of January 3, 2024. The Forever Forest Bundle will be retiring, however, the Winter Meadows DSP will be carrying over either into an upcoming catalog or as an online exclusive. Sometimes I have an idea and a vision of what my completed card will look like, but it doesn’t always turn out this way. I’m glad that it was not the case for this card – I think it came out even better than how I pictured it! I apologize for the quality of the photos. I had a hard time with the lighting as I’m still working through adjusting to new lights in my renovated space, which is where I take my pictures.

Here is how I made the card.

  • Card base – Cut a piece of Lost Lagoon cardstock at 4 1/4″ x 11″, score at 5 1/2″, fold and crease sharply with a bone folder
  • Z Fold – Cut a piece of Smoky Slate cardstock at 4″ x 10 1/4″. Score at 2 1/2″ and 5 1/2″ , fold at score lines and crease sharply.
  • Cut a piece of Lost Lagoon background paper from the Winter Meadows DSP at 3 3/4″ x 5″ and adhere to the 5 1/4″ section of the Smoky Slate fold. Cut a piece of the Lost Lagoon tree paper at 2 1/4″ x 3 3/4″ and adhere to the bottom flap of the Smoky Slate fold.
  • Stamp the five-tree image in Lost Lagoon ink on piece of Basic White cardstock measuring 2 1/2″ x 3 3/4″. Run through die cutting machine with coordinating die. Add shimmer with Wink of Stella. Adhere to top of the bottom fold so that the tree tops extend past the fold.
  • Stamp greeting on scrap piece of Basic White cardstock. I used the Merry Christmas greeting from the Brightest Glow stamp set, which is available in the 2023-2024 Annual Catalog. This is a great go-to stamp set for Christmas & Seasonal Greetings. Run through die cutting machine with die from Something Fancy Dies. Adhere to bottom flap over the tree trunks.
  • Use the three largest single tree dies. Cut one of the largest, two of the second largest and one of of the third largest. Use a small blending brush and lightly brush Smoky Slate ink around the edges of all of the trees. Continue to build up the ink until you get the ink dark enough that you can see that it has accented the trees. Brush with Wink Stella.
  • Cut a piece of Smoky Slate cardstock at 3 1/4″ x 4″ and run through die cutting machine with the mountain die. Position the die on the cardstock so that the largest peaks are cut out.
  • Adhere trees to the Lost Lagoon background DSP piece. Adhere mountain die cut at the bottom of the inner Z fold, so that the mountain tops overlap the bottoms of the trees.
  • Run the small moon die through the die cutting machine with a scrap piece of Silver Foil paper and adhere on tree piece. Adhere a few Rhinestone Basic Jewels for some additional bling.
  • Adhere the Z fold piece to the Lost Lagoon card base.
  • For the inside greeting, cut a piece of Basic White cardstock at 4″ x 5 1/4″. Stamp with a greeting from the Brightest Glow stamp set with Lost Lagoon ink. Stamp large tree image with Lost Lagoon ink in bottom corner. Adhere to the inside of the card.

Thanks for stopping by today! Wishing you a very Happy New Year and all the best in 2024!

Place an online order between $50 and $149 and use this host code for December. You will receive a free gift from me the following month.  If your order is $150 or more DO NOT use the host code. You will qualify for Stampin’ Rewards.

Product List

Celebrate the Miracle

Hello!

I’m back again after another long break. Wishing my Jewish friends and customers a very belated Happy Chanukah! I’ve been busy making cards for the last two months but haven’t had time to do any blogging. I recently finished a major renovation project in my living room and dining room which affected my annual holiday card workshops due to the chaos going on around me. I usually begin my workshops in early November but had to push them back a few weeks. My last workshop was yesterday and now I can finally start getting back into more normal routines. I will be blogging my holiday cards for the next two weeks.

Here are photos of my living room and dining room. My home is over 100 years old and the downstairs floors, steps going upstairs and upstairs hallway were covered with old white carpet that was here when I bought the home 18 years ago. I had the carpet removed and wood floors were refinished to their original state. Paint job, all new furniture in both rooms and new light fixtures. I can’t believe it is my house! I’m looking forward to the fun part, shopping around for accessories, after the new year!

I held one Chanukah card workshop using the beautiful new and very long-awaited Stampin’ Up! stamp set, Celebrate the Miracle, and even managed to get my cards mailed out on time. I did three different cards. No instructions for how I made the card, however I have listed the cutting measurements for each. Supplies used are at the end of this post.

Cutting measurements

  • Night of Navy cardstock – cut one piece at 5 1/2″ x 6 1/2″ and score at 2 1/4″; cut one piece at 4 1/4″ x 6″ and score at 3″.
  • Very Vanilla cardstock- cut one piece at 3″ x 4″ and one piece at 2 3/4″ x 4 1/4″
  • Shining Brightly DSP- cut two pieces at 2″ x 5 1/4″

Cutting measurements

  • Night of Navy cardstock – cut one piece at 5 1/2″ x 8 1/2″ and score at 4 1/4″; cut one piece at 3 3/4″ x 4 1/4″; cut one piece at 2 5/8″ x 3 3/8″
  • Very Vanilla cardstock – cut one piece at 4″ x 5 1/4″; cut one piece at 2 1/2″ x 3 1/4″
  • Shining Brightly DSP – Cut one piece at 4″ x 5 1/4″; cut one piece at 3 1/2″ x 4″

Cutting Measurements

  • Cut one piece of Pebbled Path cardstock at 4 1/4″ x 11″and score at 4 1/4″ and 5 1/2″
  • Cut one piece of Basic White cardstock at 4″ x 4″ and 4 pieces at 1 1/2″ x 1 1/2″
  • Cut four pieces of Boho Blue cardstock at 1 5/8″
  • Cut one piece of Pebbled Path Tartan Foil Specialty DSP at 4″ x 4″ and one piece at 1″ x 4″

Thanks for stopping by today!

Click here to view the Last Chance list

Click here to view the Carryover list

Place an online order between $50 and $149 and use this host code for December. You will receive a free gift from me the following month.  If your order is $150 or more DO NOT use the host code. You will qualify for Stampin’ Rewards.

Product List
Paper Snips
[103579]
$11.00

Textured Floral Explosion Card

Today’s card features the Textured Floral Bundle. I’ve been wanting to make an explosion card for quite some time and decided to give it a go with this project. I used the Fancy Flora Designer Series Paper which was in the January-April Mini Catalog and is now retired. I try not to use many retired products in my projects, however I thought it would make a pretty background for the flowers as well as the explosion piece inside the card.

Here is how I made the card.

  • Card base – cut a piece of Fresh Freesia cardstock at 4 1/4″ x 11″, score at 5 1/2″, fold and crease with a bone folder.
  • Cut a piece of the Fancy Flora DSP at 4″ x 5 1/4″ and adhere to card front.
  • Cut a piece of Basic White cardstock at 3 1/2″ x 5″ and run through the Stampin’ Cut & Emboss Machine with the 2nd largest Countryside Corners die. Use the stamp with splotches to stamp around the edges with Fresh Freesia ink. Stamp off each time before stamping onto the cardstock.
  • Stamp flowers and leaves on piece of Basic White cardstock with Fresh Freesia, Balmy Blue, Pool Party and Lemon Lime Twist inks. Stamp stamens with Orchid Oasis ink. Run through Stampin’ Cut & Emboss Machine with coordinating Textured Florals Dies. Cut a scrap piece of Lemon Lime Twist cardstock and run through machine with the leaf die. Adhere all die cut pieces to the Countryside Corners piece.
  • To make the inside explosion piece, either cut a 6″x6″ piece from a 12″x12″ piece of DSP or use a piece from a 6″x6″ pack of DSP. Score at 3″ horizontally and vertically. Score diagonally from the upper right corner to the lower left corner. Fold along score lines, creasing with a bone folder. Fold the diagonal creases out (mountain) and then fold the entire piece into a square, as shown in the photos.

Adhere the explosion piece to the inside of the card. The square should have the folds at the top and the open edges at the bottom. Add adhesive to the top and bottom square. Center the top of the folded piece up against the inside of the card score line. The left and right corners of the square should be touching the edges of the card base. Close the card to adhere the piece to the inside panels.

  • Cut two Basic White squares at 2 3/4″ square. Stamp greeting on one of the squares and stamp small flower image on the other square. Adhere to the DSP.
  • Adhere Countryside Corners collage piece to card front with Stampin’ Dimensionals.
  • Add a few gems from the Tinsel Gems Three Pack for a bit of bling.

Thanks for stopping by today!

In honor of SU’s 35th anniversary, this month there are two amazing options for joining!

  • Option 1- Get 35% off the regular cost of the Starter Kit.  Receive $125 in merchandise for only $64.35.
  • Option 2 – Get 35% more product with the Starter Kit. You will receive $168.75 worth of product by spending only $99.
  • Both kits include free business supplies and free shipping.

In addition, if you sign up by the October 31st deadline, you will also be automatically registered for FREE to our virtual OnStage event on November 11th, a $77 value!

For further details and to join, click here.

Place an online order between $50 and $149 and use this host code for October. You will receive a free gift from me the following month.  If your order is $150 or more DO NOT use the host code. You will qualify for Stampin’ Rewards.

Product List

Apple Harvest Fun Fold Card

Hello!

It’s been over a month since my last post. I’ve been making cards but haven’t had a chance to photograph most of them yet. I’ve been working on a renovation project in my living room and dining room so have been spending a lot of my time on cleaning out and getting rid of stuff, finding contractors and shopping for new furniture. It is exciting but stressful and time consuming at the same time! I’m finally in a place where I can start to turn my attention back on my cardmaking for now, but will there will continue to be weeks where I will not be able to post. With that said, I made this card back in June and it features the Apple Harvest stamp set and coordinating Apple Harvest dies. The dies were part of a promotion last year that included sets that didn’t originally come with several stamp sets. I was happy to see that they are still available for purchase in the clearance rack at 50% off, reduced from $35.00 to $14.00. The item number is still the same, #160255. This is what the card looks like folded up.

This is what the card looks like when opened up.

Here is how I made the card.

  • Card base – cut a piece of Basic White cardstock at 4 1/4″ x 11″. Score at 2 ¾”, 4 ¼”, 7 ¼”, 8 ½”. Fold into an accordion and crease very sharply with a bone folder.
  • Cut two 4″ pieces of Lemon Lime Twist cardstock. Cut two pieces of the Lemon Lime Twist paper from the Glorious Gingham Designer Series Papers, one at 3 3/4″ square and the other at 2 1/2″ x 3 3/4″. Adhere the square piece of DSP to one of the Lemon Lime Twist squares.  Adhere the 2 1/4” piece of DSP on the right side of the other Lemon Lime Twist square.
  • Cut a piece of Basic White cardstock at 3 1/2″ x 5″. Stamp the largest apple image and the single apple image with Memento Tuxedo Black ink. Color the large apple image with light and dark Poppy Parade and Sweet Sorbet Stampin’ Blends for the apples and Lemon Lime Twist and Parakeet Party Stampin’ Blends for the leaves. Color the branch with Pecan Pie Stampin’ Blends. Color the single apple image with the same Blends. Run through Stampin’ Cut & Emboss Machine with the coordinating Apple Blossom dies.
  • Adhere the large stamped image to the 4″ square piece with the 3 3/4″ piece of DSP using Stampin’ Dimensionals. Adhere the single apple image to the other 4″ square with the 2 1/4″ piece of DSP as shown.
  • Adhere the 4” square with the large image to the front fold on the card panel, only adding adhesive to the left half of the square. 
  • Adhere the second 4″ square to the second fold, only adding adhesive to the left side of the square and lining it up with the first square.
  • Stamp the criss-cross image in the upper right corner of the back inside panel with Pecan Pie ink, making sure to position it so that it doesn’t show when the card is folded. Stamp the birthday greeting.
  • Cut two lengths of Parakeet Party Bakers Twine from the 2022-2024 In-Color Bakers Twine Pack. Tie into a bow. Adhere to top of of the branch on the large front image with a mini glue dot. Adhere a few of the small Very Vanilla Classic Matte Dots to the front of the card.

Thanks for stopping by today!

Reminder! If you earned any $5 bonus coupons from orders you placed in July, you have until this Thursday, August 31st to redeem them. You should have received one or more messages from Stampin’ Up! that included the coupon codes. You will need to enter these codes during online checkout.

Kits are on sale at up to 30% off this month.  There is no limit on the number of kits you can purchase.  The discount will be applied when you check out.  Please note that this sale does not include Paper Pumpkin.  Click here to visit the kits page in my online store.

Place an online order between $50 and $149 and use this host code for August. You will receive a free gift from me the following month.  If your order is $150 or more DO NOT use the host code. You will qualify for Stampin’ Rewards.

Product List
Paper Snips
[103579]
$11.00

Cheerful Daisies-Kylie’s International Blog Highlights

Hello! It’s been a long time since I last participated in Kylie Bertucci’s International Blog Highlights. Readers get to vote on their top five favorites in the gallery and the top 10 winners will get to participate in an International Blog Hop later this month. The theme is “thank you”. This card uses products from the the Fresh as a Daisy Suite. I stumbled onto the Flying Seagull fun fold on Susan Campfield’s blog and couldn’t wait to try it out and this is what I came up with. It looks hard to do but is actually not that difficult!

Here is how I made the card.

  • Card base – cut two pieces of Pebbled Path cardstock at 8 1/4″ x 4 1/4″ and score them at 2 1/4″, 4″, 6 1/4″.
  • Pop-up piece – cut one 4 1/4″ square Pebbled Path cardstock, one 4″ square of Crushed Curry cardstock and one 3 3/4″ square of Basic White cardstock. Adhere the Pebbled Path and Crushed Curry squares together.
  • Stamp daisy images on the 3 3/4″ Basic white square. Stamp the stems and leaves with Garden Green ink. Stamp the daisy outline images with Crushed Curry ink. Stamp the flower centers with Wild Wheat ink. Adhere to the larger square piece.
  • Stamp greeting from the Go to Greetings stamp set with Peppled Path ink on scrap piece of Basic White cardstock and cut out with the label die from the Something Fancy Dies. Adhere to stamped image with Mini Stampin’ Dimensionals. Embellish with a few 2023-2025 In Color Dots.
  • Fresh as a Daisy DSP – cut two pieces of the daisy print at 2″ x 4″ for the outer side panels and cut two pieces of the Pebbled Path woodgrain print at 1 1/2″ x 4. Cut two pieces of Basic White cardstock at 2″ x 4″ to write a message or stamp a greeting on the inside panels.
  • With the widest portion of the card bases on the left, fold it up, mountain fold. Fold the two other score lines down, valley folds. Be sure to give a good sharp crease to each of the folds.
  • Adhere the two card bases to the stamped image. Place it down and with the second valley fold, right side of base, adhere to the back of the stamped image, leaving a scant 1/4″ border. Repeat with second card base. The folds should be butting up to each other on the back.
  • Adhere DSP and Basic White cardstock strips to the wings. Tuck the outer wings under the stamped image.

I’d be so appreciative if you would vote for my card! Click on the vote image below. Once you are in the gallery, click on the heart at the top right hand side of the picture as the hearts appear.

Thanks for stopping by today!

Aa select group of Designer Series Papers are on sale at 15% off from June 1-30th. Stock up on your favorites or purchase a few from your wish list. There is no limit on how many packages you can purchase. Click here to download a flyer that shows all of the papers.

Place an online order between $50 and $149 and use this host code for June. You will receive a free gift from me the following month.  If your order is $150 or more DO NOT use the host code. You will qualify for Stampin’ Rewards.

Product List

Earthen Elegance Step Card

Hello!

Today’s card is one that we made at my monthly in-person class this past Saturday and it showcases the awesome Earthen Elegance Suite. Of all of the suites in the new annual catalog this is the one that immediately got my attention. The earth tones are rich and the textures in the images are so realistic. This is a great suite for making masculine cards as well. The fun fold is a step card that I learned how to make at a recent Creative Retreat held by Kylie Bertucci and Lisa Curcio and while it might look complicated, is actually very easy to make.

Here is how I made the card.

  • Card base – cut a piece of Copper Clay cardstock at 5 1/2″ x 5 1/2″ and score at 3/4″, 1 1/2″ and 3 1/2″. Crease sharply with a bone folder.
  • Steps – For the large step cut a piece of Copper Clay cardstock at 3″ x 8 1/2″ and score at 4 1/4″ and 8″. For the small step cut a piece of the cardstock at 2″ x 7″ and score at 3 1/2″ and 6 1/2″. Fold both of the steps in half on the score line and crease with a bone folder. Lightly crease the 1/2″ score lines.
  • For the steps cut one piece of Basic White cardstock at 2/7/8″ x 4 1/8″ and one piece at1 7/8″ x 3 3/8″. Adhere to fronts of step pieces. Cut one piece of the Earthen Elegance DSP at 2 3/4″ x 4″ and one piece at 1 3/4″ x 3 1/4″. Adhere to Basic White pieces.
  • On scrap pieces of Basic White cardstock, use the Earthen Textures stamp set to stamp large vase and branch image with Pecan Pie ink and stamp the basket with Pretty Peacock ink. Run through die cutting machine with coordinating Earthen Textures dies.
  • Cut a piece of Pretty Peacock cardstock at 3″ x 4 1/2″ and run through die cutting machine with the large leaf die. Cut a piece of Pretty Pecan cardstock at 1 1/2″ x 4″ and run through die cutting machine with the fern die.
  • Adhere the large and small steps to the bottom front of the card base fold, leaving a small margin on both sides. Adhere the backs of the large and small steps to the back of the card, aligning the bottom of each to the bottom of the back fold.
  • Cut 7″ piece of Natural Wavy Trim, adhere one end at the back of the long vase and wrap it around three times, adhering the remaining end at the back. Adhere large vase to large step, cut off the stem from the large Pretty Peacock leaf and adhere with mini glue dots under the top of the vase. Adhere basket to small step and adhere the fern and branch pieces.
  • Cut piece of Basic White cardstock at 1 7/8″ x 5 3/8″ for the inside greeting. I used the Biggest Wish stamp set, as the greetings fit perfectly on this narrow strip. I stamped “Happy” (block letters) with Pretty Peacock ink at the left side of the strip and then stamped “Birthday” (cursive letters) with Pecan Pie ink, staggering it to the bottom center. Adhere to card.
  • Add several Pretty Peacock gems from the Tinsel Gems 4-Pack to the large step.

Thanks for stopping by today!

The Welcome Inn Paper Pumpkin Kit perfectly coordinates with the Countryside Inn Suite Collection (item number 161474) from the 2023–2024 Annual Catalog! You can use the stamps and paper from both the suite and kit to create cards that are stylish and refined. Create these elegant hospitality cards using the suite’s Countryside Inn 12″ x 12″ (30.5 x 30.5 cm) Designer Series Paper and the kit’s beautiful floral cards. You can purchase a set of coordinating add-on dies that include a vase, flower and leaf, while supplies last. Item number 163192, Price $6.00. Click here to purchase the kit on my Paper Pumpkin website.

The kit includes all supplies needed to create nine cards, three each of three different designs; coordinating stamp set; Night of Navy Stampin’ Spot; embellishments; floral details and precut vases. Coordinating Stampin’ Up! colors: Balmy Blue, Boho Blue, Calypso Coral, Daffodil Delight, Early Espresso, Misty Moonlight, Night of Navy, Old Olive.

Place an online order between $50 and $149 and use this host code for May. You will receive a free gift from me the following month.  If your order is $150 or more DO NOT use the host code. You will qualify for Stampin’ Rewards.

Product List