Pansy Patch Envelope Fold Card

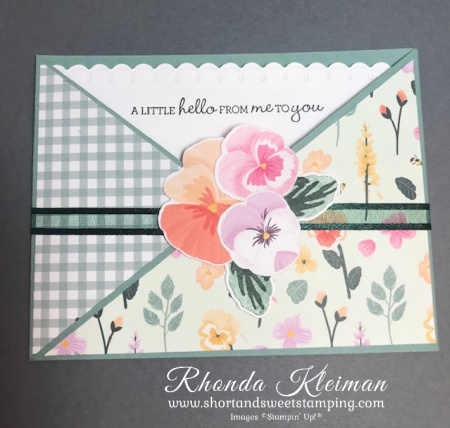
Hello! Today I’m sharing an envelope fold card that features the pretty Pansy Patch Suite. Pansies are one of my favorite flowers so I was happy to see this sweet set of products in the annual catalog. I didn’t do much stamping on this card – just the leaves and the greeting. The little pansy collage was done by die cutting the pansies from one of the sheets of the Pansy Petal Designer Series Paper that coordinates with the pansy dies.
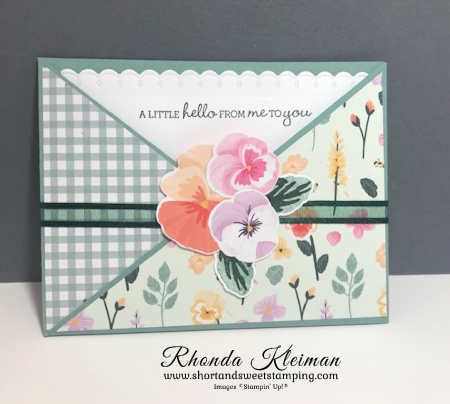
Here is how I made the card. There are lots of steps, however, it wasn’t difficult!

  • Cut two pieces of Soft Succulent cardstock at 4 1/4″ x 11″. Score at 5 1/2″.
  • Place one piece in your paper trimmer and cut from the score line diagonally down to the opposite bottom corner. Repeat with other piece. You can put both pieces together and cut both at the same time if you prefer but you will have to add a little more pressure to make sure you cut evenly through both pieces. Fold on the score line and sharply crease with a bone folder. Adhere the two pieces together to form the card base. Use either Stampin’ Seal+ or Tear & Tape.
  • Cut a piece of Pansy Petal DSP at 4″ x 5 1/4″ and cut on the diagonal. If you don’t want to use the reverse side of the paper you can cut two different pieces. Note: if using paper with a directional pattern, make sure you are cutting it on the diagonal in the right direction!
  • Adhere DSP to the diagonal folds.
  • Adhere the diagonal sides to the bottom of the card base. Decide which DSP you would like to show more of and adhere the other flap first, placing a line of Tear & Tape at the bottom inside flap. Then place a piece of Tear & Tape along the bottom of the other flap and fold over the first flap to make the pocket.
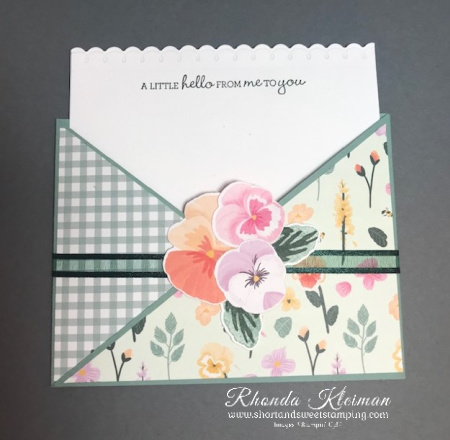
  • Cut a piece of Evening Evergreen Open Weave Ribbon at 12 1/2″ and wrap around card front, with the two ends of the ribbon meeting in the front of the card. Secure with a piece of tape.
  • Make the pansy collage. I punched out a circle from a scrap piece of Whisper White cardstock to use as a base to build the collage. You can also use one of the Layering Circles dies.
  • Stamp two leaves from the Pansy Patch stamp set. This is a two-step set so first stamp the base with Evening Evergreen ink, stamping off once before stamping onto scrap piece of Basic White cardstock. Stamp the second leaf piece with the veins over the first leaf image with Evening Evergreen ink. Cut with coordinating die.
  • Using the piece of DSP with the different sizes and colors of pansies, select three pansies, one of the large images and two of the smaller images, and cut with coordinating dies.
  • Arrange the flowers and leaves on the circle base. Adhere the leaves first using Mini Glue Dots. Then adhere the large pansy. Adhere the two smaller pansies. Adhere the collage to the center of the envelope by adhering glue only to the bottom part of the collage so that the pocket is open in order to slide the note card into it.
  • To make the note card, cut a piece of Basic White cardstock at 4″ x 5 1/2″. I used the scalloped border die from the Penned Flowers die set to create the scalloped edge. You can use any other scalloped border die you might have in your collection. Stamp the greeting from the Pansy Patch stamp set with Evening Evergreen ink. Slide note card into envelope pocket.
Thanks for stopping by today!

Place an online order between $50 and $149 and use this host code for August. You will receive a free gift from me the following month.  If your order is $150 or more DO NOT use the host code. You will qualify for Stampin’ Rewards.

Product List
Pansy Dies
[155680]
$32.00
Paper Snips
[103579]
$10.00

Hand-Penned Fun Fold-Kylie’s Training Blog Hop

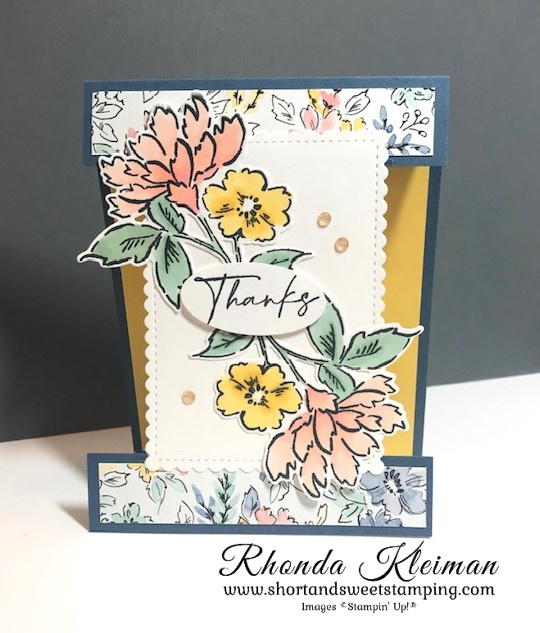
Hello! Welcome to Kylie Bertucci’s Demonstrator Training Blog Hop for July. I’m part of a group of Stampin’ Up! demonstrators from around the world that participate in Kylie’s program for building our businesses. The theme for this year is thank you cards that we make as a way to show appreciation to our customers and teams. Please be sure to click on the names in the list at the end of this post to hop around and view the beautiful projects created by so many talented stampers.

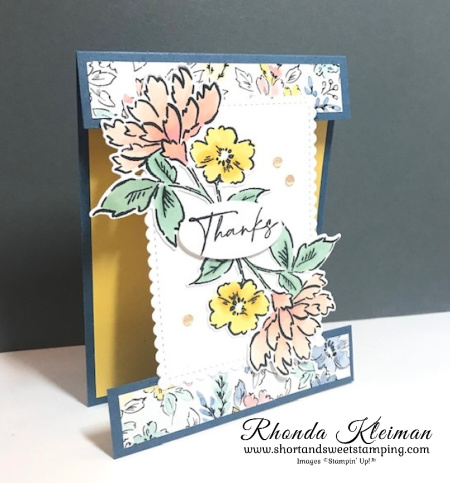
Today’s card is a fun fold that features the Hand-Penned Suite. It is one of four cards we will be making in one of my classes this week. The Hand-Penned Designer Series Paper is so soft and pretty and I love the color palette.

Here is how I made the card.

  • Card base – cut piece of Misty Moonlight cardstock at 4 1/4″ x 11″, score at 5 1/2″, fold and crease with a bone folder. Cut the card front 1″ from the fold line. Cut a 1″ x 4 1/4″ strip from the Misty Moonlight piece that was cut off.
  • Cut two strips of DSP at 3/4″ x 4″ and adhere to the 1″ Misty Moonlight strips. Cut a piece of Daffodil Delight cardstock at 4″ x 5 1/4″ and adhere to card base.
  • Cut a piece of Basic White cardstock with the largest die from the Stitched So Sweetly die set.
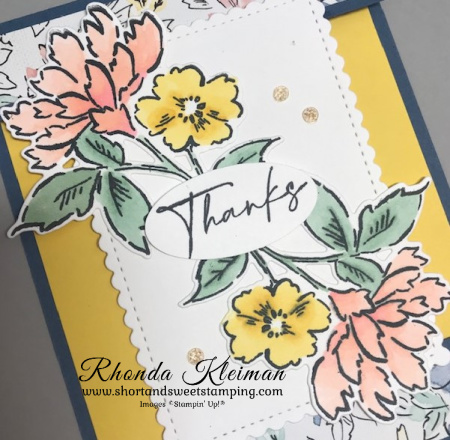
  • Stamp two of the floral images from the Hand-Penned Petals stamp set with Tuxedo Black Memento ink on piece of Basic White cardstock. Color the flowers with Stampin’ Blends. I used Mint Macaron dark and light blends for the leaves, Daffodil Delight dark and light blends for the small flower and for the large flower I used Petal Pink dark and light blends and Flirty Flamingo light blend. When finished coloring, cut both flowers out with the coordinating die from the Penned Flowers Dies.
  • Adhere flowers to the Basic White scalloped piece with liquid glue. Place one flower in one direction and the other flower in the opposite direction, making sure not to put glue on the parts of the flowers that will hang off the edges of the Basic White piece. Leave a space in between the flowers in order to add the greeting.
  • Stamp the greeting with Tuxedo Black ink on scrap piece of Basic White cardstock and punch out with the Oval Punch or other punch or die that will fit the space. Adhere with Stampin’ Dimensionals.
  • Adhere top of art piece to bottom edge of the 1″ folded card base. Adhere the other 1″ strip to the bottom of the piece.
  • Embellish card with three Pale Papaya Genial Gems.

Thanks for stopping by today!

Place an online order between $50 and $149 and use this host code for June. You will receive a free gift from me the following month.  If your order is $150 or more DO NOT use the host code. You will qualify for Stampin’ Rewards.

Product List

Sweet as a Peach Book Binding Fun Fold Card

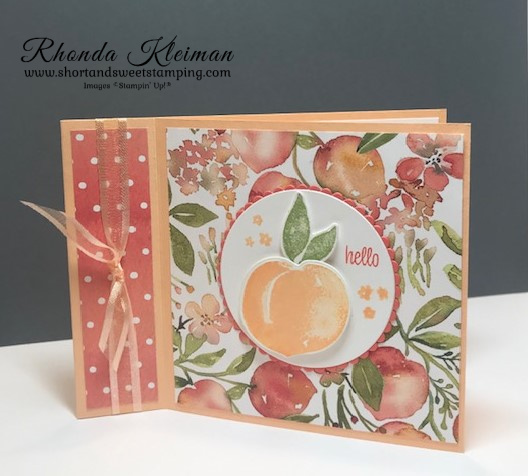
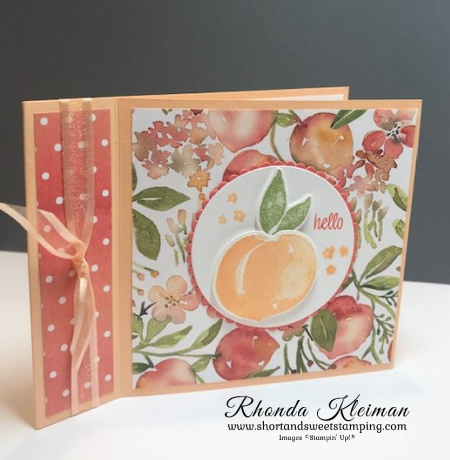
Hello! Today’s card features the new You’re A Peach Suite. I love peaches so when I saw this suite it was at the top of my list when I placed my first order from the 2021-2022 Annual Catalog. Some of you might remember the Fruit Stand stamp set and coordinating DSP from 2016, which had a peach as one of the images. I used the peach stamp heavily, but it doesn’t hold a candle to this new stamp set! Lately, I’ve been seeing a bunch of cards using the book binding fun fold so I decided to give it a try. It is very easy to do!

Here is how I made the card.

  • Card base – cut a piece of Pale Papaya cardstock at 4 1/4″ x 11″. Score at 4 1/4″ and 5 1/2″, fold in half and crease folds with a bone folder. Adhere the hinge on the left side of the card. When you open up the card the inside will now be 4 1/4″ square.
  • Cut one piece of the You’re A Peach DSP at 4″ square and a contrasting piece at 1″ x 4″ and adhere to card front.
  • Stamp the large peach image on scrap piece of Basic White cardstsock. To add depth to the color, I used a tip from Patty Bennett. First ink up the stamp with Pale Papaya ink and then sponge Calypso Coral ink onto the stamp with a sponge dauber. Stamp onto cardstock. Stamp leaf image with Pear Pizzazz ink on scrap piece of Basic White cardstock. Cut peach and leaves with coordinating dies from the Peach Dies. Adhere the leaf to the peach with a Mini Glue Dot.
  • Die cut a circle from Basic White cardstock with the 2 3/8″ Layering Circle Die. Adhere peach to circle with Stampin’ Dimensionals, leaving space for the greeting. Stamp “hello” with Calypso Coral ink. Stamp the small blossoms with Pale Papaya ink.
  • Die cut a scalloped circle from Calypso Coral cardstock with the 2 1/2″ scalloped Layering Circle Die. Adhere to stamped circle piece. Adhere to card front.
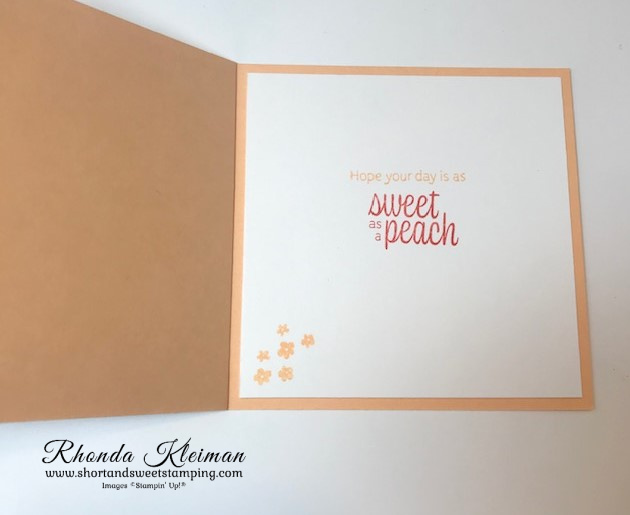
  • For the inside of the card, cut a piece of Basic White cardstock at 4″ square. Stamp greetings of your choice. I stamped “hope your day is as” with Pale Papaya ink and “as sweet as a peach” with Calypso Coral ink. Stamp small blossoms with Pale Papaya ink in bottom left. Adhere to card.
  • Cut a piece of Pale Papaya Open Weave Ribbon at 16″ and tie into a knot around the hinged piece.

Thanks for stopping by today!

The January-June 2021 Mini Catalog is retiring on June 30th. Starting tomorrow, June 1st, many products will be available at reduced prices from 10%-50% off! If you still have items on your wish list, now is the time to shop because these products will only be available while supplies last. Click here to see the retiring list.

Place an online order between $50 and $149 and use this host code for June. You will receive a free gift from me the following month.  If your order is $150 or more DO NOT use the host code.  Click here for instructions on using the host code.

Place an online order between $50 and $149 and use this host code for June. You will receive a free gift from me the following month.  If your order is $150 or more DO NOT use the host code.  Click here for instructions on using the host code.

Product List
Peach Dies
[155829]
$23.00
Paper Snips
[103579]
$10.00

Butterfly Bouquet Blog Hop

Hello and welcome to the Butterfly Bouquet Blog Hop! I’m participating with a group of fabulous Stampin’ Up! Demonstrators from around the world that are showcasing projects made with products from the Butterfly Brilliance Collection. Please be sure to click on the names in the list at the end of this post to hop around and view the beautiful projects posted by these talented stampers.

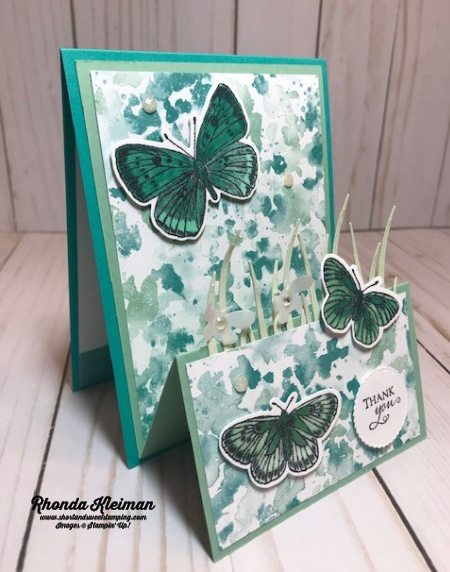
Here is how I made this fun Z-fold card.

  • Cut a piece of Bermuda Bay cardstock at 4 1/4″ x 11″ and fold in half, creasing sharply with a bone folder. For the Z-fold base, cut a piece of Mint Macaron cardstock at 4″ x 10 1/4″. Score at 2 1/2″ and 5″ and fold, creasing sharply. Adhere piece to the Bermuda Bay card base.
  • Cut piece of DSP from the Butterfly Bijou Designer Series Paper at 3 3/4″ x 5″ and adhere to larger section of the Mint Macaron base. Cut another piece of the paper at 2 1/4″ x 3 3/4″ for the front fold, but do not adhere this piece yet.
  • To stamp the butterfly images, it is easiest to use the Stamparatus because this is a very large stamp. Cut piece of Basic White cardstock at 5 1/4″ x 6 1/4″ and place on the base of the Stamparatus. Position the butterfly stamp and once it is adhered to the acrylic plate, ink up the entire image with Memento Tuxedo Black ink and stamp onto the cardstock. Cut out images with the coordinating Brilliant Wings die.
  • Color the butterflies with Bermuda Bay, Pool Party, Mint Macaron and Just Jade Stampin’ Blends. I used the three smaller butterflies and colored the larger of the three with the darker Blends. Don’t be afraid to mix all of these colors together. For some extra sparkle, brush with Wink of Stella.
  • Stamp the thank you greeting from the Very Versailles stamp set with the Memento ink and cut out with the small circle from the Tasteful Labels dies.
  • For the blades of grass, cut four large and four small grass pieces from Mint Macaron cardstock with the Dandy Wishes dies.
  • To put the card together, first adhere the largest butterfly to the larger front piece with Stampin’ Dimensionals. Next, arrange the grass along the top edge of the smaller front fold, alternating the heights of each piece. Adhere with multipurpose liquid glue for more flexible positioning. Adhere the smaller piece of DSP. When adhering the rest of the pieces, use Stampin’ Dimensionals on all of them. Adhere one of the butterflies at an angle, partially on the card front and partially on the grass, just using Stampin’ Dimensionals on the side of the wings that are on the flap. Adhere the last butterfly towards the bottom of the smaller card front. Adhere stamped greeting.
  • To embellish the card, add a few Elegant Faceted Gems. I also cut out two small vellum butterflies from the Brilliant Wing dies, curled the wings and adhered them to the grass with Mini Glue Dots. Add an Elegant Faceted Gem to each.

This special collection is only available until May 3rd, and I’m sad to say that the Designer Series Paper has proven to be so popular that is has sold out and is no longer available. The Natural Touch Specialty Paper is still available and the stamp set and dies will carry over to the new 2021-2022 Annual Catalog.

Thanks for stopping by today!

Product List
Stamparatus
[146276]
$49.00

Hydrangea Hill-Kylie’s International Blog Highlights

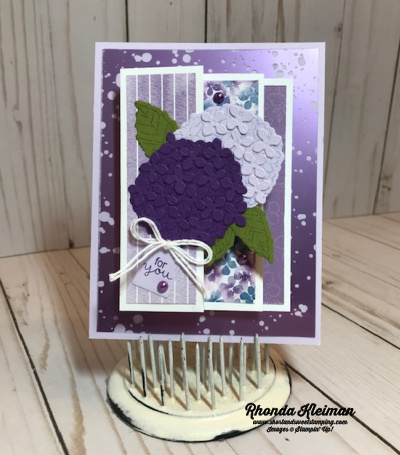
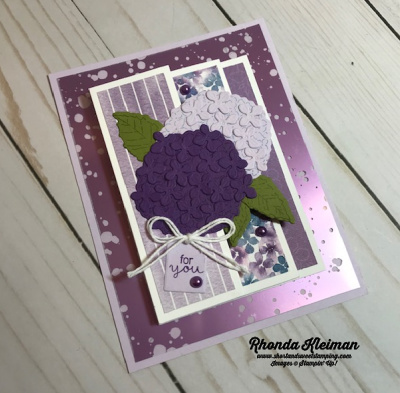
Today I’m participating in Kylie Bertucci’s International Blog Highlights. Readers get to vote on their top five favorites in the gallery and the top 10 winners will get to participate in an International Blog Hop later this month. The theme is “thank you” and is a way for us to show our appreciation to someone that has inspired, helped or supported us in some way. Today’s card is a fun fold that features the beautiful Hydrangea Hill Suite.

Here is how I made the card.

  • Card base – cut a piece of Purple Posy cardstock at 4 1/4″ x 5 1/2″.
  • Cut piece of Highland Heather Mercury Glass Designer Acetate at 4″x 5 1/4″ and adhere with Stampin’ Seal+ to card base.
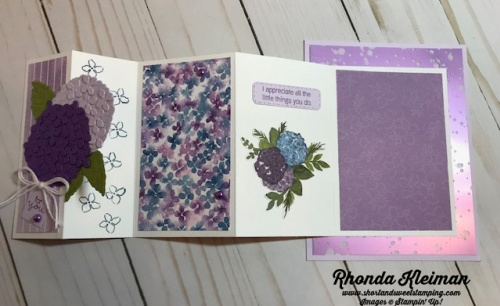
  • Cut piece of Basic White cardstock at 4 1/4″ x 11″, score at 1 1/2″, 3″, 5 1/2″, 8″, fold and crease sharply with a bone folder.
  • Cut three coordinating pieces of Hydrangea Hill Designer Series Paper at 1 1/4″ x 4″, 2 1/4″ x 4″, 2 3/4″ x 4″and adhere to folds.
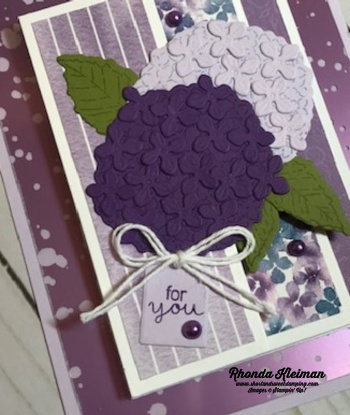
  • Stamp two of the flower tops of the hydrangea. Stamp one with Gorgeous Grape ink on a piece of Gorgeous Grape cardstock and the other with Seaside Spray ink on a piece of Purple Posy cardstock. Stamp the leaf part of the flower with Old Olive ink on piece of Old Olive cardstock. Die cut with the coordinating Hydrangea dies. Trim away the stems. Die cut one set of flower petals with Purple Posy cardstock and two sets with Gorgeous Grape cardstock.
  • Adhere the flower petals on the two flowers. Arrange them around the flowers before adhering and then do one at a time with a tiny dot of liquid glue in the center of each petal so that you have some wiggle room to move them around to adjust how they fit. I found it very helpful to use a tweezer to hold the petals while applying the glue and then flipping to the other side to adhere.
  • Adhere the two flowers together and then adhere the leaves.
  • Stamp “For You” greeting for front of card with Gorgeous Grape ink on scrap piece of Purple Posy cardstock and cut with the tag die.
  • Cut two lengths of white bakers twine and tie in a bow.
  • Adhere the flower to the card front, making sure to only glue the left half of the piece onto the front flap so that the card can open. Adhere the tag under the bottom of the Gorgeous Grape flower. Adhere the bow with a mini glue dot.
  • For the inside of the fun folds, on the first panel, stamp the small open petal randomly with Misty Moonlight ink.
  • Stamp greeting for inside of card with Gorgeous Grape ink on scrap piece of Purple Posy cardstock. Cut with the label die from the Hydrangea Dies set. Adhere to top of the larger panel.
  • Fussy cut one of the floral clusters from the DSP and adhere under the greeting.
  • To finish off the card, add one of the Gorgeous Grape Pastel Pearls to the tag and two more around the card front.

I’d be so appreciative if you would vote for my card! Click on the vote image below. Once you are in the gallery, click on the heart at the top right hand side of the picture as the hearts appear.

Thanks so much for stopping by today!

Product List
Paper Snips
[103579]
$10.00

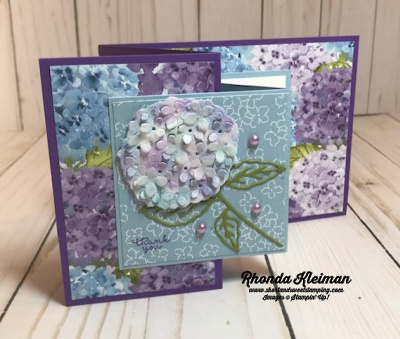
Hydrangea Haven-Kylie’s Training Blog Hop

Hello! Welcome to Kylie Bertucci’s Demonstrator Training Blog Hop for January. I’m part of a group of Stampin’ Up! demonstrators from around the world that participate in Kylie’s program for building our businesses. The theme for this year is thank you, to show appreciation to our customers and team. Please be sure to click on the names in the list at the end of this post to hop around and view the beautiful projects posted by so many talented stampers.

Today’s card features the Hydrangea Hill Suite in the new mini catalog. Purple is one of my favorite colors and it isn’t very often that Stampin’ Up! Designer Series Papers showcase the great purples available in the different color families. I also love flowers so this suite was a winning combination for me and was the first one I purchased as soon as the catalog went live!

I thought that the Double Z Fold would be a nice way to show off the 3D flower. Here is how I made the card.

  • Card base – Cut a piece of Gorgeous Grape cardstock at 4 1/4″ x 11″. Score at 2 3/4″ and 5 1/2″, fold and sharply crease with a bone folder.
  • Designer Series Paper for card base – cut one piece at 4″ x 5 1/4″ and one piece at 2 1/2″ x 4″ and adhere. I used the paper with the smaller all-over hydrangea design.
  • Smaller card base – cut a piece of Seaside Spray cardstock at 3″ x 9″ and score at 3″ and 6″. Fold and crease sharply with a bone folder.
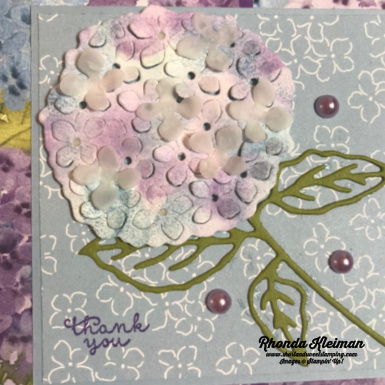
  • Cut piece of the Seaside Spray DSP at 2 7/8″ x 2 7/8″ . Stamp “thank you” from the Hydrangea Haven stamp set with Gorgeous Grape in the bottom left corner.
  • Die cut the leaf and stem piece with Old Olive cardstock using the die from the Hydrangea die set. Cut a piece of an adhesive sheet and adhere to the Old Olive cardstock before running through the die cutting machine. Adhere to Seaside Spray DSP.
  • To make the 3D flower cut a 2 1/2″ square piece of Basic White cardstock. I used three colors of ink: Highland Heather, Misty Moonlight and Seaside Spray and applied them with a blending brush. I started with the Highland Heather, randomly dabbing the color on, making small circles, working from the center and going out to make a large circle. I repeated this step with the Seaside Spray and then filled in with accents of Highland Heather. I did first and second generation inking to produce the shading. I have a set of blender brushes in different sizes that I purchased at a scrapbooking show several years ago and I used one of the smaller brushes since I was working with a small piece. I don’t have our new brushes yet so I’m not sure how well this technique will work with the size of the SU brush. You can also use sponge daubers, which would work nicely for this technique.
  • Once the inking is done run it through your die cutting machine using the solid flower die. To get the raised effect turn the piece to the back and use either the paper piercer end of the Take Your Pick tool or the point of the paper snips to poke the flowers out to the front. To fill the flower out more, cut a strip of Vellum Paper and use the long die with the blossoms to cut them out. Curl them with your fingertip, place a small drop of liquid glue in the center and randomly adhere to the flower. I used five of the blossoms.
  • Adhere piece to the Seaside Spray DSP piece with Stampin’ Dimensionals. Add three of the Highland Heather Pastel Pearls. Adhere the DSP piece to the front of the smaller card base.
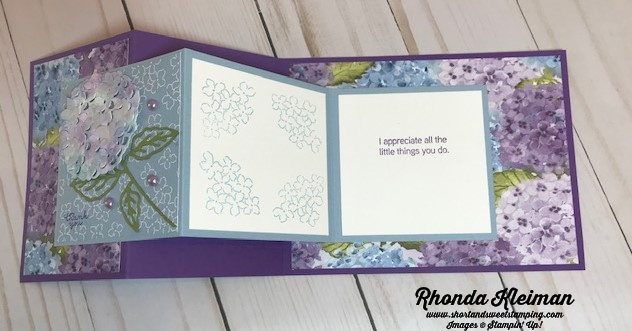
  • For the inside of the smaller card base cut two pieces of Basic White cardstock at 2 3/4″ square. Stamp a greeting with Gorgeous Grape ink on one piece and adhere to inside of the card base. Stamp the smaller petal image with Seaside Spray ink in each of the four corners of the other piece and adhere to the middle section of the card base. Adhere smaller card base to the larger card base. When adhering the front make sure to only apply the adhesive to the left half of the piece in order for the card to open.

Thanks for stopping by today!

Dandy Garden Suite-Kylie’s Training Blog Hop

Hello! Welcome to Kylie Bertucci’s Demonstrator Training Blog Hop for December. I’m part of a group of Stampin’ Up! demonstrators from around the world that participate in Kylie’s program for building our businesses. Please be sure to click on the names in the list at the end of this post to hop around and view the beautiful projects posted by so many talented stampers.

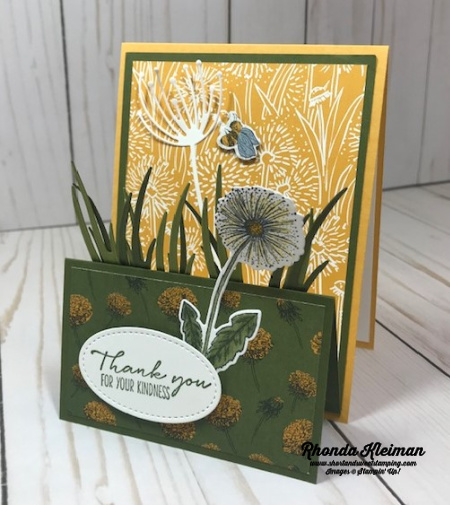
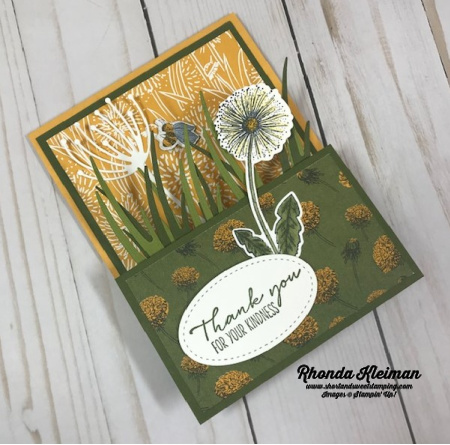
Today’s card is a fun fold and is a sneak peek of the Dandy Garden Mega-Suite from the January-June 2021 Mini Catalog that will be available beginning on January 5th . One of the perks of being a Stampin’ Up! demonstrator is that we have been able to pre-order these products since December 1st. I fell in love with this suite because the beautiful images in the stamp sets and Designer Series Papers remind me of the Arts and Crafts decorative and fine arts movement that began in the United Kingdom in the 1860’s, spread across Europe and the United States and lasted until the 1920’s. I’ve always been drawn to the beauty of this movement.

I had this idea in my head for the last two months and had hoped to contribute this project to Kylie and Bruno’s Dragonfly Wishes Mega Bundle Tutorial, however, time got away from me and I couldn’t meet the deadline. I run a consulting business and received project work in November from two different clients, so whenever that happens, Stampin’ Up! has to take a back seat – when it rains it pours!

Here is how I made the card.

  • Card base – cut a piece of Bumblebee cardstock at 4 1/4″ x 11″, score at 5 1/2″, fold and crease with a bone folder.
  • For the fun fold, cut a piece of Mossy Meadow cardstock at 4″ x 10 1/4″. Score at 5 1/4″ and 7 3/4″, fold and crease sharply with a bone folder.
  • Cut piece of the Bumblebee floral design paper from Dandy Garden Designer Series Paper at 3 3/4″ x 5″ and adhere to the front of the Mossy Meadow piece. Cut two pieces of a contrasting DSP at 2 1/4″ x 3 3’4″. Adhere one to the front of the folded flap and the other on the inside of the flap.
  • Stamp the dandelion image from the Garden Wishes stamp set in Memento Black Ink. Color the leaves and stem with dark and light Mossy Meadow Stampin’ Blends. Color the flower with the dark Daffodil Delight Stampin’ blends. Cut out with the coordinating die from the Dandy Wishes dies.
  • Die cut the white stem piece from a piece of Whisper White cardstock. Die cut five each of the large and small thin leaf blades from Mossy Meadow and Old Olive cardstock. Adhere several large Mossy Meadow blades to the smaller Old Olive blades and several large Old Olive blades to the smaller Mossy Meadow blades for contrast.
  • Die cut one bee from the sheet of DSP with bee images using the coordinating bee die from the set.
  • Stamp the thank you greeting from the Dragonfly Garden stamp set. Cut with the second smallest oval die from the Stitched Shapes dies.
  • Adhere the die cut flower to the front folded flap so that the top of the flower is above the fold. Adhere the greeting to the front flap with Stampin’ Dimensionals, partially overlapping the leaves of the flower.
  • Adhere the white flower stem to the Bumblebee DSP with liquid glue, only applying it to the stem and base of the flower, leaving the floral part free for added dimension. Adhere the bee with two Mini Stampin’ Dimensionals.
  • Adhere the five sets of leaf blades to the back of the folded flap with liquid glue. Let them overlap and staggering the height.
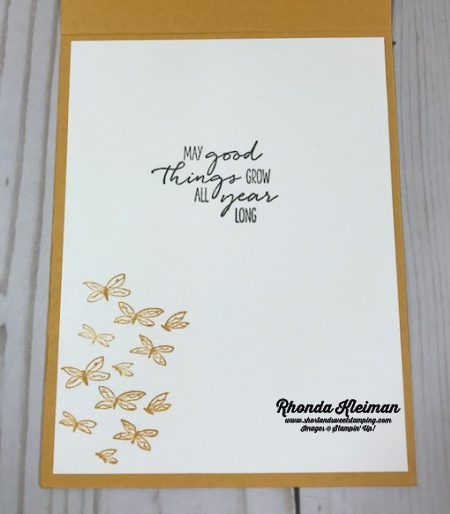
  • For the inside of the card cut a piece of Whisper White cardstock at 4″ x 5 1/4″. Stamp greeting from the Dragonfly Garden stamp set with Mossy Meadow ink. Stamp two sets of the small scattered dragonflies with Bumblebee ink.

Thanks for stopping by today!


Stampin’ Up!’s Year-End Closeout Sale continues through January 4, 2021. You’ll get deep discounts, some as much as 50% off, on your favorite products from the August–December 2020 Mini Catalog, also known as the Holiday Catalog.  If you’ve been waiting to make last-minute purchases from this catalog, now is the time, as availability is only while supplies last.  Please note that all of the bundles in the Holiday Catalog will be retired, however some stamp sets with coordinating dies or punches that are currently sold as bundles at 10% off will be carrying over and will be sold as individual items. 

Click here to view a list of retiring items.

Click here to view a list of products that will be carrying over.

You can purchase any of these items through my online store.