Nature Walk Card

Hello!

It’s been a few months since I’ve posted any cards. I had knee replacement surgery in January and had a sinus infection that lasted for two months so I wasn’t able to make any cards or hold classes until late March, when I was finally feeling better. I’ve been catching up since then and my business is finally back on track I am now holding classes regularly again. I have a backlog of cards to post! Today’s card is from my March class and it features the Nature Walk Suite. This beautiful suite was featured in the January-April 2026 Mini Catalog. This is the first suite I purchased when the catalog was introduced to demonstrators. I loved the beautiful DSP and images and thought it would make great masculine cards. While the suite has retired from the catalog, the Nature’s Symphony stamp set and die bundle has been carried over into the new May-August 2026 Catalog and all of the other products in the suite are available in the online store.

Measurements

  • Secret Sea cardstock for card base – 5 1/2″ x 8 1/2″
  • Lost Lagoon cardstock – mat – 4″ x 5 1/4″
  • Basic Beige cardstock – inside of card – 4″ x 5 1/4″; scrap for greeting
  • Natural Hues Specialty paper – 1 1/2″ x 3 1/2″
  • Nature Walk Designer Series Paper – cut seven 1/2″ strips from different papers. Cut strips into 4 1/2″, 4 3/4″ and 5″ lengths; dark green piece cut at 3 1/2″ x 4 1/2″ for leaves

Here’s how I made the card.

  • Score card base at 4 1/2″ and fold.
  • Lay strips out on the Lost Lagoon mat, placing them at different heights. Once you get a pleasing color arrangement, adhere to mat. Adhere the outside strips on the left and right side of the mat and then space the rest of the strips evenly in between them. Adhere to card front.
  • Run leaf die through die cutting machine with the piece of dark green DSP. Adhere to mat piece.
  • Run piece of Natural Hues Specialty Paper through die cutting machine with the tree bark die.
  • Cut scrap piece of Basic Beige cardstock to 5/8″ x 2″. Stamp greeting with Secret Sea ink.
  • Cut a length of Secret Sea Bordered Open Weave Ribbon and make into a loop that fits across the mat. Adhere the loop with a piece of Tear and Tape or Scotch Tape. Adhere the tree bark piece over the ribbon with Stampin’ Dimensionals. Run a thin bead of liquid glue to the top of the tree bark. Place Mini Dimensionals at the top of the greeting. Adhere the greeting to the tree bark, placing the bottom of the greeting piece over the line of liquid glue.
  • Embellish with several Faux Bronze Pentagons.
  • Stamp greeting of your choice on the piece of 4″ x 5 1/4″ Basic Beige cardstock and adhere to inside of card.

Thanks for stopping by today!

Product List

Floral Impressions Hello Card

Hello!

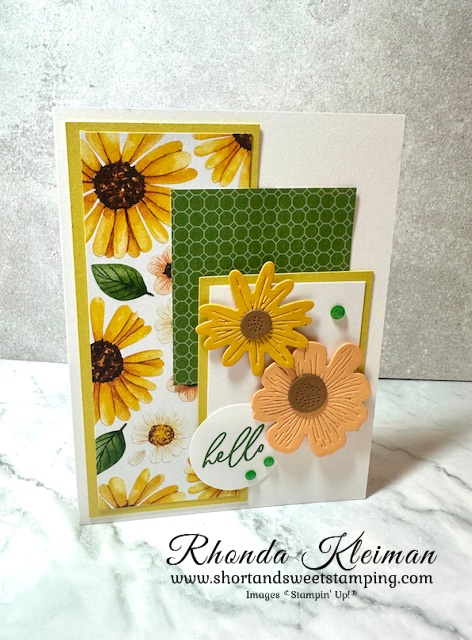
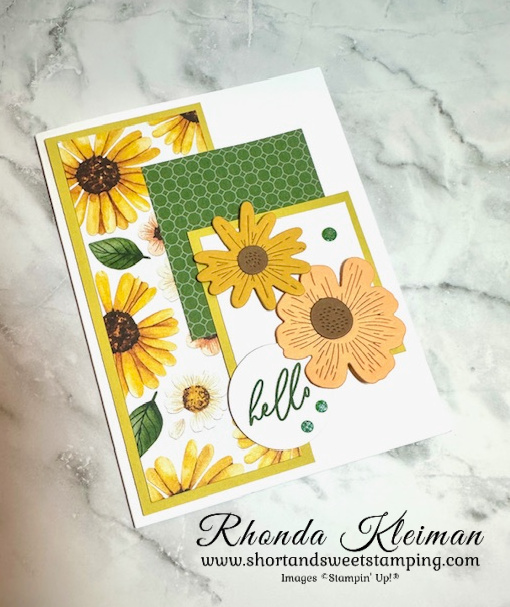
Once again, it’s been awhile since I last posted. I’ve been very busy making cards since late July and am sitting on a backlog for posting them. In addition to my monthly in-person classes, I did two pro bono in-person workshops so was busy designing cards and preparing kits for weeks. One of the pro bono workshops I did was at St. Peter’s Apartments in Columbia, PA. I’ve done workshops there in the past, but it was over two years ago since I did the last one. I was happy to be back to help spread some joy to the residents there! I had twelve people in the session, all with varying stamping experience! I was grateful to have one of my experienced customers come along to help me! Since the skill levels were all over the place, I tried to keep the cards somewhat basic, which is always a challenge. Here is the card we made using the Floral Impressions Suite, an online exclusive that was introduced in July.

Measurements

  • Thick Basic White cardstock – 5 1/2″ x 8 1/2″
  • Basic White cardstock – 2 1/8″ x 2 1/8″; scrap piece for greeting
  • Darling Duckling cardstock – 2 1/4″ x 5 1/4″; 2 3/8″ x 2 3/8″
  • Peach Pie cardstock – scrap piece
  • Crushed Curry cardstock – scrap piece
  • Pecan Pie cardstock – scrap piece
  • Floral Impressions Designer Series Paper – 2″ x 5″; 2 3/8″ x 2 1/2″

Here is how I made the card.

  • Fold Thick White Cardstock base in half and crease sharply with bone folder
  • Adhere the larger piece of DSP to the larger piece of Darling Duckling cardstock. Adhere to left side of card front.
  • Adhere the smaller piece of contrasting DSP to card dhere
  • Adhere Basic White square to Darling Duckling square and adhere to front of card.
  • Run the scrap pieces of Peach Pie and Crushed Curry cardstock through die cutting machine using the largest and medium size flowers from the Impressions Abloom die set. There are two coordinating dies for each of the flowers. One cuts an outline only and the other cuts a solid piece. You want to nest both dies together in order to cut the solid flowers.
  • Run scrap piece of Pecan Pie cardstock through die cutting machine with both sizes of the flower centers. Adhere them to the flowers.
  • Adhere the flowers to the Basic White square with Stampin’ Dimensionals
  • Stamp greeting in Garden Green ink on scrap piece of Basic White cardstock. I used the hello greeting from the Beautiful Butterflies stamp set. Punch out with a circle punch. Adhere under the large flower.
  • Embellish card. I used Earth Tones embellishments, which are now retired. The colors went beautifully with the DSP!
  • Stamp greeting of your choice on the inside of the card.

Thanks for stopping by today!

Free Online Crafting Event 4:00pm-5:00pm EST

Click Here to Register

If you’d like to craft along during the event, the projects will be made using the new Handmade & Heartfelt Kit.  Item number is 166213 and price is $32.00

Product List

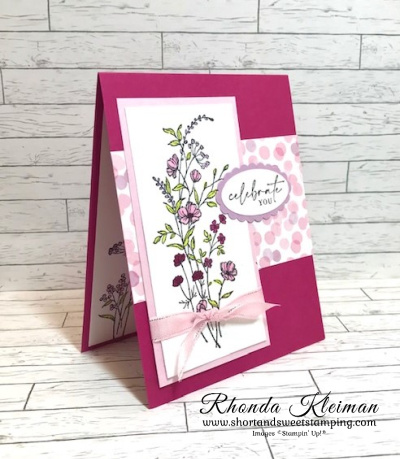
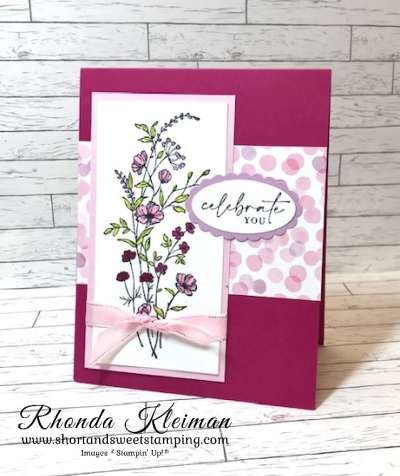
Dainty Delight Celebrate You Card

Hello!

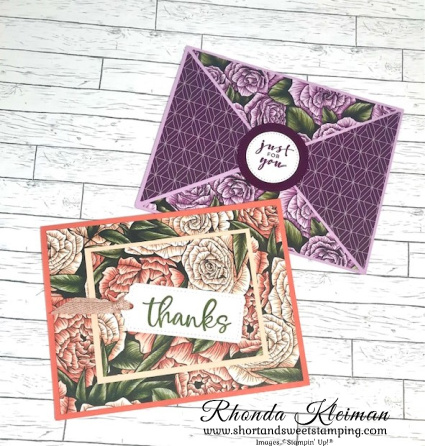
Today’s card is another of the cards we made at a beginner stamping class I held in June and features the lovely Dainty Delight stamp set. This set has coordinating dies, however, I chose to keep things simple and decided not to use them. I also wanted to use some new colors and chose Berry Burst, Bubble Bath and Fresh Freesia as my color combination.

Here is how I made the card.

  • Card base – cut a piece of Berry Burst cardstock at 4 1/4″ x 11″, score at 5 1/2″, fold and crease with a bone folder.
  • Cut a piece of the Bright and Beautiful Designer Series Paper at 2 1/2″ x 4 14″ and adhere to card front as shown.
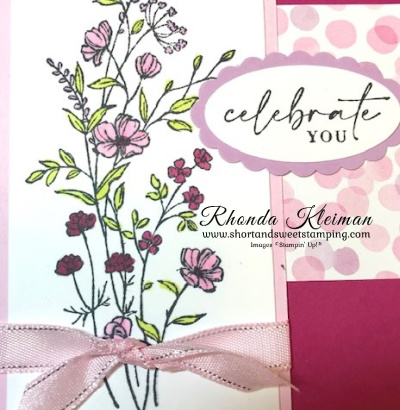
  • Cut a piece of Bubble Bath cardstock at 2 1/2″ x 4 3/4″. Stamp the floral image from the Dainty Delight stamp set with Memento Black Ink on a piece of Basic White cardstock cut at 2 1/4″ x 4 1/2″. Color the large flowers with these Stampin’ Blends: large flowers – Bubble Bath, smaller flowers and large flower centers – Berry Burst, flower buds – Fresh Freesia, leaves – Lemon Lime Twist. Adhere piece to Bubble Bath cardstock.
  • Stamp greeting with Memento Black Ink on scrap piece of Basic White cardstock. Punch out with the Double Oval Punch. Punch the scallop oval with a scrap piece of Fresh Freesia cardstock and adhere two pieces together.
  • Cut a length of the Bubble Bath ribbon from the Ribbon Duo Combo Pack. This is a pretty ribbon and has a nice silver edge. Tie into a knot around the floral piece and trim ends of the ribbon. Adhere to card front.
  • Adhere the greeting so that it overlaps the stamped floral piece and the DSP.
  • Cut another piece of Basic White cardstock at 4″ x 4 1/4″. Stamp one of the smaller floral images with the black ink and color with Stampin’ Blends. Adhere to inside of card.

Give this quick and easy card a try.

Thanks for stopping by today!

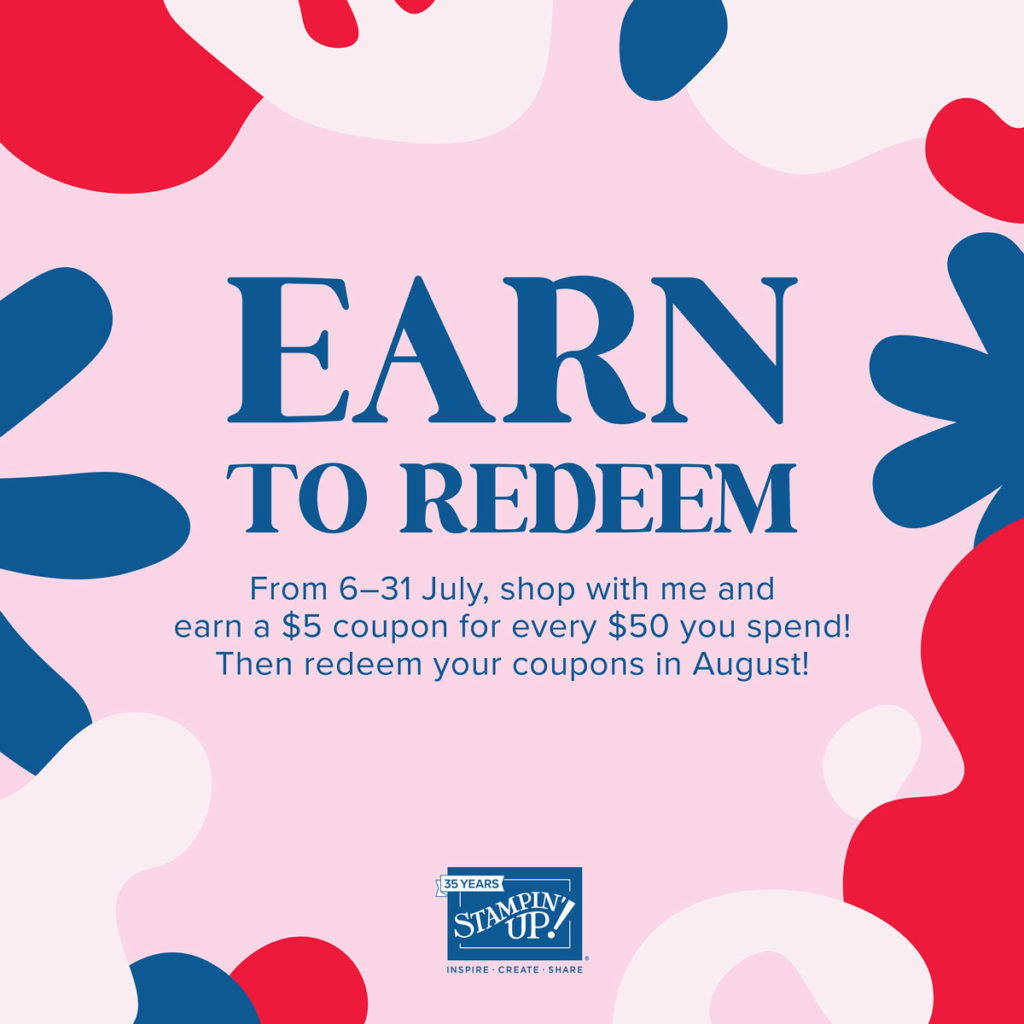
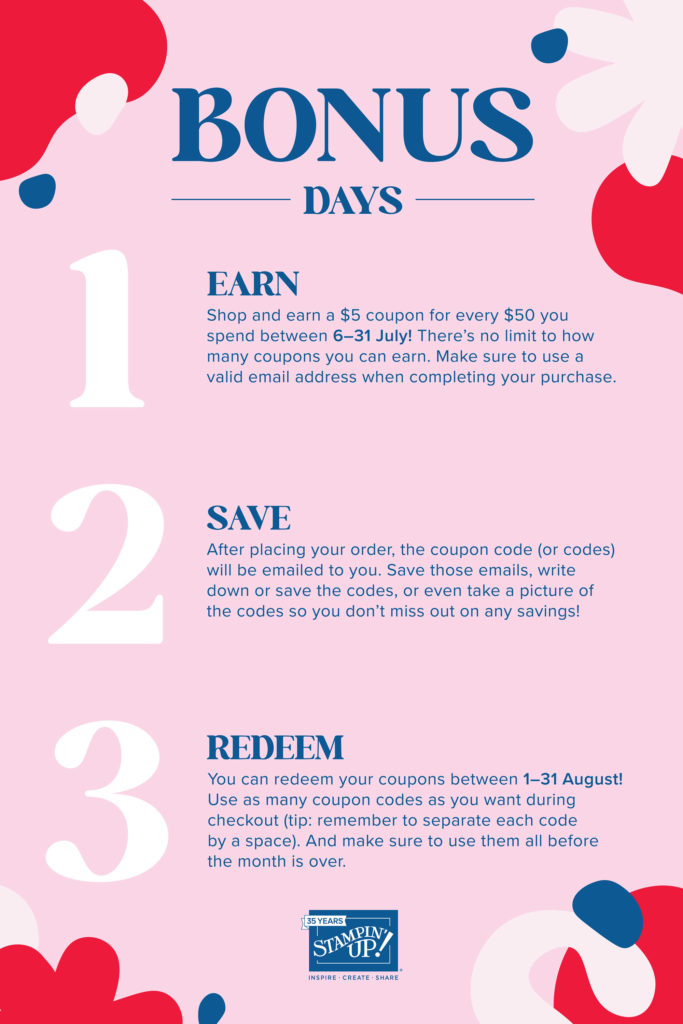
Bonus Days are back! Earn a $5 coupon for every $50 you spend until July 31st. There is no limit on how many coupons you can earn. You will be able to redeem your coupons in August. The instructions above explain how to redeem them. Make sure that your email address is correct because coupon codes will be sent to you via email.

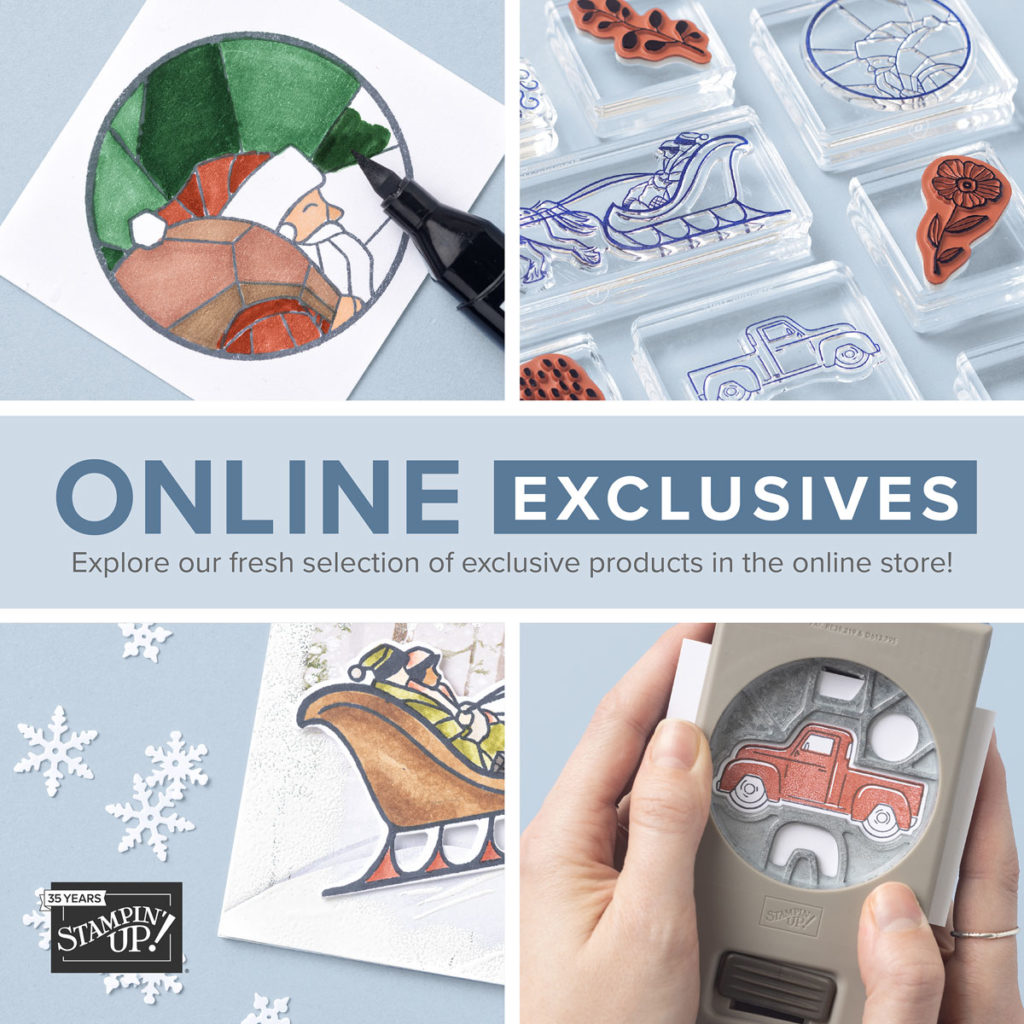
A brand new collection of Online Exclusive products has now been released. These products are only available online – they do not appear in any of our print catalogs. And there’s no end date for the sales period! Some products will be reordered when inventory is low, and others will only be available while supplies last. This way we can offer even more new products throughout the year. Click here to visit my online store to view the new products and to place your orders. Please note that past Online Exclusives and kits that are still available for sale are included.

Place an online order between $50 and $149 and use this host code for July. You will receive a free gift from me the following month.  If your order is $150 or more DO NOT use the host code. You will qualify for Stampin’ Rewards.

Product List
Paper Snips
[103579]
$11.00

Favored Flowers Cards

Hello!

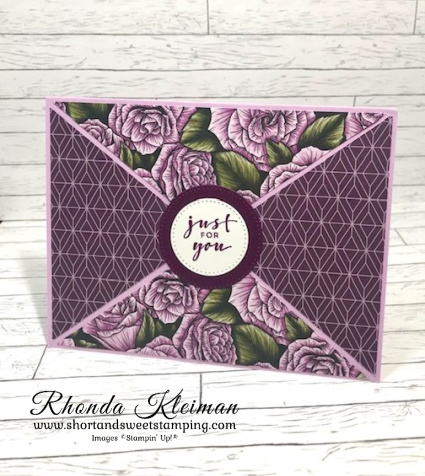
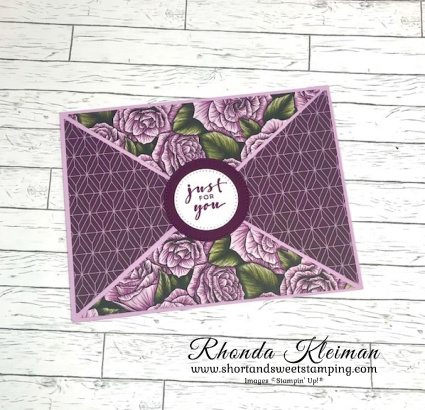
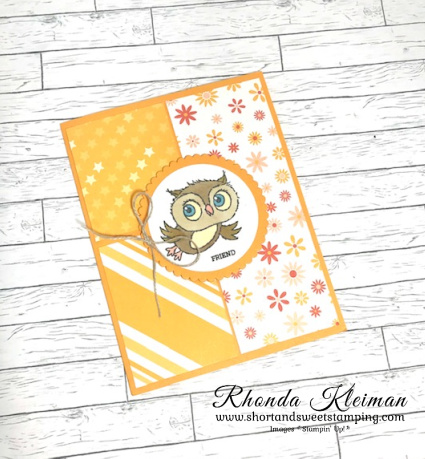
Today’s cards feature the Favored Flowers 12″ x 12″ Designer Series Paper that you can earn as a free Sale-A-Bration gift with a $50 purchase. There are only two days left for this year’s Sale-A-Bration so now is your last chance to get this beautiful paper! These cards are easy peasy to put together and require very little stamping – just a greeting! I wanted to show off the paper to its full effect.

Here is how I made the first card.

  • Card base – cut a piece of Fresh Freesia cardstock at 5 1/2″ x 8 1/2″, score at 4 1/4″, fold and crease with a bone folder.
  • Cut a piece of Favored Flowers DSP at 4″ x 5 1/4″. Use your paper trimmer to place the DSP on the diagonal, lining up opposite points with the cutting track and cut. Hold paper and carefully turn so that the two remaining opposite corners are lined up with the cutting track and cut. You can choose to use one sheet of DSP and use the front and back for the card or you can cut two different pieces of DSP and mix and match the designs.
  • Adhere the pieces with the long ends at the top and bottom of the card. Adhere the pieces with the shorter ends on the sides of the card. There will be a space in the center of the card and that’s okay because the greeting will cover it. I used liquid adhesive to give me a bit more wiggle room when adhering the pieces.
  • Stamp a greeting of your choice with Blackberry Bliss ink on a scrap piece of Basic White cardstock. I chose a greeting from the Charming Sentiments stamp set. Run through die cutting machine with a circle die from the Stylish Shapes die set. Run a scrap piece of Blackberry Bliss through die cutting machine with a larger circle from the Stylish Shapes die set. Adhere to greeting and adhere the piece to the center of the card.
  • For the inside of the card cut a piece of Basic White cardstock at 4″ x 5 1/4″. Cut a strip of the DSP at 1/2″ x 5 1/4″ and adhere to bottom of the cardstock. Adhere to inside of card.

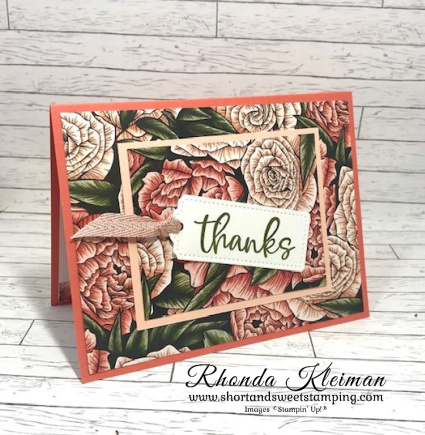
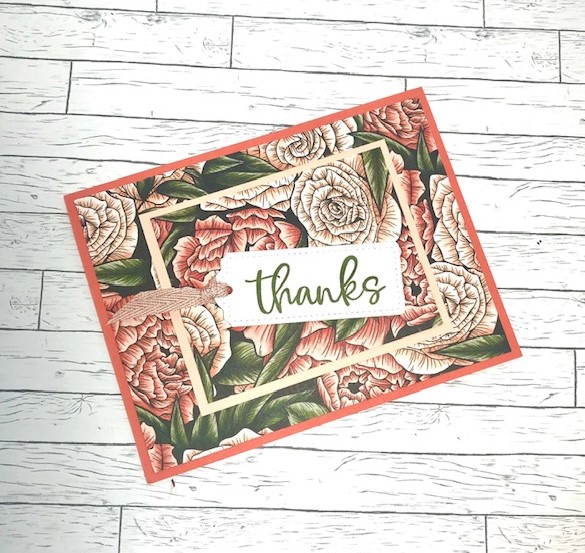
I made the second card as my customer thank you’s for January. Here is how I made it.

  • Card base – cut a piece of Calypso Coral cardstock at 5 1/2″ x 8 1/2″, score at 4 1/4″, fold and crease with a bone folder.
  • Cut two pieces of the DSP, one at 4″ x 5 1/4″ and one at 2 3/4″ x 2 1/2″. Adhere the larger piece to the card base. Cut a piece of Petal Pink cardstock at 3″ x 3 3/4″ and adhere it to the smaller piece of DSP. Adhere piece to card front.
  • Run a scrap piece of Basic White cardstock through die cutting machine with the second smallest rounded edge die from the Tailor Made Tags dies. Stamp greeting with Mossy Meadow ink. I chose the greeting from the Biggest Wish stamp set.
  • Cut a piece of a 1/4″ or 1/8″ of ribbon at 8″. Slide through the hole at the top of the tag and make a slip knot. Cut ends of ribbon at an angle. I used Petal Pink ribbon that is retired, as it worked perfectly on the card!
  • For the inside of the card, I did the same thing as for the first card.

Thanks for stopping by today!

This is your last chance to take advantage of three limited time options to join Stampin’ Up!

Option 1 – The exclusive Boho Blue Mini Stampin’ Cut & Emboss Machine ($63 value) plus your choice of $175 of products for only $129.
Option 2 – The original white Mini Stampin’ Cut & Emboss Machine ($63 value) for only $129.
Option 3 – Your choice of $175 of products for only $99.

The starter kit ships for free and you will enjoy a 20%-25% discount on all future orders. Become a happy discount shopper or build a business – the choice is yours! The first quarter that you join you can take advantage of all the benefits. At the next full quarter you are required to have $300 in sales, which can be personal sales or from orders you get from others. If you do not meet the minimum, you are free to drop at no penalty! I’d love to have you join my team! Feel free to contact me at rhondastamps@verizon.net for further information. Click here to join.

Place an online order between $50 and $149 and use this host code for February. You will receive a free gift from me the following month.  If your order is $150 or more DO NOT use the host code. You will qualify for Stampin’ Rewards.

Product List
Paper Snips
[103579]
$11.00

Adorable Owls Cards

Hello!

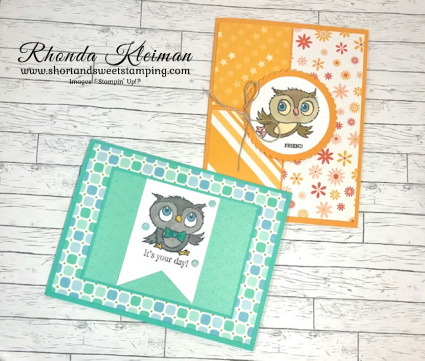
I’ve been so busy with making cards and holding card making classes this month that I haven’t had a chance to post any of the cards I made until now! There are only eight days left to this year’s Sale-A-Bration promotion. I’ve had so much fun creating cards with the SAB products I earned and this week my blog posts will feature the cards I made. Today’s cards feature the Adorable Owls stamp set and yes, it is quite adorable! I paired the cards with the Dandy Designs Designer Series Paper, which is an item you can get for free with a $100 purchase. This fabulous package has 48 sheets of 12″ x 12″ DSP with bright and cheerful colors: Balmy Blue, Calypso Coral, Coastal Cabana, Fresh Freesia, Granny Apple Green, Mango Melody and Petal Pink. These two cards are done with a few of my “go to” easy layouts and are a nice way to showcase DSP.

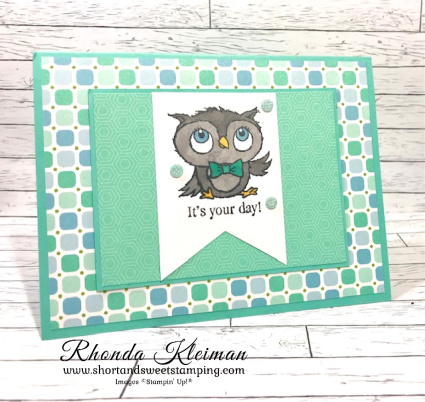
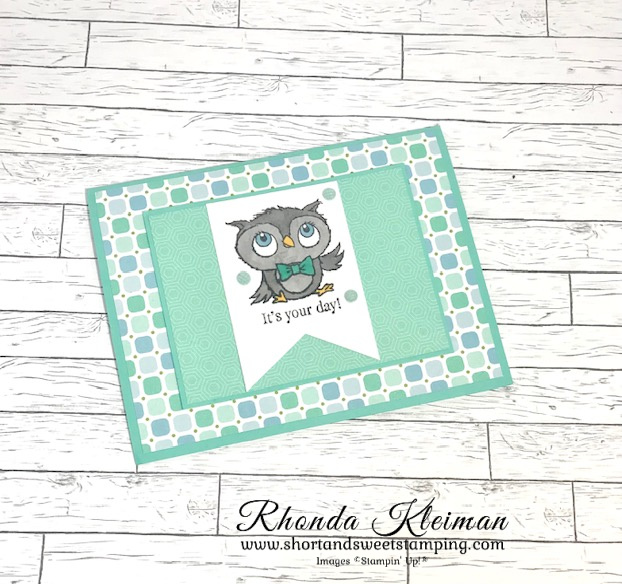
Here is how I made the first card.

  • Card base – cut a piece of Coastal Cabana cardstock at 5 1/2″ x 8 1/2″, score at 4 1/4″, fold and crease with a bone folder.
  • Cut a piece of DSP at 4″ x 5 1/4″ and adhere to card front.
  • Cut another piece of Coastal Cabana cardstock at 3″ x 4″. Cut a coordinating piece of DSP at 2 7/8″ x 3 7/8″ and adhere to cardstock. Adhere piece to card front.
  • Cut a piece of Basic White cardstock at 2″ x 3″. Stamp owl with bow tie image at the top of the strip with Memento Black Ink. Color with Stampin’ Blends: owl-Dark & Light Smoky Slate, eyes-Dark Balmy Blue, beak and feet-Dark Daffodil Delight, bow tie-Dark Bermuda Bay. Stamp greeting with Memento Black Ink.
  • Flag one end of the strip. Adhere to center panel.
  • Add some bling. I used a few of the Fine Sparkle Adhesive-Backed Gems from the July-December 2022 Mini Catalog, which are now retired.

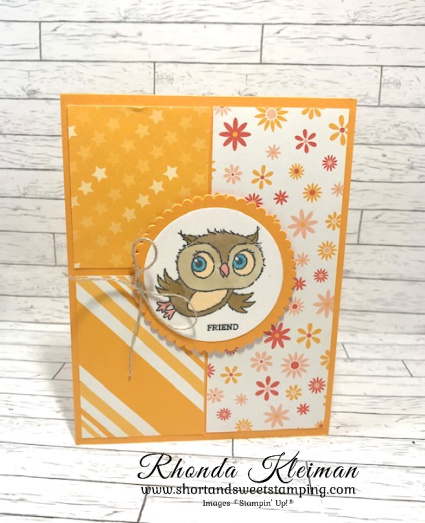
Here’s how I made the second card.

  • Card base – Cut a piece of Mango Melody cardstock at 5 1/2″ x 8 1/2″, score at 4 1/4″, fold and crease with a bone folder.
  • Select three different coordinating pieces of Mango Melody DSP. Cut one piece at 2″ x 5 1/4″, one piece at 2″ x 2 3/4″ and one piece at 2″ x 2 3/8″. Adhere to card front.
  • Cut piece of Basic White cardstock at 2 1/2″ and stamp owl image with Memento Black ink. Color the image with these Stampin’ Blends: owl-Dark and Light Crumb Cake, belly-Light Pale Papaya, eyes-Light Pale Papaya and Dark Balmy Blue, beak and feet-Light Calypso Coral. Run through die cutting machine with a Layering Circle Die. Stamp greeting. I needed a very small greeting to fit the space so I went through all of my current stamp sets and found the perfect greetings in the Potted Geraniums stamp set.
  • Run a 3″ square piece of Mango Melody cardstock through die cutting machine with a scalloped edge Layering Circle Die. Adhere to stamped image. Adhere piece to card front with Stampin’ Dimensionals. Tie a bow with a piece of linen thread and adhere to circle with a mini glue dot.

    Thanks for stopping by today!

    There is just one week left for this year’s Sale-A-Bration. You can select free items from the SAB brochure or any of the items in this flyer. Nine items are available at the $50 level and one at the $100 level. Please be sure that if you select one of these items, that you use the item numbers listed on this flyer, as they are different from the numbers in the catalogs for these products. All products are available while supplies last.

    Place an online order between $50 and $149 and use this host code for February. You will receive a free gift from me the following month.  If your order is $150 or more DO NOT use the host code. You will qualify for Stampin’ Rewards.

    Product List

    Rainbow of Happiness Double Dutch Door Fold

    Hello! I haven’t been posting much lately. Sadly, my father, who turned 100 years old in January, unexpectedly passed away three weeks ago so I’ve had to put my projects on the back burner. My father was a kind and wonderful man, and everyone that knew him described him as a gentleman. He was an educator, teaching industrial arts for many years. His carpentry work was beautiful and he spent hours making exquisite model ships with thousands of pieces of wood and thread. He wasn’t only my father – he was also my mentor and friend and I will miss him more than I can say. I’d like to think that my artistic sensibilities and creativity came from him. So, for now, while I am back making cards and have started my in-person classes up again, I will probably be posting sporadically for the next month or two as I tend to my consulting business and taking care of my father’s business as well.

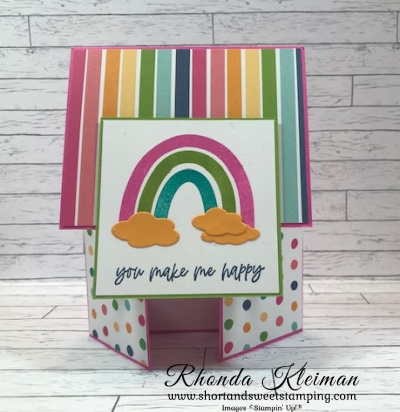
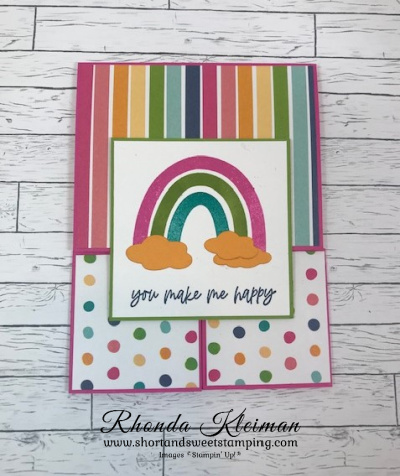
    Today’s card is one of four projects we made at my stamping club yesterday and it features the Rainbows of Happiness Bundle and the coordinating Sunshine & Rainbows Designer Series Paper that you can get for free with a $50 purchase during Sale-A-Bration. The Sale-A-Bration promotion ends tomorrow, February 28th, so you have just two days left to get this DSP! I’ve been wanting to make a card using the Double Dutch Door fold for quite some time and thought these products would lend themselves perfectly to this fun fold. It is a super easy fold and a great way to show off Designer Series Papers you have in your stash.

    Here is how I made the card.

    • Card base – Cut one piece of Magenta Madness cardstock at 8 3/4″ x 4 1/2″, score at 5 1/2″, fold and crease with a bone folder. Cut another piece of Magenta Madness cardstock at 8 1/2″ x 2 1/4″ and score at 2 1/8″ from each end. Fold and crease sharply with a bone folder.
    • For the top flap, cut piece of striped paper from the Sunshine and Rainbows Designer series paper at 4″ x 3 1/8″. The stripes are directional so keep it in mind when cutting so that they are vertical and not horizontal. Adhere to flap.
    • Cut two pieces of the polka dot DSP at 2″ x 2 1/8″ and adhere to each of the side flaps.
    • Adhere the front panel to the side panel.
    • Cut a piece of Basic White cardstock at 2 7/8″ square. Stamp three rainbow arcs with Magenta Madness, Granny Apple Green and Bermuda Bay ink. I started by using the next to largest stamp for the Magenta Madness arc. When stamping, leave enough room to stamp the greeting at the bottom of the piece. Stamp the greeting with Misty Moonlight ink. Cut three clouds from a scrap piece of Mango Melody cardstock with the dies from the Brilliant Rainbow Dies. Adhere to both sides at the bottom of the rainbow image.
    • Cut a piece of Granny Apple Green cardstock at 3″ square. Adhere it to the stamped image. Adhere piece to the top flap with Stampin’ Dimensionals.
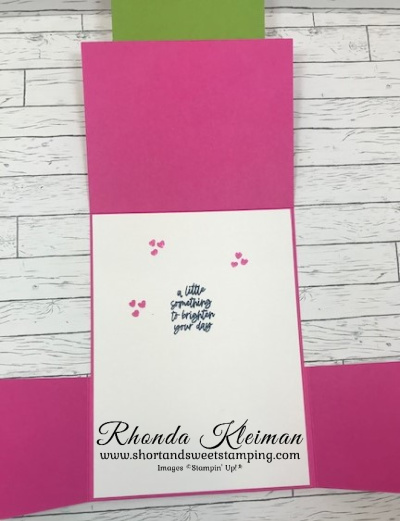
    • Cut a piece of Basic White cardstock at 4″ x 5 1/4″. Stamp greeting with Misty Moonlight ink. Stamp small hearts with Magenta Madness ink. Adhere to inside of card.

    I was cheered up as I was making this card. I love the fun images and bright colors!

    Thanks for stopping by today!

    There are only two days remaining for Sale-A-Bration! View the Sale-A-Bration brochure by clicking on the image on the right side-bar. This is a great time to join Stampin’ Up!  Select $125 worth of products for only $99 and you will also get two FREE stamp sets (excluding host sets and SAB sets) of your choice! The kit ships for free. As a demonstrator you will enjoy a 20% discount on all future orders. Become a happy discount shopper or build a business – the choice is yours. I’d love to have you join my team! Click here to learn more about the benefits of joining Stampin’ Up! 

    The Beyond the Horizon Paper Pumpkin Kit includes watercolor prints and designs inspired by the beautiful nature around us to create nine cards and coordinating envelopes. And paper pieces that perfectly coordinate with the New Horizons Suite Collection in the January–June 2022 Mini Catalog. And if you thought one stamp set was great just wait—this month’s kit comes with a BONUS stamp set for FREE! That’s two stamp sets in one kit! It’s our way of saying THANK YOU to you our Paper Pumpkin subscribers. Create 3 each of 3 different designs. Coordinating colors: Bumblebee, Calypso Coral, Evening Evergreen, Misty Moonlight, Night of Navy, Old Olive, Pale Papaya. For further information and to subscribe, click here to visit my Paper Pumpkin website.

    Place an online order between $50 and $149 and use this host code for February. You will receive a free gift from me the following month.  If your order is $150 or more DO NOT use the host code. You will qualify for Stampin’ Rewards.

    Product List

    Lovely You Meets Paper Blooms

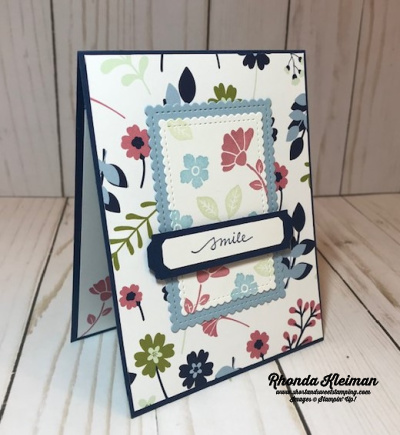
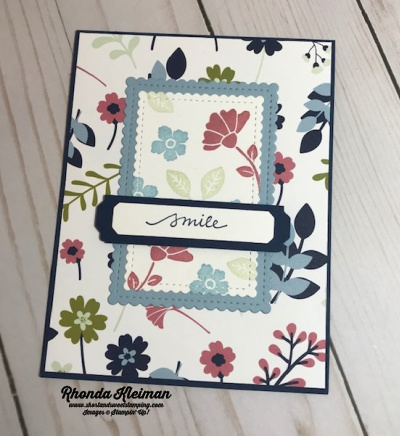
    Hello! Today’s card features the pretty Paper Blooms Designer Series Paper, one of the Stampin’ Up! free Sale-A-Bration items you can earn with a $50 purchase. When I first saw this paper, I immediately thought that it would work beautifully with the Lovely You stamp set, so I’ve paired up these two products.

    The card layout is from Sunday Stamps Challenge. I haven’t participated in a challenge for a long time and when I came across this sketch I thought it would be a fun one to do so decided to give it a go! Here is the sketch for SSC248.

    Here is how I made the card.

    • Card base – Night of Navy cardstock cut at 4 1/4″ x 11″. Score at 5 1/2″, fold and crease with a bone folder.
    • Cut piece of Paper Blooms DSP at 4 1/8″ x 5 3/8″ and adhere to card front.
    • Cut piece of Seaside Spray cardstock at 2 3/4″ x 3 3/4″ and run through die cutting machine with the second largest rectangle from the Stitched so Sweetly dies.
    • Cut piece of Basic White cardstock at 2 1/2″ x 3 1/2″ and run through die cutting machine with third largest rectangle from the Stitched so Sweetly dies. Randomly stamp flowers and leaves from Lovely You stamp set with Rococo Rose, Seaside Spray and Soft Sea Foam inks. Adhere to Seaside Spray rectangle. Adhere piece to center of card front.
    • Cut scrap piece of Basic White cardstock at 1/2″ x 2 3/4″, stamp greeting with Night of Navy ink and punch both ends with the Lovely Labels Pick a Punch. Cut scrap piece of Night of Navy cardstock at 3/4″ x 3 1/4″ and punch both ends. Adhere labels together. Adhere to stamped piece with Stampin’ Dimensionals.
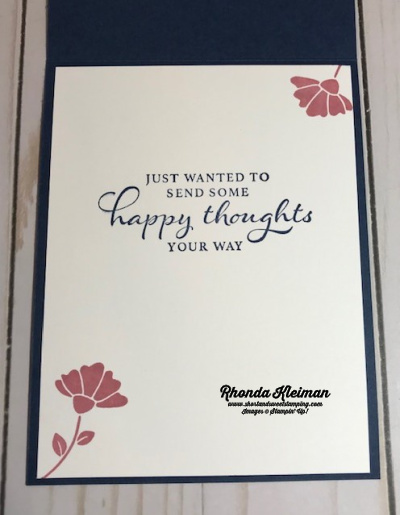
    • Cut piece of Basic White cardstock at 4″ x 5 1//4″. Stamp flower with Rococo Rose ink. Stamp greeting from Happy Thoughts stamp set with Night of Navy ink. Adhere to inside of card.

    Thanks for stopping by today!

    Product List