
Hello! Today I’m featuring the August 2021 Paper Pumpkin Hope Box kit that was designed by Shelli Gardner, co-founder of Stampin’ Up! I purchase a few kits every year, and I must confess that I seldom get around to making most of them so I have quite a few boxes piled up! However, I loved this kit as soon as I opened the box so I intentionally set a few hours aside this weekend to make the projects, along with a few alternative projects. The items in the kit are pretty and include some of my favorite colors. Normally, the subscription period for Paper Pumpkin ends on the 10th of every month and then some of the kits are no longer available. This month is an exception. Due to a glitch in the ordering system, customers were unable to subscribe to Paper Pumpkin’s Shelli Hope Box between 31 July–5 August, so Stampin’ Up! is offering the Shelli Hope Box to all North American customers, regardless of subscription from 24 August–31 August! The kit can be purchased through the Paper Pumpkin Refills and Past Kits section of my online store until 11:59 PM (MT) 31 August. Click here to order the kit. Hope Box refills will continue to be available to subscribers only. After this limited offering, the full kit will only be available on the regular past kit schedule for subscribers only.

The kit is loaded with a stamp set, ink spot, cards, envelopes, embellishments, adhesives and a color brochure with photographs and instructions for how to put the projects together. You can make the projects as shown or create your own alternate designs.

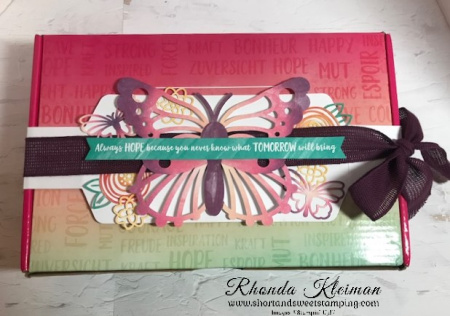
The kit also contains everything you need to make a beautiful belly band for the box – so pretty!
These are the three cards I made following the instructions given.

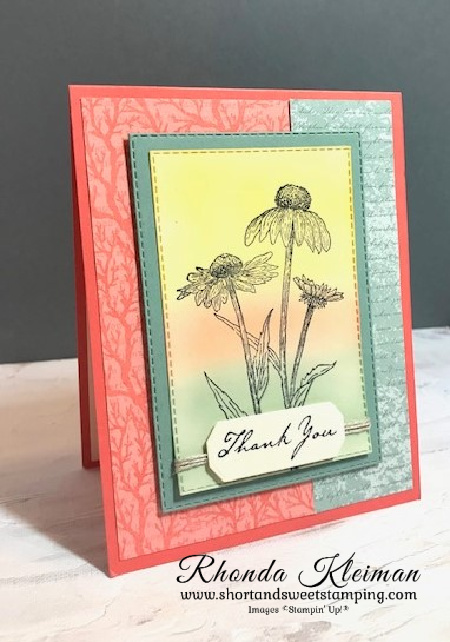
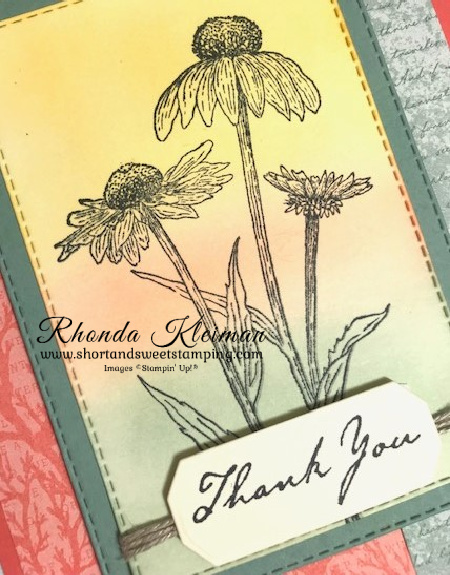
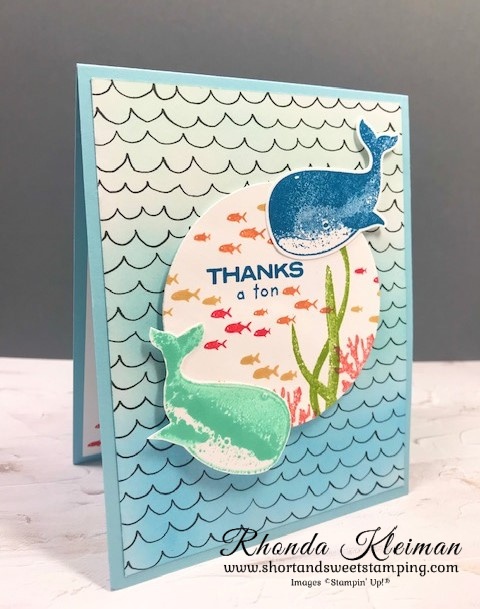
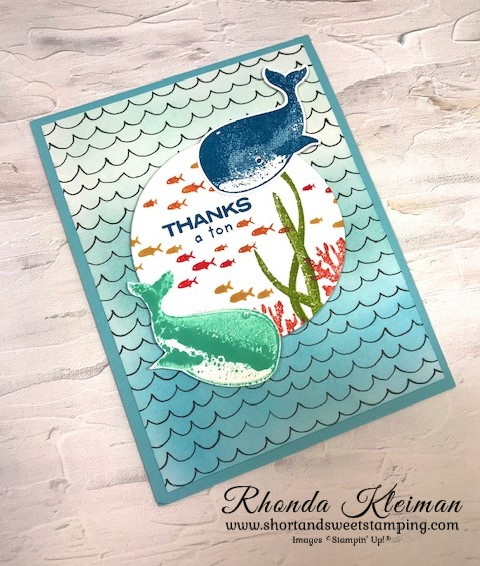
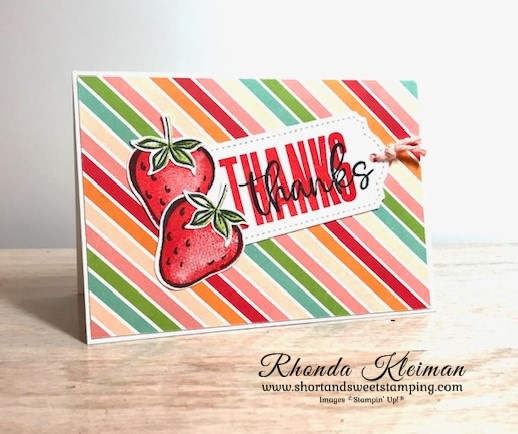
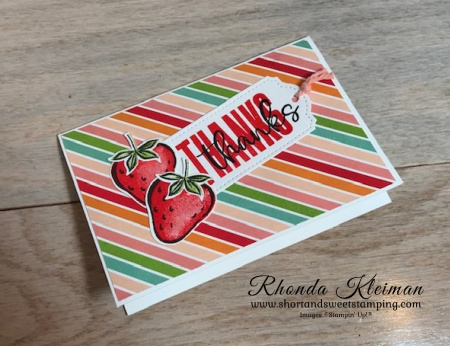
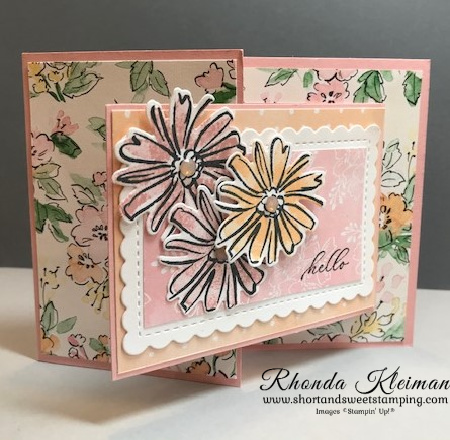
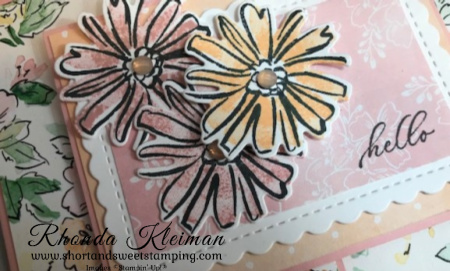
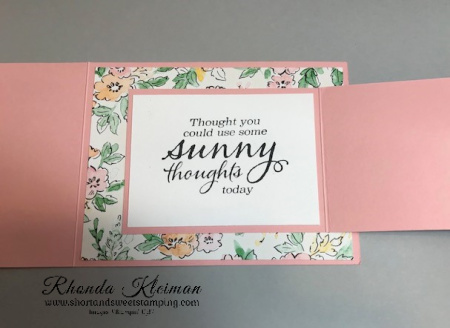
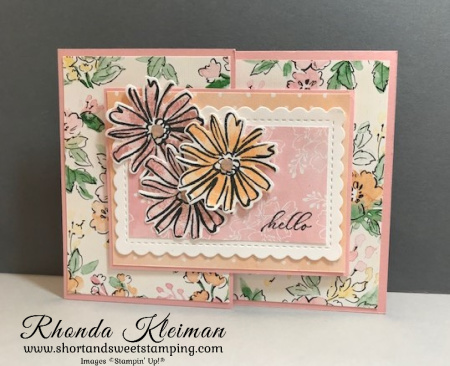
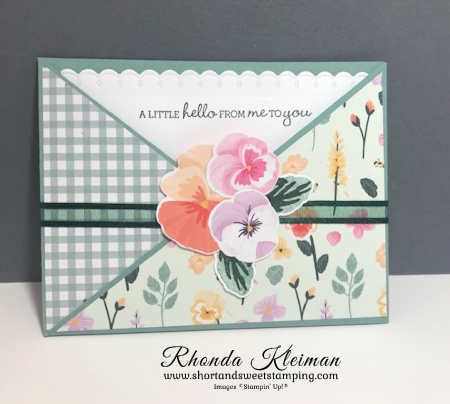
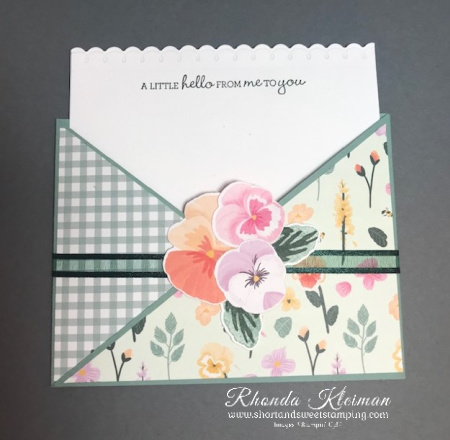
These are three alternative cards I made with the supplies in the kit.

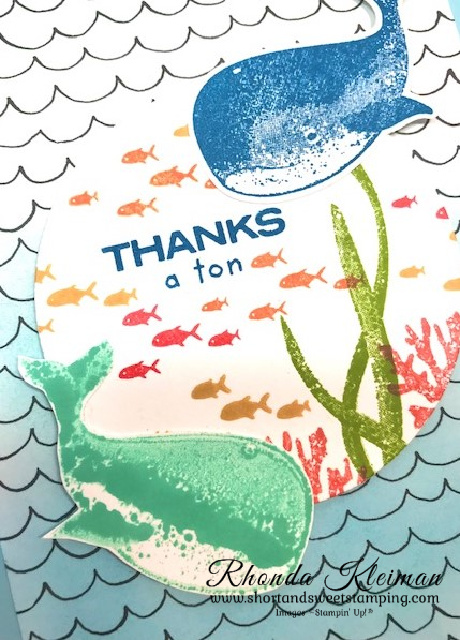
Here are separate pictures for each of the alternative cards. I chose some stamp sets with different greetings in my collection so that I could use the cards for other occasions. The DSP on the card with the hello friend tag is actually one of the envelopes that I cut up to use as a background.


Monthly pay as you go subscriptions are available for $22.00 per month including shipping by going to my Paper Pumpkin website. Prepaid three, six and twelve month subscriptions are also available by going to my online store.
Thanks for stopping by today!


Experience everything the autumn season has to offer with the Haunts & Harvest Paper Pumpkin Kit! This month’s kit includes enough supplies to create 12 treat boxes—4 each of 3 designs. That means you can take your pick of apple, pumpkins, or jack-o-lantern treat boxes! Plus, the Paper Pumpkin box is designed to easily transform into a vintage wheelbarrow for you to display your harvest! The kit contains enough supplies to create 12 treat packages—4 each of 3 designs. The all-inclusive kit includes printed die-cut boxes, die-cut sheets, adhesive, and more! Finished treat box size: 2-1/2″ x 2″ (6.4 x 5.1 cm). Coordinating colors are Basic Black, Pale Papaya, Poppy Parade, Pumpkin Pie, Soft Succulent. Subscribe now through September10th. The kit will arrive in your mailbox around the 20th of the month.

Place an online order between $50 and $149 and use this host code for August. You will receive a free gift from me the following month. If your order is $150 or more DO NOT use the host code. You will qualify for Stampin’ Rewards.


")
")


 Designer Series Paper")


")


 Designer Series Paper")


")


 Host Designer Series Paper")


")

")
")


 Designer Series Paper")


")
")


 Designer Series Paper")

 Open Weave Ribbon")


