
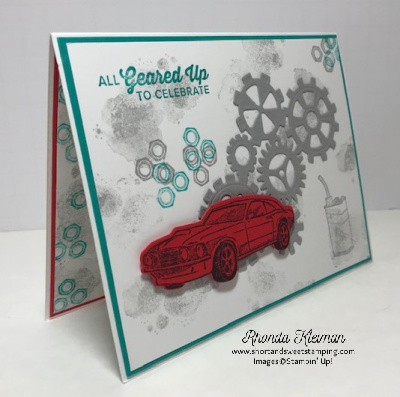
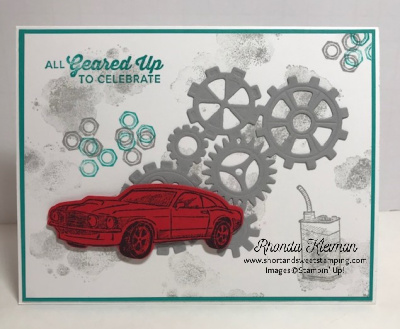
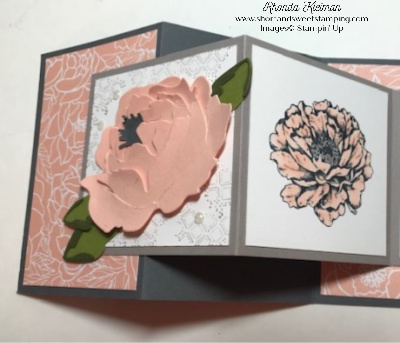
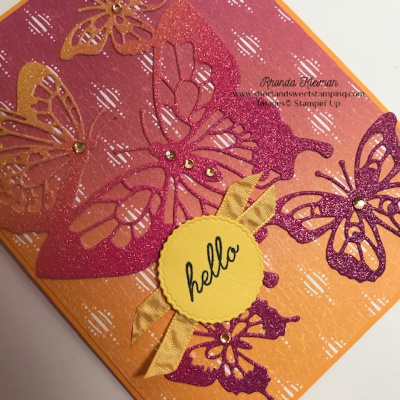
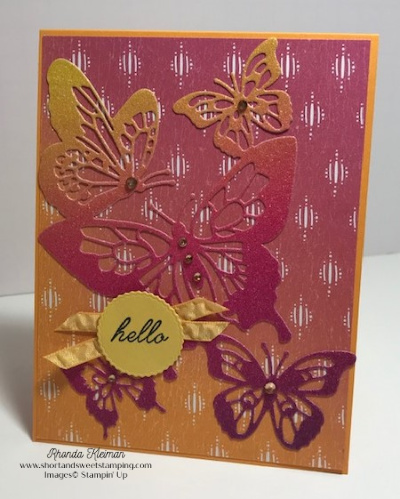
Hello! Today I’m sharing a Z-fold card I made with products from the In Good Taste suite. I decided to challenge myself to use one of the papers from In Good Taste Designer Series Paper and to work in neutrals, something that is hard for me to do, as I lean more towards the brights and jewel tones. I had an idea in mind so it was a matter of auditioning several papers from the set until I found one that worked for me. I think it came out better than I thought it would!

Here is how I made the card.
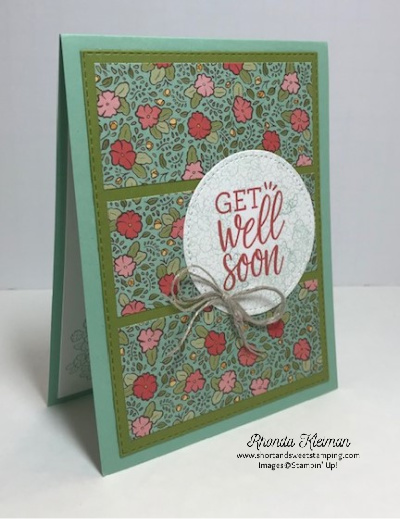
- Card base – cut a piece of Thick Very Vanilla cardstock at 4 1/4″ x 11″, score at 5 1/2″ and fold in half.
- Cut a piece of Cinnamon Cider cardstock at 4″ x 10 1/4″ and score at 2 1/2″ and 5″. Fold on score lines, making sure to give them a good crease with a bone folder.
- Cut one piece of the DSP at 3 3/4″ x 5″ and another at 2 1/4″ x 3 3/4″ . Adhere the 3 3/4″ x 5″ piece to the front of the Cinnamon Cider piece. The smaller piece will be adhered later.
- Adhere the Cinnamon Cider piece to the Very Vanilla card front.
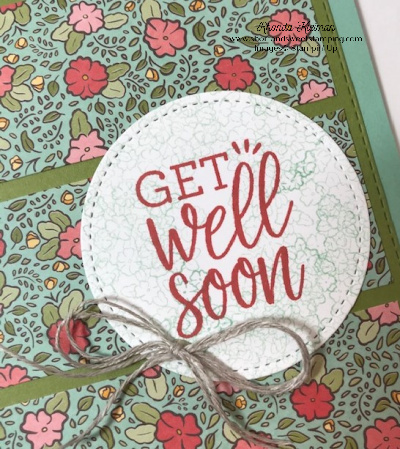
- Stamp greeting from the Tasteful Touches stamp set with Cherry Cobbler ink on scrap piece of Very Vanilla cardstock. Cut using the largest die in the Tasteful Labels set. Stamp feather image over the greeting with Cinnamon Cider ink, stamping off on a scrap of paper before stamping onto the greeting.
- Cut another label from a scrap piece of Cherry Cobbler cardstock. Cut label in half horizontally and layer the two pieces onto the stamped greeting, adhering with liquid glue.

- Adhere the 2 1/4″ x 3 3/4″ piece of DSP to the front of the smaller Cinnamon Cider fold.
- To build the spray of gold leaves I used the Forever Gold Laser-Cut Specialty Paper , selecting a grouping of the die cuts that would give good coverage for the front of the card. I arranged them at the top of the fold and once I liked how they looked I used tape to adhere them in place, only taping the bottom of the stems so that when the card is opened, they don’t stick to the front of the card. I also added one leaf to the bottom of the small fold. With all of the leaves now in place, adhere the label, making sure not to put glue at the top of the label, otherwise it will stick to the card front.
- Add one the largest of the three sizes of the Gilded Gems to label for an added accent.

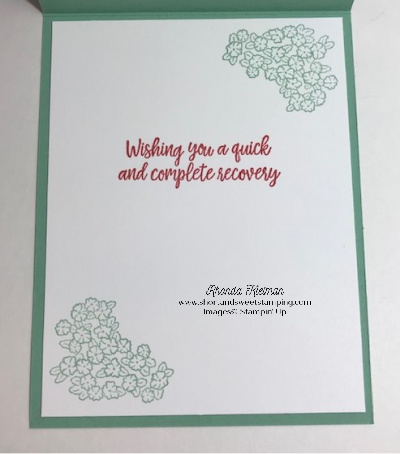
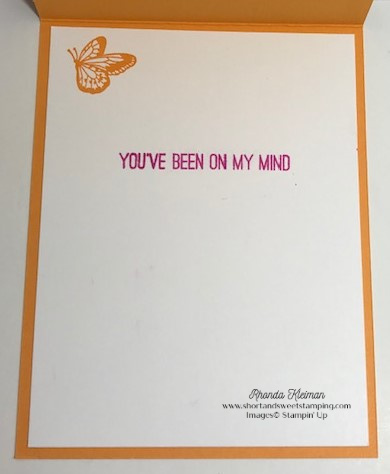
- Cut a piece of Very Vanilla cardstock at 4″ x 5 1/4″. Stamp greeting with Cherry Cobbler ink. Stamp feather image with Cinnamon Cider ink at bottom left. Adhere to the inside of the card.

Thanks for stopping by today!

Product List
") | |
 | |
 | |
 |  |
 |  |
")


")
")


")
")


")


 Ruched Ribbon")

