

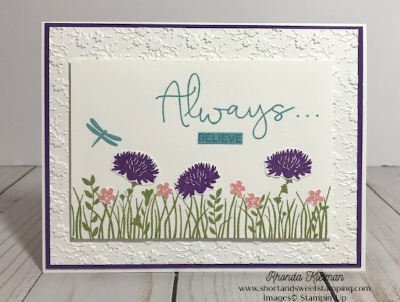
Hello! Today I’m sharing another card I recently made with the Field of Flowers stamp set. I combined it with the Ornate Floral embossing folder that is part of the Ornate Gardens Suite and love how it compliments the stamped images.

Here is how I made the card:
- Card base – cut a piece of Whisper White Thick cardstock at 5 1/2″ x 8 1/2″, score at 4 1/4″ and fold in half.
- Cut piece of Gorgeous Grape cardstock at 4 1/8″ x 5 3/8″ and adhere to card base.
- Cut piece of Whisper White cardstock at 4″ x 5 1/4″ and run through an embossing machine with the Ornate Floral embossing folder. Adhere to Gorgeous Grape layer.
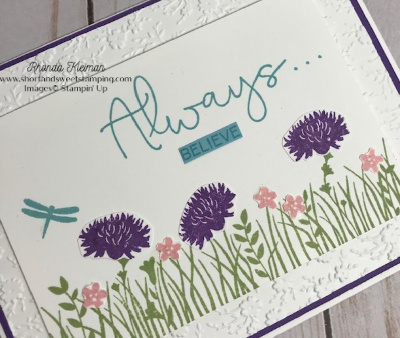
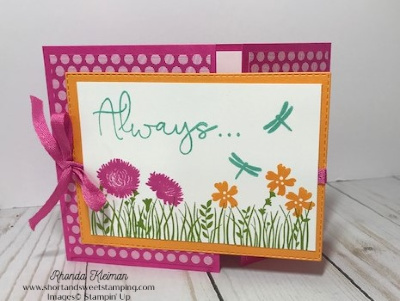
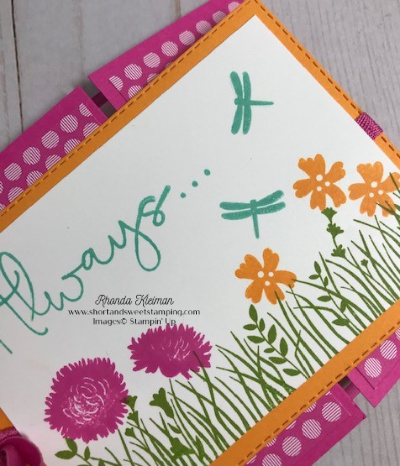
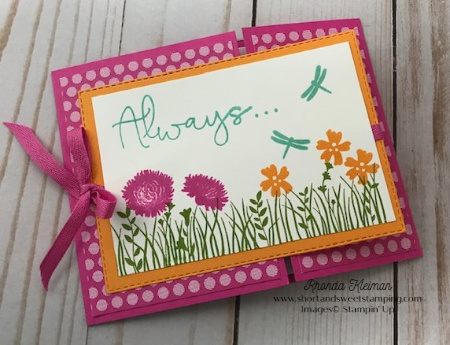
- Cut piece of Whisper White cardstock at 3″ x 4 3/8″. Stamp large grass image with Pear Pizzazz ink. Stamp “always” greeting with Balmy Blue ink. Stamp “believe” with Balmy Blue ink on scrap piece of Balmy Blue cardstock and trim with paper snips. Adhere underneath greeting . Stamp dragonfly with Balmy Blue ink and brush with clear Wink of Stella.
- Stamp the flower image three times with Gorgeous Grape ink on scrap piece of Whisper White cardstock and fussy cut with paper snips. Stamp the smallest flowers with Blushing Bride ink and fussy cut. You can also punch these flowers out with the coordinating Confetti Flowers Border Punch. Adhere to grass image with liquid glue. Brush with Wink of Stella.
- Adhere stamped image to embossed layer with Stampin’ Dimensionals.
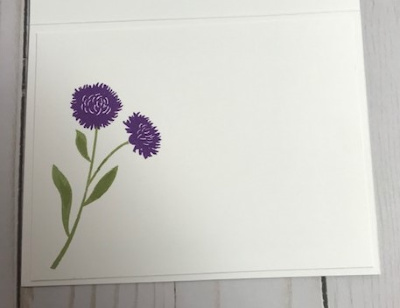
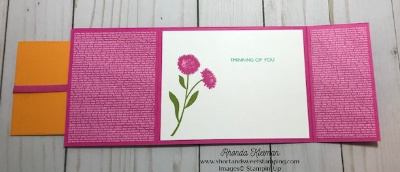
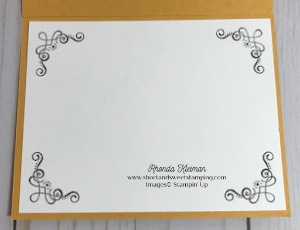
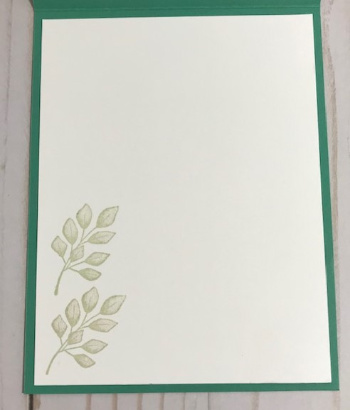
- Cut piece of Whisper White cardstock at 4″ x 5 1/4″. Stamp large single leaf image with Pear Pizzazz ink in lower left corner. Stamp flowers with Gorgeous Grape ink. Adhere piece to inside of card.
Bonus Days are Here!

Bonus Days are back once again! From July 1 through August 3rd, for every $50 you spend (before shipping & tax) you will receive a $5 Bonus Day coupon code that can be used from August 4th – 31st.
- You must have an email address in order to participate because the codes can only be delivered electronically.
- If you earn multiple coupons in a single order, all of the codes will be sent in one email. If you earn multiple coupons for multiple orders they will be sent in separate emails for each code earned.
- There is no limit on the number of coupon codes you can earn during this promotion.
Thanks for stopping by today!

Product List
 | |
 | |
 | |
 |  |
 |  |
 |


")
")


 Gathered Ribbon")


")
")


 Designer Series Paper")


 2020–2022 In Color Ribbon")


")
")


