
Hello!
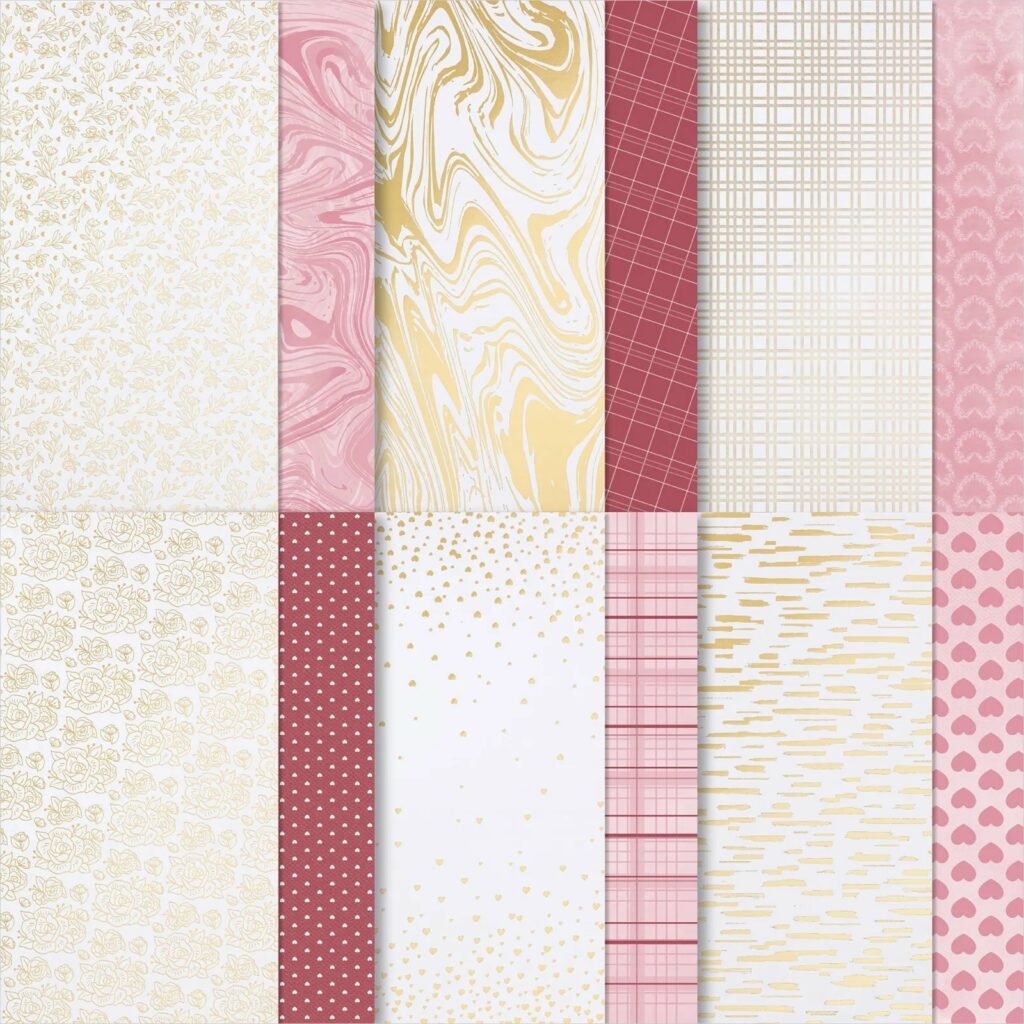
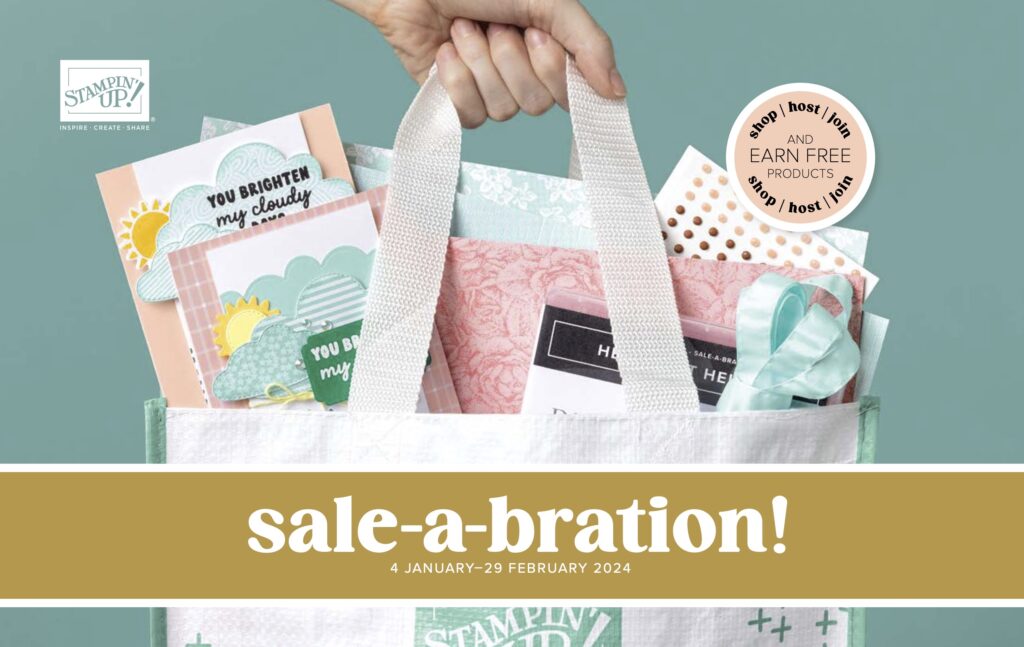
Today’s card features the Most Adored Specialty Designer Series Paper, one of the free items you can earn with a $50 purchase during Sale-A-Bration. While I used this paper to make a Valentine’s Day card, you can use this paper for other occasions. I used the red and pink designs on one side of several papers but the other sides are gold foil and white. There are only 9 days remaining for you to earn this paper before this year’s Sale-A-Bration promotion ends.

Here is how I made the card.
- Card base – cut a piece of Flirty Flamingo cardstock at 4 1/4″ x 11″. Score at 4 1/4 and 5 1/2″. Fold and sharply crease score lines with a bone folder. Adhere the 1 1/4″ fold section to the card base so that it opens up like a book.
- Cut a piece of the Most Adored Specialty Designer Series Paper at 4″ square. Cut another piece of DSP at 1″ x 4″. Adhere both pieces to card front.
- Die cut or punch out nine 1″ circles with Basic White cardstock and one 1 1/4″ circle with Real Red cardstock. I never got rid of any of the circle punches Stampin’ Up! has sold in the past so I was able to punch everything out. You can use any nested circle dies as well.
- Stamp greeting with Real Red ink on one of the Basic White circles and adhere to the Real Red circle. I used the Love You greeting from the Season of Chic stamp set because it fit perfectly in the circle.
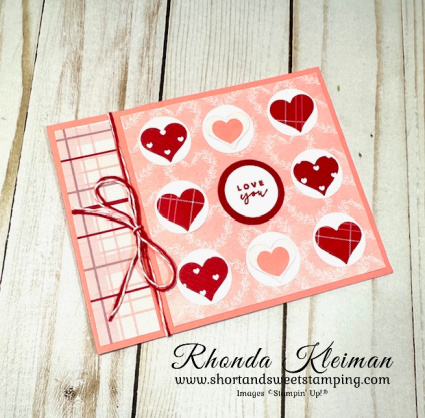
- Cut three different 1 1/2″ strips of the DSP and either punch out eight hearts with any heart punch or dies in your collection that will fit within the circles. I used dies from a long-retired set of heart shaped dies. Hearts are one of my favorite shapes, so I always keep them.
- Adhere the hearts to the circles. Lay the circles out on the card front, three circles per row, and when you like how the arrangement looks, adhere them down.
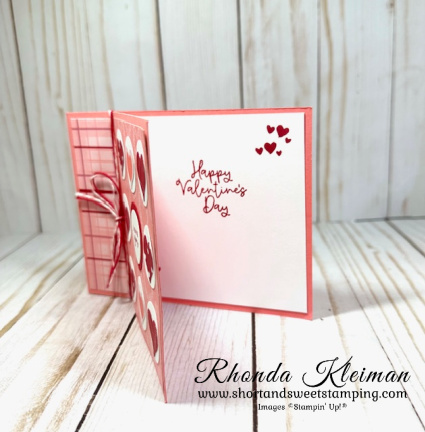
- Cut piece of Basic White cardstock at 4″x4″. Stamp small hearts from the Bee Mine Valentine stamp set two times with Real Red ink in upper right corner. Stamp Valentine’s greeting with Real Red ink. Adhere to inside of card.
- Cut a piece of ribbon or bakers twine and tie around card front. I used two different colors of retired bakers twine on my card.
Most Adored Specialty Designer Series Paper Item #162976 Free with $50 Purchase
Thanks for stopping by today!

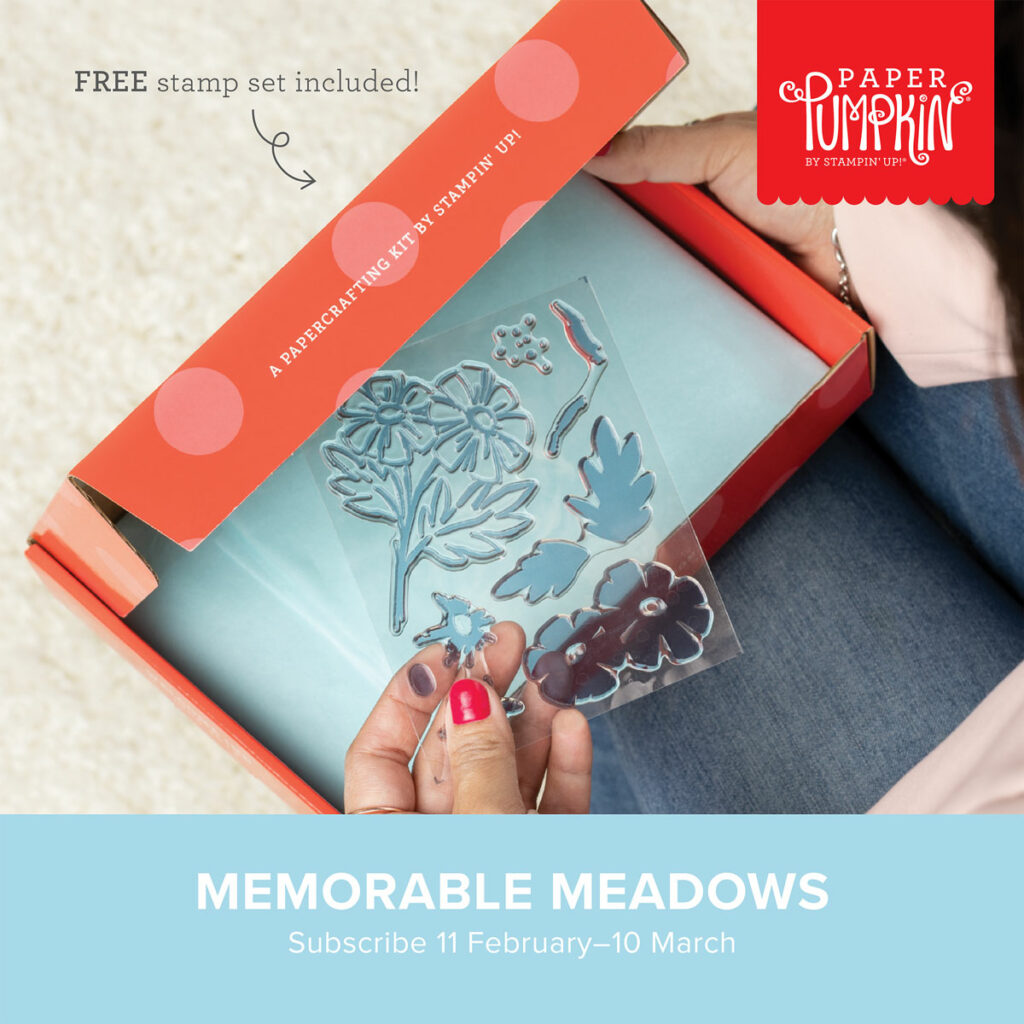
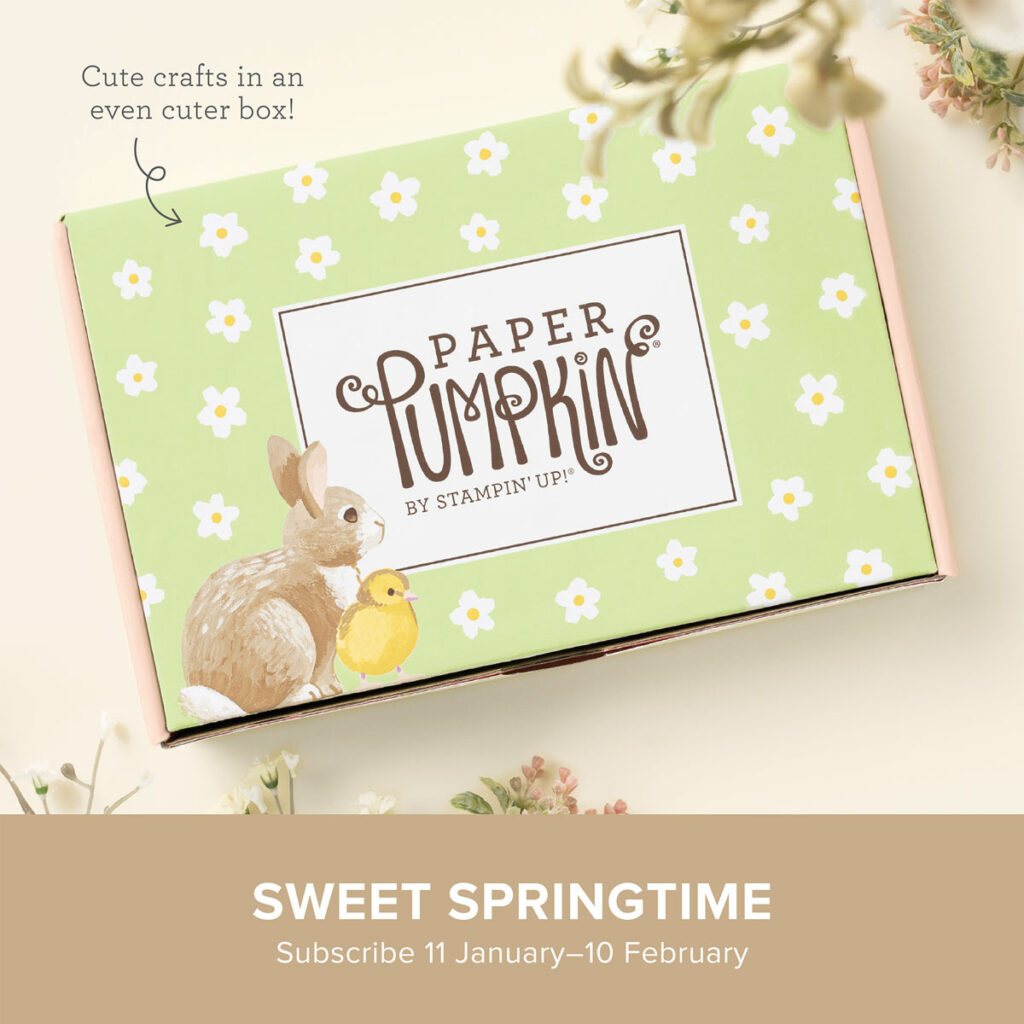
Subscribe now through March 10 for the Memorable Meadows Paper Pumpkin kit. Included in the kit are supplies to make nine cards, 3 each of 3 different designs and coordinating envelopes; precut vellum pieces and wood embellishments; coordinates with the Meandering Meadows Suite Collection (Item #162745); free stamp set and Garden Green Stampin’ Spot; Coordinating Colors: Granny Apple Green, Garden Green, Balmy Blue, Night of Navy, Georgeous Grape, Fresh Freesia. The Love of Spring Add On Dies are made to coordinate with this kit, Item #164396. Click here for further information and to subscribe.

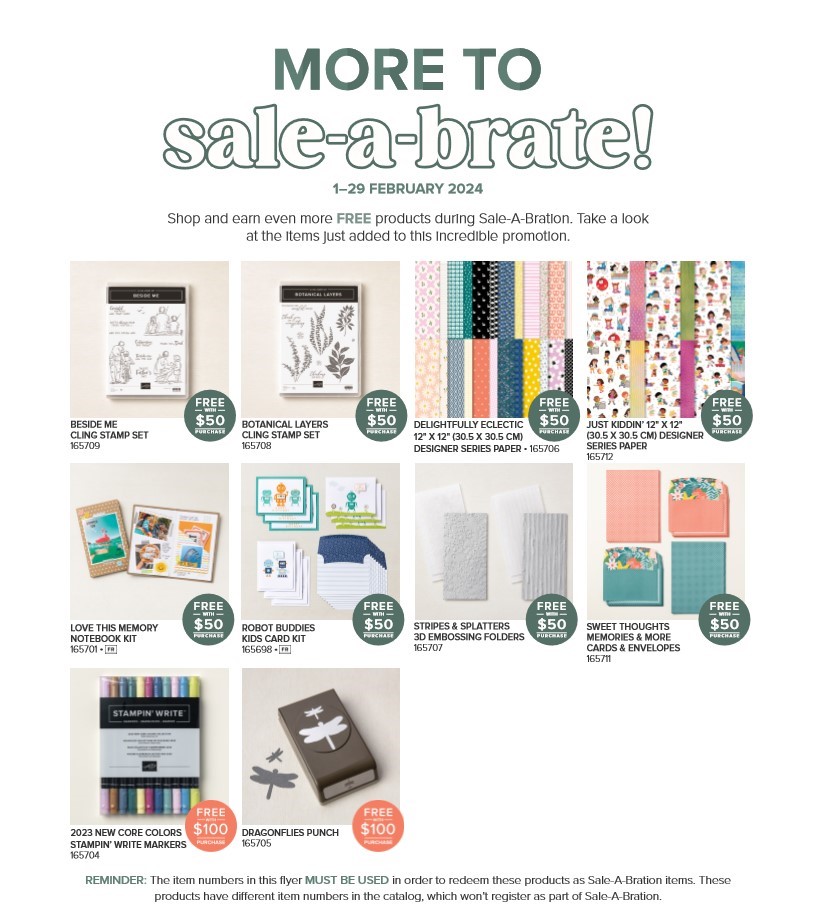
Stampin’ Up! has added more products that you can earn for free with a $50 or $100 purchase. Sale-A-Bration runs through February 29th. Here are the new selections.

Place an online order between $50 and $149 and use this host code for February. You will receive a free gift from me the following month. If your order is $150 or more DO NOT use the host code. You will qualify for Stampin’ Rewards.
Product List  |  | |
 |  |  |
 |  |  |
 |
")
")
 Specialty Designer Series Paper")


 Designer Series Paper")
")


 Textured Ribbon")


")


")
")

 Designer Series Paper")
 Designer Series Paper")
 Specialty Paper")


")
")
")
")


")


 Designer Series Paper")
 Specialty Pack")


