
Hello!
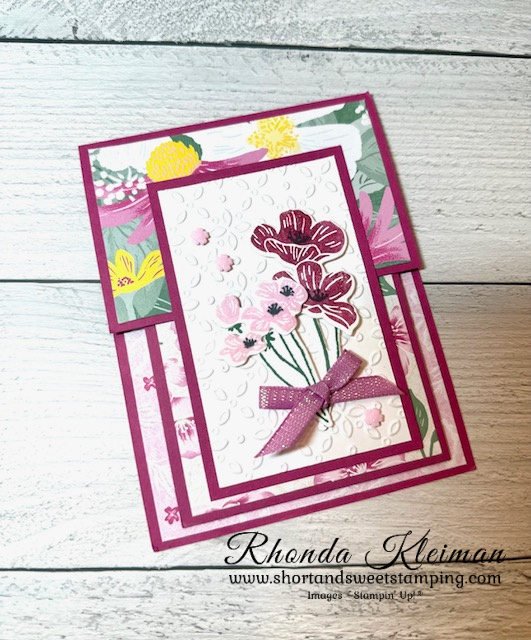
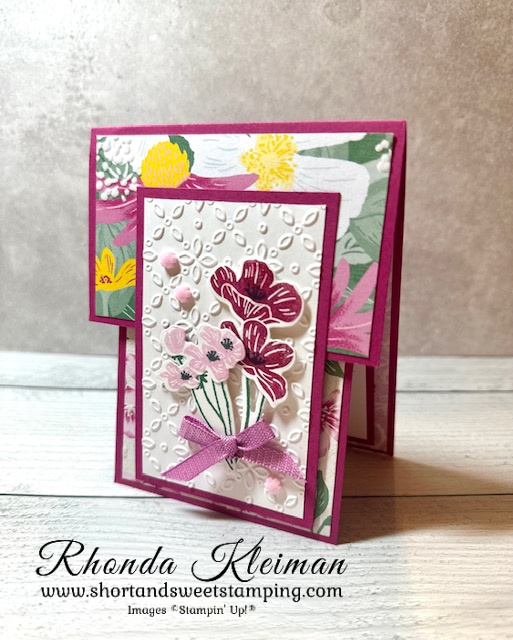
Today’s card features the Velvet Meadow Suite, one of the beautiful new suites in the May-August 2026 Catalog. I love the specialty DSP because of the lovely flowers and color palette, which shout spring. The DSP is special because each of the papers has velvet textures on one side of the sheet, adding to the dimension of the paper.
Measurements
- Berry Burst cardstock – card base 4 1/4″ x 11″ and cut off the paper at 8 1/4″ (this piece will be used for front flap), score at 5 1/2″
- Berry Burst cardstock – inner card 3 1/2″ x 9 1/2″, score at 4 3/4″
- Basic White cardstock – cut one piece at 2 1/2″ x 4″ for card front; cut one piece at 3 1/4″ x 4 1/2′ for inner card; scrap pieces for stamping flowers and stems
- Bubble Bath cardstock – cut piece at 2 1/2″ square for stamping greeting on front of inner card
- Velvet Meadow Specialty Designer Series Paper – cut one piece at 4″ x 5 1/4″ for inside of card base; cut one piece at 3 1/4″ x 4 1/2″ for front of inner card; cut one piece at 2 1/2″ x 4″ for top of front fold
Here’s how I made the card.
- Adhere the three different pieces of DSP to the outer and inner cards.
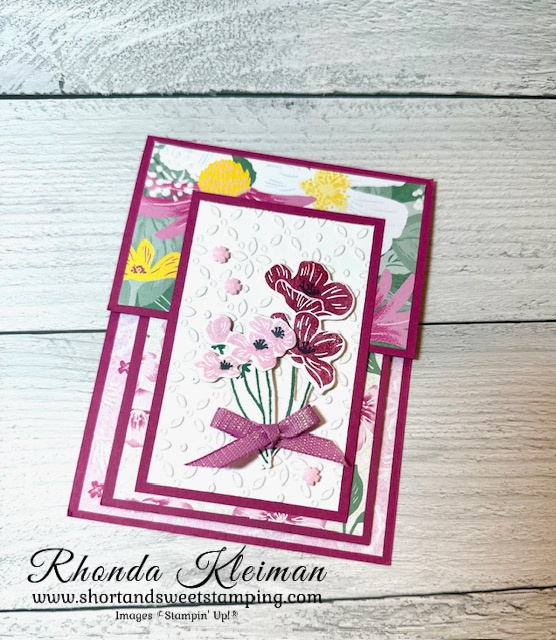
- Run the piece of Basic White cardstock for the card front through embossing machine with an embossing folder of your choice. I used the 3D Eyelet Embossing Folder, which is now retired. Adhere to the 2 1/2″ x 4″ piece of Berry Burst cardstock that was cut from the original 4 1/4″ x 11″ piece of cardstock.
- Stamp images from the Flowering Meadow stamp set. Stamp the large flowers with Berry Burst ink and the small flowers with Bubble Bath ink. Stamp stamens with Memento Black Ink or the new Basic Black Hybrid Stampin’ Pad (see page 77 in catalog). Stamp the two different stem images with Peaceful Pine ink. Run through die cutting machine with the coordinating Flowering Meadow Dies. Adhere flowers to stems and adhere to front flap with Stampin’ Dimensionals.
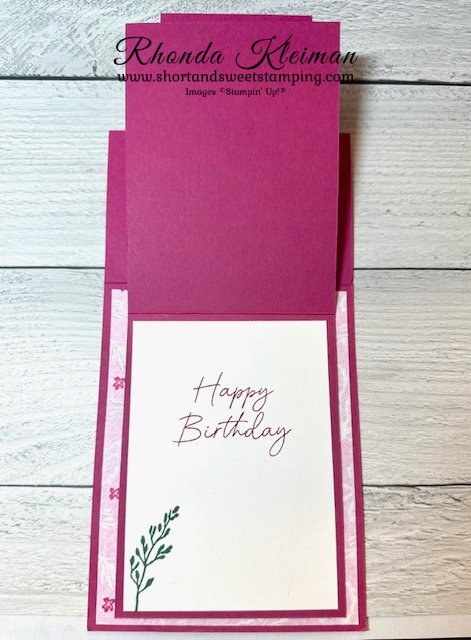
- Stamp greeting with Berry Burst ink on piece of Basic White cardstock for inside of the inner card. I used the birthday greeting from the Scalloped Blooms stamp set. Stamp the leaf image with Peaceful Pine ink in the left corner. Adhere to inside of the inner card.
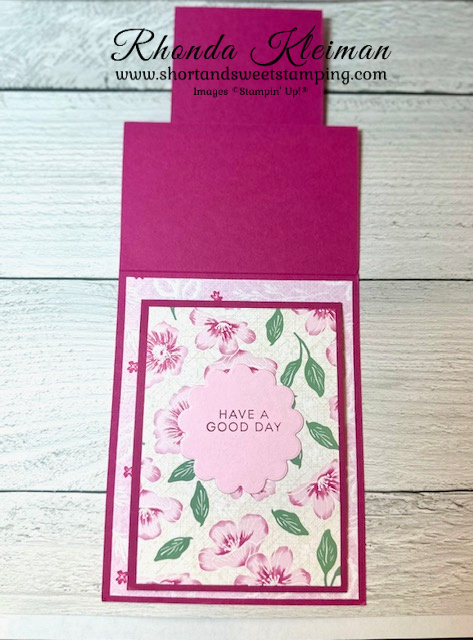
- Run piece of Bubble Bath cardstock through die cutting machine with the third smallest die from the Scalloped Blooms Dies. Stamp greeting from the Scalloped Blooms stamp set with Berry Burst ink. Adhere to front of inner card. Adhere inner card to back piece of the card base, centering it so that the bottom of the inner card is 1/4″ from the bottom of the card base, as shown in the photo.
- Finish off the card front. Make a small bow and adhere to base of stems with a glue dot. Add Wink of Stella to the flowers. Be careful when adding to the Berry Burst flowers because it can make the ink bleed into the white spaces. Add three of the Bubble Bath Dreamy Flower embellishments.
Thanks for stopping by today!

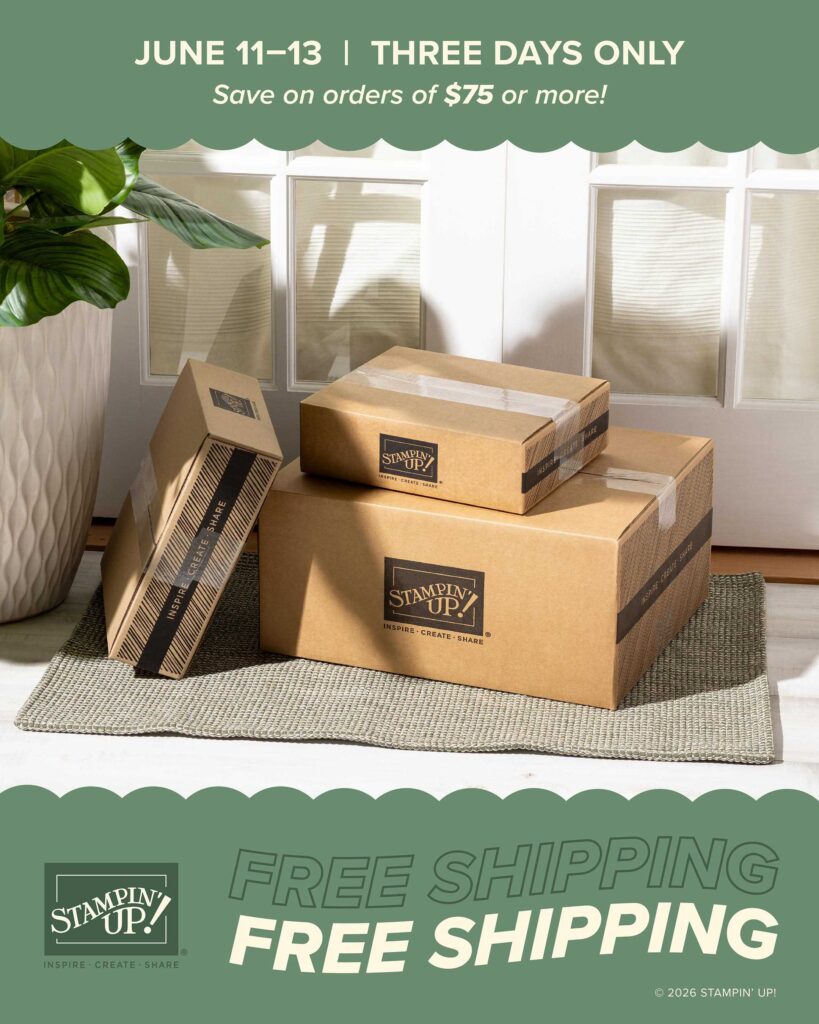
Place an order of $75 (before tax) or more from June 11-June 13. Please note that if you use any coupon codes or Stampin’ Rewards, it will lower the total amount of your order. After the qualifying amount is met the discount will automatically show up in your cart.


The Last Chance product category has just been updated with many new items. There are discounts of up to 60% on selected items. Items are only available while supplies last. Click here to check out the Last Chance items.
Product List ![Flowering Meadow Bundle (English) [ 167912 ]](https://assets1.tamsnetwork.com/images/EC042017NF/167912s.jpg "Flowering Meadow Bundle (English) [ 167912 ]") | ||
![Flowering Meadow Dies [ 167911 ]](https://assets1.tamsnetwork.com/images/EC042017NF/167911s.jpg "Flowering Meadow Dies [ 167911 ]") | ![Scalloped Blooms Bundle (English) [ 167647 ]](https://assets1.tamsnetwork.com/images/EC042017NF/167647s.jpg "Scalloped Blooms Bundle (English) [ 167647 ]") | |
![Scalloped Blooms Dies [ 167646 ]](https://assets1.tamsnetwork.com/images/EC042017NF/167646s.jpg "Scalloped Blooms Dies [ 167646 ]") | ![Berry Burst 8-1/2" X 11" Cardstock [ 144243 ]](https://assets1.tamsnetwork.com/images/EC042017NF/144243s.jpg "Berry Burst 8-1/2\" X 11\" Cardstock [ 144243 ]") | |
![Bubble Bath 8 1/2" X 11" Cardstock [ 161718 ]](https://assets1.tamsnetwork.com/images/EC042017NF/161718s.jpg "Bubble Bath 8 1/2\" X 11\" Cardstock [ 161718 ]") | ![Basic White 8 1/2" X 11" Cardstock [ 166780 ]](https://assets1.tamsnetwork.com/images/EC042017NF/166780s.jpg "Basic White 8 1/2\" X 11\" Cardstock [ 166780 ]") | ![Berry Burst Classic Stampin' Pad [ 147143 ]](https://assets1.tamsnetwork.com/images/EC042017NF/147143s.jpg "Berry Burst Classic Stampin' Pad [ 147143 ]") |
![Bubble Bath Classic Stampin' Pad [ 161664 ]](https://assets1.tamsnetwork.com/images/EC042017NF/161664s.jpg "Bubble Bath Classic Stampin' Pad [ 161664 ]") | ![Peaceful Pine Classic Stampin Pad [ 167679 ]](https://assets1.tamsnetwork.com/images/EC042017NF/167679s.jpg "Peaceful Pine Classic Stampin Pad [ 167679 ]") | ![Basic Black Hybrid Stampin' Pad [ 166648 ]](https://assets1.tamsnetwork.com/images/EC042017NF/166648s.jpg "Basic Black Hybrid Stampin' Pad [ 166648 ]") |
![Clear Wink Of Stella Glitter Brush [ 141897 ]](https://assets1.tamsnetwork.com/images/EC042017NF/141897s.jpg "Clear Wink Of Stella Glitter Brush [ 141897 ]") | ![Dreamy Flowers [ 167916 ]](https://assets1.tamsnetwork.com/images/EC042017NF/167916s.jpg "Dreamy Flowers [ 167916 ]") | |
![Stampin' Cut & Emboss Machine [ 149653 ]](https://assets1.tamsnetwork.com/images/EC042017NF/149653s.jpg "Stampin' Cut & Emboss Machine [ 149653 ]") | ![Paper Trimmer [ 152392 ]](https://assets1.tamsnetwork.com/images/EC042017NF/152392s.jpg "Paper Trimmer [ 152392 ]") | ![Bone Folder [ 102300 ]](https://assets1.tamsnetwork.com/images/EC042017NF/102300s.jpg "Bone Folder [ 102300 ]") |
![Stampin' Seal [ 152813 ]](https://assets1.tamsnetwork.com/images/EC042017NF/152813s.jpg "Stampin' Seal [ 152813 ]") | ![Stampin' Dimensionals [ 104430 ]](https://assets1.tamsnetwork.com/images/EC042017NF/104430s.jpg "Stampin' Dimensionals [ 104430 ]") | ![Multipurpose Liquid Glue [ 110755 ]](https://assets1.tamsnetwork.com/images/EC042017NF/110755s.jpg "Multipurpose Liquid Glue [ 110755 ]") |
![Mini Glue Dots [ 103683 ]](https://assets1.tamsnetwork.com/images/EC042017NF/103683s.jpg "Mini Glue Dots [ 103683 ]") |
![Velvet Meadow Suite Collection (English) [ 167917 ]](https://assets1.tamsnetwork.com/images/EC042017NF/167917s.jpg "Velvet Meadow Suite Collection (English) [ 167917 ]")
![Flowering Meadow Photopolymer Stamp Set (English) [ 167906 ]](https://assets1.tamsnetwork.com/images/EC042017NF/167906s.jpg "Flowering Meadow Photopolymer Stamp Set (English) [ 167906 ]")
![Scalloped Blooms Photopolymer Stamp Set (English) [ 167639 ]](https://assets1.tamsnetwork.com/images/EC042017NF/167639s.jpg "Scalloped Blooms Photopolymer Stamp Set (English) [ 167639 ]")
![Velvet Meadow 12" X 12" (30.5 X 30.5 Cm) Specialty Designer Series Paper [ 167904 ]](https://assets1.tamsnetwork.com/images/EC042017NF/167904s.jpg "Velvet Meadow 12\" X 12\" (30.5 X 30.5 Cm) Specialty Designer Series Paper [ 167904 ]")
![Petunia Pop 1/4" (6.4 Mm) Iridescent Ribbon [ 166203 ]](https://assets1.tamsnetwork.com/images/EC042017NF/166203s.jpg "Petunia Pop 1/4\" (6.4 Mm) Iridescent Ribbon [ 166203 ]")
