Always Valentine’s Day Card

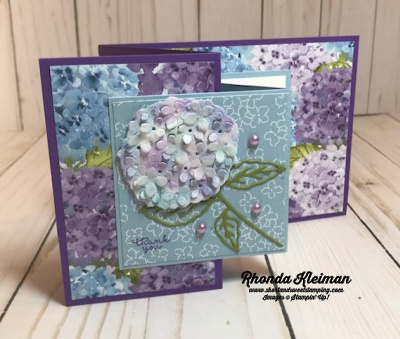
Hello! Today I’m featuring a Valentine’s Day card that we did in my January class to go. It uses dies and an embossing folder and the only stamping is the greeting on the inside of the card. I’ve been seeing cards with a Basic Black, Basic White and Magenta Madness color combination that I think is very striking so here is what I came up with.

Here is how I made the card.

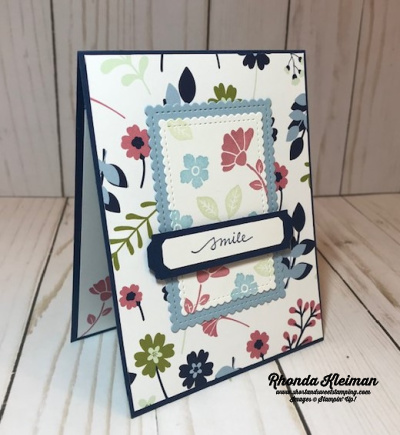
  • Cut piece of Basic Black cardstock at 4 1/2″ x 11″, score at 5 ½”, fold and crease with bone folder.  Cut piece of True Love Designer Series Paper at 4″ x 5 1/4″ and adhere to card front.
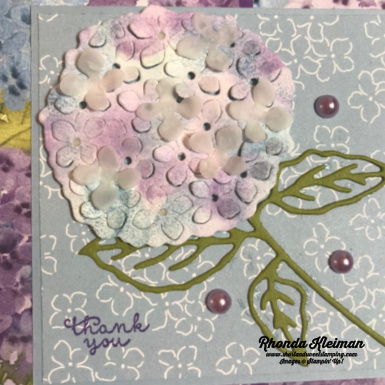
  • Cut piece of Basic White cardstock at 2 3/4″ x 4 1/4″. Run it through your die cutting and embossing machine with the Lace 3D embossing folder, centering the design so that it is even on both sides.  Adhere to a piece of Magenta Madness cardstock cut at 3 1/4″ x 4 1/2″.
  • Back a scrap piece of Basic Black cardstock with part of an adhesive sheet that is cut to size and run through your die cutting & embossing machine with the Always die from the Always Die set.  Cut a 2 1/2″ square piece of Magenta Madness cardstock and back with a piece of adhesive sheet. Run it through the machine with the second largest scalloped heart from the Stitched Be Mine die set.  Adhere the heart to the embossed Basic White piece.  Adhere to the Magenta Madness cardstock.  Adhere the Always die cut to the piece and then adhere piece to card front with Stampin’ Dimensionals.
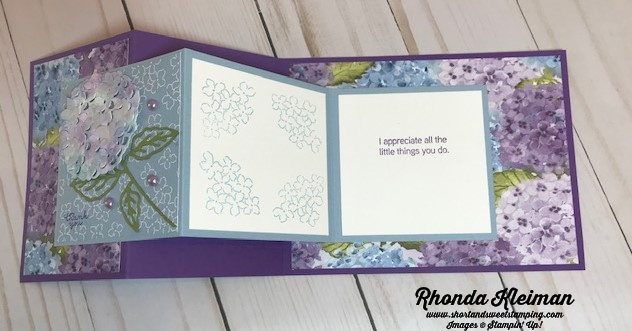
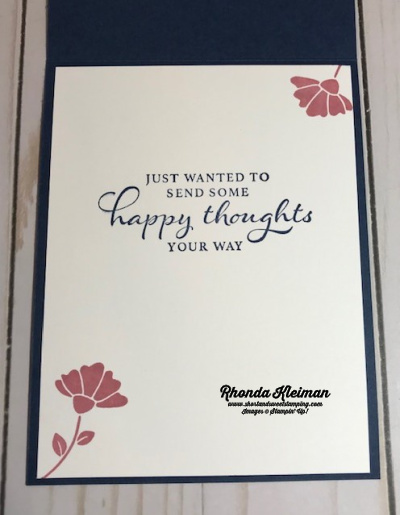
  • You can use any greeting from your stamp sets for the inside greeting. I mixed sentiments from two different stamp sets. I used “In My Heart” from the Field of Flowers stamp set and the “Happy Valentine’s Day” greeting from the Forever Lovely stamp set, which is now retired. I lined both of them up on an acrylic block so I could stamp them both at the same time and stamped them with Magenta Madness ink on a piece of Basic White cardstock cut at 4″ x 5 1/4″. Adhere to inside of card.

Thanks for stopping by today!

Hey Chick and Hey Birthday Chick Bundles Now Available!

The Hey Birthday Chick bundle on page 52 in the Mini catalog probably reminded some of you of the Hey Chick stamp set that was a well-loved SAB item in 2017.  Stampin’ Up! decided to bring it back and has added a coordinating die set and a new bundle created in the same style. These products are now available through June 30th. For further information and to place an order in my online store click here

Product List
Always Dies
[154307]
$33.00
Paper Snips
[103579]
$10.00

Fine Art Floral Happy Birthday

Hello! Today I have two birthday cards for you that feature the Fine Art Floral Suite. I used the same layout for both but changed up the colors. I used the pink tones for one and the blue tones for the other.

Here is how I made the card.

  • Card base – cut piece of Flirty Flamingo cardstock at 4 1/4″ x 11″, score at 5 1/2″, fold and crease with a bone folder.
  • Cut piece of Fine Art Floral Designer Series Paper at 4 1/8″ x 5 3/8″ and adhere to front of card. Cut another piece of Flirty Flamingo cardstock at 2 7/8″ x 4 5/8″. Cut a contrasting piece of Fine Art Floral DSP at 2 3/4″ x 4 1/2″ and adhere to Flirty Flamingo piece.
  • Use the Art Gallery stamp set and stamp the flower with Petal Pink and Flirty Flamingo ink. Stamp the leaves with Old Olive ink. Cut out with coordinating dies from the Floral Gallery Dies set. Stamp birthday greeting with Flirty Flamingo ink on scrap piece of Basic White cardstock. Cut out with one of the labels in the dies set.
  • Adhere greeting at bottom of the smaller card front. Arrange leaves and flower. Adhere leaves and then adhere flower with Stampin’ Dimensionals.
  • Cut a length of Organdy Striped Ribbon and tie in bow around the piece. Adhere piece to card front.

Follow the above steps to make the blue version of the card.

  • Card base – Night of Navy cardstock, Pool Party cardstock for smaller card base
  • DSP – select papers from the blue family in the set
  • Ink – Mossy Meadow for the leaves, Night of Navy and Pool Party for the flower. Night of Navy for the birthday greeting.
  • Ribbon – Pool Party Sheer Ribbon

For the inside of both cards:

  • Cut piece of Basic White cardstock at 4″ x 5 1/4″.
  • Stamp sentiment from the Happy Thoughts stamp set with Night of Navy /Flirty Flamingo ink.
  • Stamp small flower in lower left corner with either the Night of Navy/Pool Party combination or the Flirty Flamingo/Petal Pink combination of inks. Adhere to inside of card.

Which one do you like better – the pink or the blue? Please feel free to leave me a comment!

Thanks for stopping by today!

The Bouquet of Hope Paper Pumpkin Kit provides enough supplies to create nine cards and coordinating envelopes. This soft, sympathetic kit includes patterned card bases, die-cut floral elements, ribbon, embellishments, and more! The kit’s exclusive Bouquet of Hope Stamp Set features supportive sentiments centered around comfort, care, hope, and love. Such a versatile stamp set can be used throughout the year! To subscribe to Paper Pumpkin, visit my site by clicking here.

Product List
Paper Snips
[103579]
$10.00

Lovely You Meets Paper Blooms

Hello! Today’s card features the pretty Paper Blooms Designer Series Paper, one of the Stampin’ Up! free Sale-A-Bration items you can earn with a $50 purchase. When I first saw this paper, I immediately thought that it would work beautifully with the Lovely You stamp set, so I’ve paired up these two products.

The card layout is from Sunday Stamps Challenge. I haven’t participated in a challenge for a long time and when I came across this sketch I thought it would be a fun one to do so decided to give it a go! Here is the sketch for SSC248.

Here is how I made the card.

  • Card base – Night of Navy cardstock cut at 4 1/4″ x 11″. Score at 5 1/2″, fold and crease with a bone folder.
  • Cut piece of Paper Blooms DSP at 4 1/8″ x 5 3/8″ and adhere to card front.
  • Cut piece of Seaside Spray cardstock at 2 3/4″ x 3 3/4″ and run through die cutting machine with the second largest rectangle from the Stitched so Sweetly dies.
  • Cut piece of Basic White cardstock at 2 1/2″ x 3 1/2″ and run through die cutting machine with third largest rectangle from the Stitched so Sweetly dies. Randomly stamp flowers and leaves from Lovely You stamp set with Rococo Rose, Seaside Spray and Soft Sea Foam inks. Adhere to Seaside Spray rectangle. Adhere piece to center of card front.
  • Cut scrap piece of Basic White cardstock at 1/2″ x 2 3/4″, stamp greeting with Night of Navy ink and punch both ends with the Lovely Labels Pick a Punch. Cut scrap piece of Night of Navy cardstock at 3/4″ x 3 1/4″ and punch both ends. Adhere labels together. Adhere to stamped piece with Stampin’ Dimensionals.
  • Cut piece of Basic White cardstock at 4″ x 5 1//4″. Stamp flower with Rococo Rose ink. Stamp greeting from Happy Thoughts stamp set with Night of Navy ink. Adhere to inside of card.

Thanks for stopping by today!

Product List

Handsomely Suited Birthday Card

Hello! Today I’m sharing a fun card I made with products from the new Well Suited Suite. This is a great suite for making masculine cards for many occasions. The Handsomely Suited stamp set has a nice variety of greetings and type fonts and the Designer Series Paper is fabulous! The fabric designs for the men’s suits, shirts and ties are so realistic. I made this card for my father, who will be celebrating his 99th birthday this Saturday – it is hard to believe!!

Here is how I made the card.

  • Card base – cut a piece of Basic Gray cardstock at 4 1/4″ x 11″, score at 5 1/2″, fold and crease with a bone folder.
  • Cut a piece of Well Suited DSP at 4 1/8″ x 5 3/8″ and adhere to card front.
  • Cut a piece of Basic White cardstock at 3 1/2″ x 4 1/2″ and using the third largest rectangle from the Stitched Rectangles dies, run it through your embossing machine.
  • Select three different pieces of DSP and from each, die cut the bow ties with the large bow tie and small knot dies from the Suit & Ties Dies. Adhere the knots to the bow ties. Adhere two of them to the top part of the rectangle. Adhere one to the bottom of the rectangle, leaving space in between for the greeting.
  • Stamp greeting on scrap piece of Basic White cardstock with Basic Gray ink. Punch out with the Tailored Tag punch. This is one of my all-time favorite Stampin’ Up! punches! To add a touch of contrast, punch another tag from a scrap piece of Basic Gray cardstock. Cut in half horizontally. Adhere one half to the top of the tag and the other half to the bottom of the tag, leaving just a little bit of the gray showing.
  • Wrap a piece of Night of Navy Twine around the blank section between the bow ties four times. Start wrapping from the back of the piece, taping the tail down with Scotch Tape or Tear and Tape. After the fourth wrap, cut twine from the spool and tape again.
  • Adhere piece to card front. Adhere the greeting over the twine with Stampin’ Dimensionals.
  • Cut a piece of Basic White cardstock at 4″ x 5 1/4″ and stamp a greeting with Basic Gray ink. Stamp a bow tie with Night of Navy ink in bottom left corner. Adhere to inside of card.

Thanks for stopping by today!

Product List
Paper Snips
[103579]
$10.00

Basic White Products are Now Available

Hello! As previously announced, Whisper White cardstock products are no longer available and have been replaced with Basic White cardstock products. They are now available for purchase. Prices remain the same however the item numbers are different. I’m awaiting an order so while I haven’t seen it in person yet, I am told by other Stampin’ Up! demonstrators that while the Whisper White had some yellow overtones, the Basic White has some blue overtones, making it a brighter white. I can’t wait for my order to arrive so I can see the difference for myself and test it out!

Product List

The new Mini Stampin’ Cut & Emboss Machine is now available! The machine is compact, lightweight and is so cute! The plates glide nicely through the machine, whether you are die cutting or running mini embossing folders through it and rubber feet securely grip the work surface. My machine sits right on my desk, always ready to use – I love it!

Product List

Thanks for stopping by today!

Hydrangea Haven-Kylie’s Training Blog Hop

Hello! Welcome to Kylie Bertucci’s Demonstrator Training Blog Hop for January. I’m part of a group of Stampin’ Up! demonstrators from around the world that participate in Kylie’s program for building our businesses. The theme for this year is thank you, to show appreciation to our customers and team. Please be sure to click on the names in the list at the end of this post to hop around and view the beautiful projects posted by so many talented stampers.

Today’s card features the Hydrangea Hill Suite in the new mini catalog. Purple is one of my favorite colors and it isn’t very often that Stampin’ Up! Designer Series Papers showcase the great purples available in the different color families. I also love flowers so this suite was a winning combination for me and was the first one I purchased as soon as the catalog went live!

I thought that the Double Z Fold would be a nice way to show off the 3D flower. Here is how I made the card.

  • Card base – Cut a piece of Gorgeous Grape cardstock at 4 1/4″ x 11″. Score at 2 3/4″ and 5 1/2″, fold and sharply crease with a bone folder.
  • Designer Series Paper for card base – cut one piece at 4″ x 5 1/4″ and one piece at 2 1/2″ x 4″ and adhere. I used the paper with the smaller all-over hydrangea design.
  • Smaller card base – cut a piece of Seaside Spray cardstock at 3″ x 9″ and score at 3″ and 6″. Fold and crease sharply with a bone folder.
  • Cut piece of the Seaside Spray DSP at 2 7/8″ x 2 7/8″ . Stamp “thank you” from the Hydrangea Haven stamp set with Gorgeous Grape in the bottom left corner.
  • Die cut the leaf and stem piece with Old Olive cardstock using the die from the Hydrangea die set. Cut a piece of an adhesive sheet and adhere to the Old Olive cardstock before running through the die cutting machine. Adhere to Seaside Spray DSP.
  • To make the 3D flower cut a 2 1/2″ square piece of Basic White cardstock. I used three colors of ink: Highland Heather, Misty Moonlight and Seaside Spray and applied them with a blending brush. I started with the Highland Heather, randomly dabbing the color on, making small circles, working from the center and going out to make a large circle. I repeated this step with the Seaside Spray and then filled in with accents of Highland Heather. I did first and second generation inking to produce the shading. I have a set of blender brushes in different sizes that I purchased at a scrapbooking show several years ago and I used one of the smaller brushes since I was working with a small piece. I don’t have our new brushes yet so I’m not sure how well this technique will work with the size of the SU brush. You can also use sponge daubers, which would work nicely for this technique.
  • Once the inking is done run it through your die cutting machine using the solid flower die. To get the raised effect turn the piece to the back and use either the paper piercer end of the Take Your Pick tool or the point of the paper snips to poke the flowers out to the front. To fill the flower out more, cut a strip of Vellum Paper and use the long die with the blossoms to cut them out. Curl them with your fingertip, place a small drop of liquid glue in the center and randomly adhere to the flower. I used five of the blossoms.
  • Adhere piece to the Seaside Spray DSP piece with Stampin’ Dimensionals. Add three of the Highland Heather Pastel Pearls. Adhere the DSP piece to the front of the smaller card base.
  • For the inside of the smaller card base cut two pieces of Basic White cardstock at 2 3/4″ square. Stamp a greeting with Gorgeous Grape ink on one piece and adhere to inside of the card base. Stamp the smaller petal image with Seaside Spray ink in each of the four corners of the other piece and adhere to the middle section of the card base. Adhere smaller card base to the larger card base. When adhering the front make sure to only apply the adhesive to the left half of the piece in order for the card to open.

Thanks for stopping by today!

January-June Mini Catalog and Sale-A-Bration Begin Today!

Hello! The January-June 2021 Mini Catalog and Sale-A-Bration promotion have begun! As always there are so many beautiful new products to choose from. There is something for everyone! Click on the cover to view the catalog online.

It is also time for Sale-A-Bration! This is our biggest promotion of the year. For those of you that have been long-time Stampin’ Up! customers you know that this promotion has always run for three months beginning in January through the end of March. This year there will be two Sale-A-Bration promotions. The current promotion will run through February 28th and the second promotion will run from July-August. You can earn free limited-edition products with every $50 that you spend. There are also several items at the $100 level. For example, if you spend $100 you can select two $50 items or one $100 item. If you spend $150 you can select three $50 items or one $100 item and one $50 item, etc. Click on the cover to view the brochure online.

Sale-A- Bration is a great time to consider joining Stampin’ Up!. During this promotion you can purchase the starter kit for only $99 and select $125 worth of merchandise from the current annual catalog or the new mini catalog. You will also get a FREE 200 6″ x 6″ sheet assortment of our newest Designer Series Papers for five current color families, a $57.50 value! This paper will not be available for purchase until May 2021. Free shipping is also included. Click here for further information about joining my team.

During Sale-A-Bration if you either host a workshop (you can host one virtually in order to stay safe during the pandemic – ask me how!) or place a personal order of $300 or more, in addition to Stampin’ Rewards, you will get the exclusive Punch Party stamp set for free.

If you do not have a Stampin’ Up! Demonstrator I’d love to have you as a new customer or as part of my team and would be happy to send you a free copy of the new catalog. Please contact me by clicking here.

Thanks for stopping by today!