
Hello!
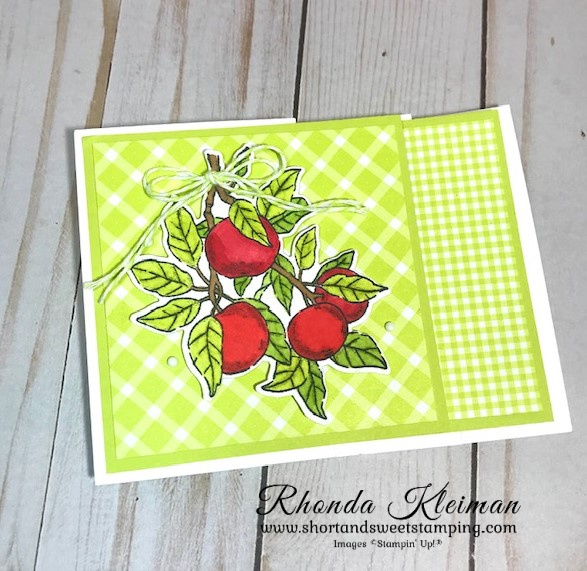
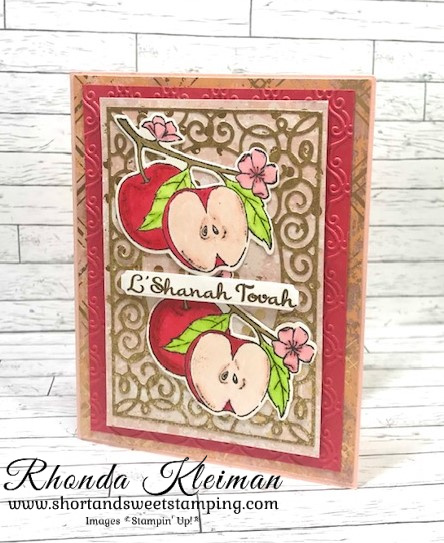
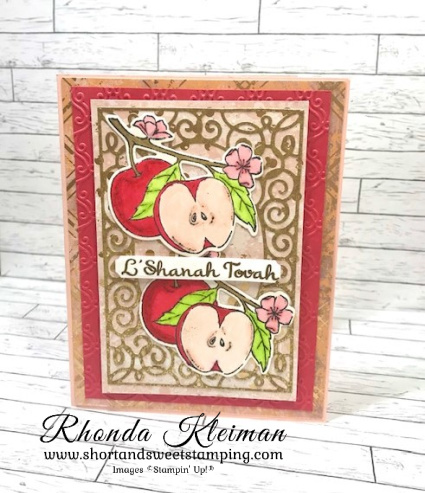
It’s been over a month since my last post. I’ve been making cards but haven’t had a chance to photograph most of them yet. I’ve been working on a renovation project in my living room and dining room so have been spending a lot of my time on cleaning out and getting rid of stuff, finding contractors and shopping for new furniture. It is exciting but stressful and time consuming at the same time! I’m finally in a place where I can start to turn my attention back on my cardmaking for now, but will there will continue to be weeks where I will not be able to post. With that said, I made this card back in June and it features the Apple Harvest stamp set and coordinating Apple Harvest dies. The dies were part of a promotion last year that included sets that didn’t originally come with several stamp sets. I was happy to see that they are still available for purchase in the clearance rack at 50% off, reduced from $35.00 to $14.00. The item number is still the same, #160255. This is what the card looks like folded up.
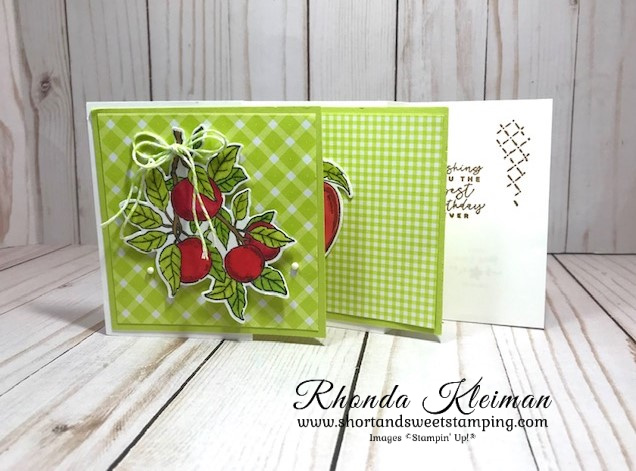
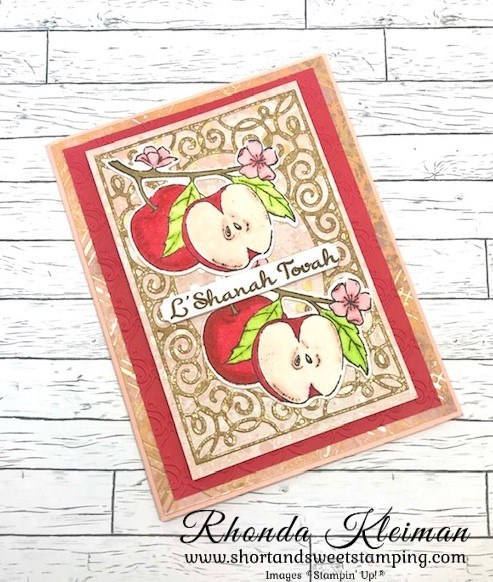
This is what the card looks like when opened up.
Here is how I made the card.
- Card base – cut a piece of Basic White cardstock at 4 1/4″ x 11″. Score at 2 ¾”, 4 ¼”, 7 ¼”, 8 ½”. Fold into an accordion and crease very sharply with a bone folder.
- Cut two 4″ pieces of Lemon Lime Twist cardstock. Cut two pieces of the Lemon Lime Twist paper from the Glorious Gingham Designer Series Papers, one at 3 3/4″ square and the other at 2 1/2″ x 3 3/4″. Adhere the square piece of DSP to one of the Lemon Lime Twist squares. Adhere the 2 1/4” piece of DSP on the right side of the other Lemon Lime Twist square.
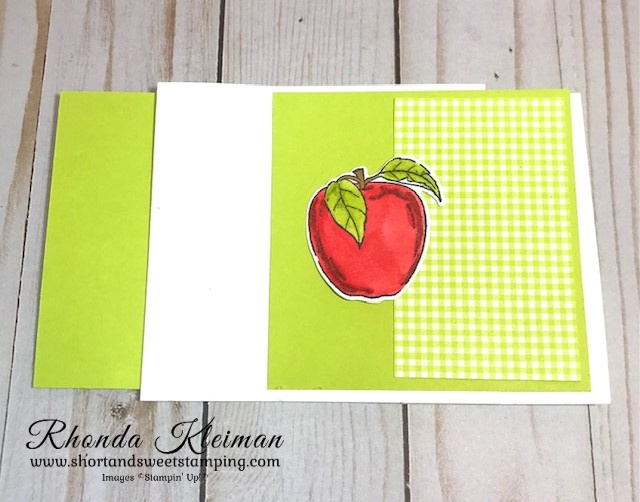
- Cut a piece of Basic White cardstock at 3 1/2″ x 5″. Stamp the largest apple image and the single apple image with Memento Tuxedo Black ink. Color the large apple image with light and dark Poppy Parade and Sweet Sorbet Stampin’ Blends for the apples and Lemon Lime Twist and Parakeet Party Stampin’ Blends for the leaves. Color the branch with Pecan Pie Stampin’ Blends. Color the single apple image with the same Blends. Run through Stampin’ Cut & Emboss Machine with the coordinating Apple Blossom dies.
- Adhere the large stamped image to the 4″ square piece with the 3 3/4″ piece of DSP using Stampin’ Dimensionals. Adhere the single apple image to the other 4″ square with the 2 1/4″ piece of DSP as shown.
- Adhere the 4” square with the large image to the front fold on the card panel, only adding adhesive to the left half of the square.
- Adhere the second 4″ square to the second fold, only adding adhesive to the left side of the square and lining it up with the first square.
- Stamp the criss-cross image in the upper right corner of the back inside panel with Pecan Pie ink, making sure to position it so that it doesn’t show when the card is folded. Stamp the birthday greeting.

- Cut two lengths of Parakeet Party Bakers Twine from the 2022-2024 In-Color Bakers Twine Pack. Tie into a bow. Adhere to top of of the branch on the large front image with a mini glue dot. Adhere a few of the small Very Vanilla Classic Matte Dots to the front of the card.

Thanks for stopping by today!

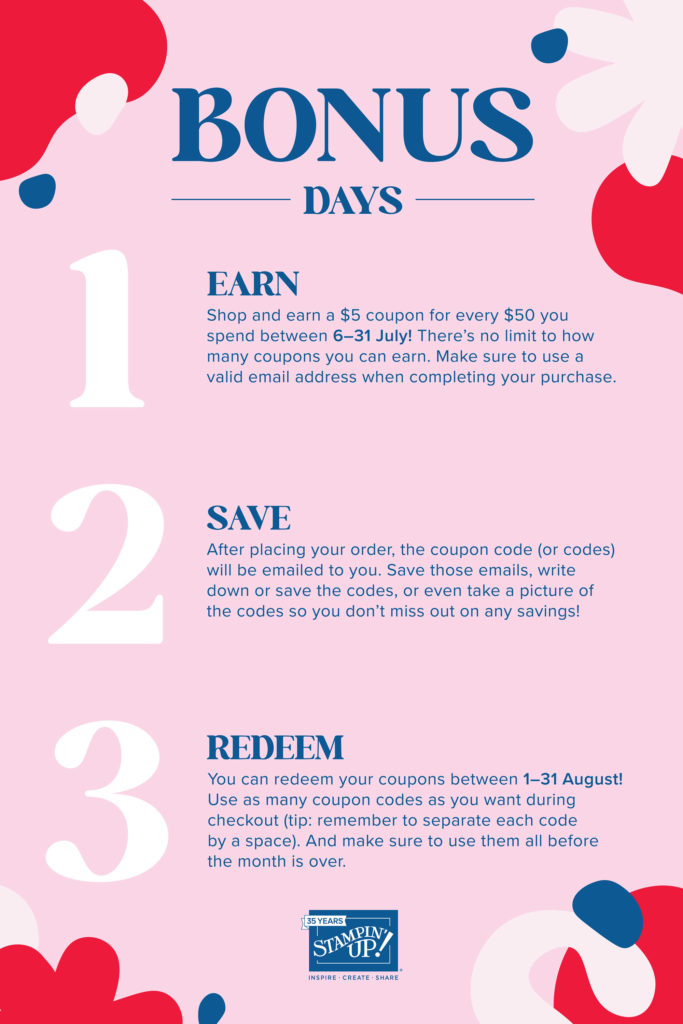
Reminder! If you earned any $5 bonus coupons from orders you placed in July, you have until this Thursday, August 31st to redeem them. You should have received one or more messages from Stampin’ Up! that included the coupon codes. You will need to enter these codes during online checkout.

Kits are on sale at up to 30% off this month. There is no limit on the number of kits you can purchase. The discount will be applied when you check out. Please note that this sale does not include Paper Pumpkin. Click here to visit the kits page in my online store.

Place an online order between $50 and $149 and use this host code for August. You will receive a free gift from me the following month. If your order is $150 or more DO NOT use the host code. You will qualify for Stampin’ Rewards.
Product List  | ||
 |  | |
 | ||
 |  | |
 |  |  |
 |  |  |
 |
")
 Designer Series Paper")


")


 Specialty Designer Series Paper")
 Specialty Paper")


