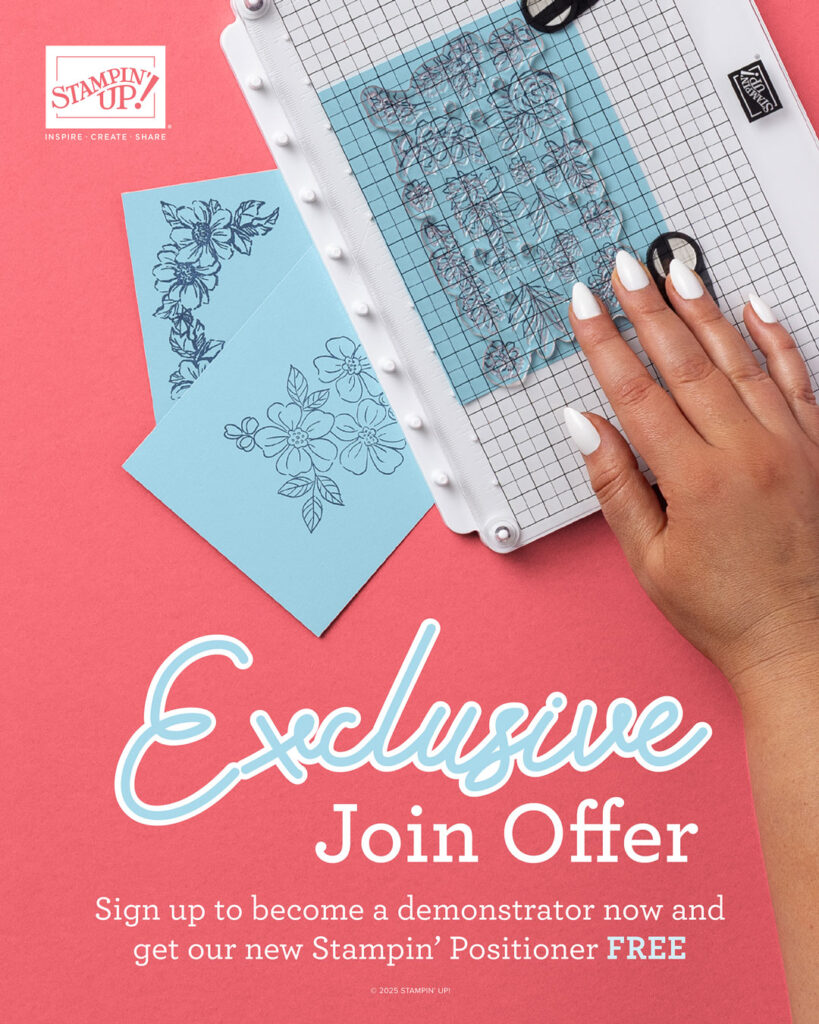
When you join Stampin’ Up! through February 28 you will receive a FREE Stampin’ Positioner, a $49.00 value. Join SU for $99 and get $125 worth of products of your choice. Free shipping is included. Please contact me for more information about becoming a demonstrator. The Stampin’ Positioner is our new stamping alignment tool that makes stamping easier and more accurate. It allows you to stamp precisely aligned images, create repeating patterns and Two-Step Stampin’ images easily, and make multiple projects in minutes. Some of you may remember our previous positioning tool, the Stamparatus, which sadly had to be discontinued due to intellectual property issues. We’ve been waiting for a few years for a replacement and it is finally here! Once the join promotion is over, the positioner will be available for purchase, however, no date has been announced as of yet. Click on the video below to watch a demonstration of how it works.


The new Product of the Month is now available. Get this exclusive product for only $5 when you spend $75 or more in a single order. This month’s product is Painted Illusions 12” x 12” Designer Series Paper. Item number is 167977.

If you earned bonus coupons in January, it is now time to redeem them through February 28. You should have received an email with your coupon codes. When you place your February orders you will need to enter the codes when you check out.
Thanks for stopping by today!


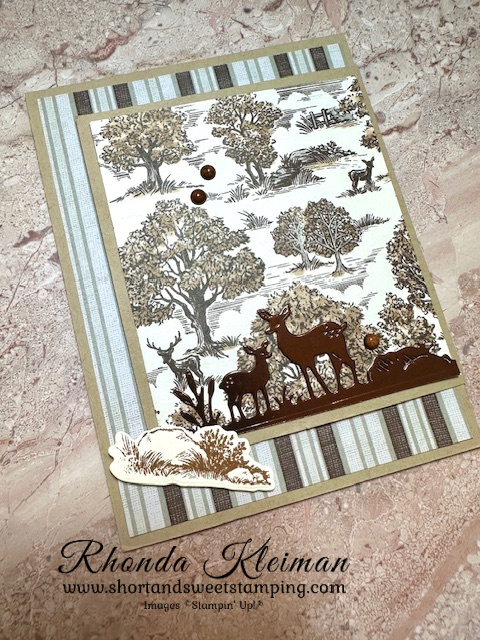
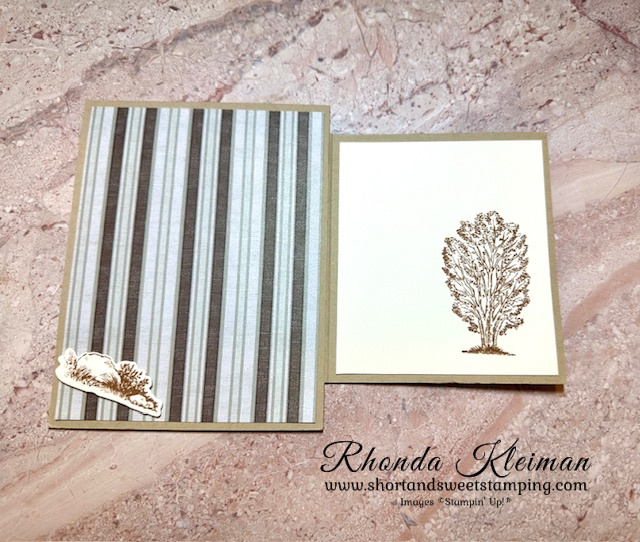

![Autumn Toile Suite Collection (English) [ 165904 ]](https://assets1.tamsnetwork.com/images/EC042017NF/165904s.jpg "Autumn Toile Suite Collection (English) [ 165904 ]")
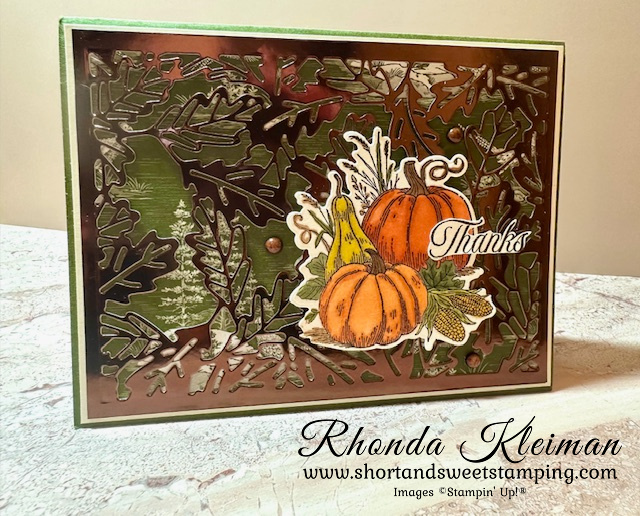
![Amber Autumn Bundle (English) [ 165893 ]](https://assets1.tamsnetwork.com/images/EC042017NF/165893s.jpg "Amber Autumn Bundle (English) [ 165893 ]")
![Amber Autumn Cling Stamp Set (English) [ 165883 ]](https://assets1.tamsnetwork.com/images/EC042017NF/165883s.jpg "Amber Autumn Cling Stamp Set (English) [ 165883 ]")
![Amber Autumn Dies [ 165892 ]](https://assets1.tamsnetwork.com/images/EC042017NF/165892s.jpg "Amber Autumn Dies [ 165892 ]")
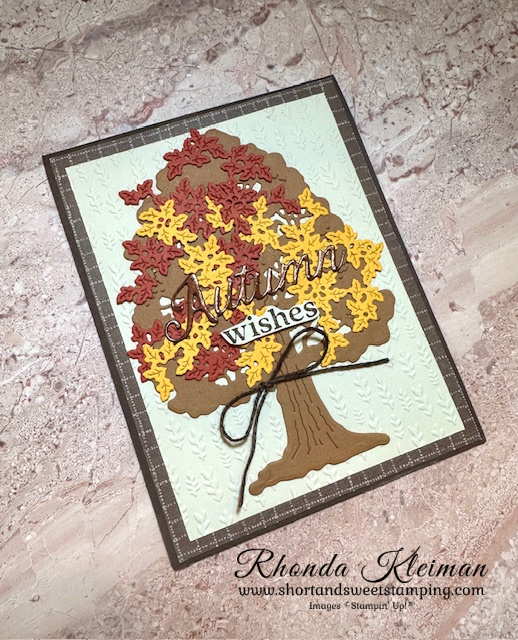
![Autumn Trees Bundle [ 165900 ]](https://assets1.tamsnetwork.com/images/EC042017NF/165900s.jpg "Autumn Trees Bundle [ 165900 ]")
![Autumn Trees Cling Stamp Set [ 165896 ]](https://assets1.tamsnetwork.com/images/EC042017NF/165896s.jpg "Autumn Trees Cling Stamp Set [ 165896 ]")
![Autumn Trees Dies [ 165899 ]](https://assets1.tamsnetwork.com/images/EC042017NF/165899s.jpg "Autumn Trees Dies [ 165899 ]")
![Stylish Shapes Dies [ 159183 ]](https://assets1.tamsnetwork.com/images/EC042017NF/159183s.jpg "Stylish Shapes Dies [ 159183 ]")
![Gathering Leaves Embossing Folder [ 165983 ]](https://assets1.tamsnetwork.com/images/EC042017NF/165983s.jpg "Gathering Leaves Embossing Folder [ 165983 ]")
![Autumn Toile 12" X 12" (30.5 X 30.5 Cm) Designer Series Paper [ 165882 ]](https://assets1.tamsnetwork.com/images/EC042017NF/165882s.jpg "Autumn Toile 12\" X 12\" (30.5 X 30.5 Cm) Designer Series Paper [ 165882 ]")
![Earthen Toned Metallic 12" X 12" (30.5 X 30.5 Cm) Specialty Paper [ 165901 ]](https://assets1.tamsnetwork.com/images/EC042017NF/165901s.jpg "Earthen Toned Metallic 12\" X 12\" (30.5 X 30.5 Cm) Specialty Paper [ 165901 ]")
![Basic White 8 1/2" X 11" Cardstock [ 166780 ]](https://assets1.tamsnetwork.com/images/EC042017NF/166780s.jpg "Basic White 8 1/2\" X 11\" Cardstock [ 166780 ]")
![Very Vanilla 8 1/2" X 11" Cardstock [ 166784 ]](https://assets1.tamsnetwork.com/images/EC042017NF/166784s.jpg "Very Vanilla 8 1/2\" X 11\" Cardstock [ 166784 ]")
![Basic Beige 8 1/2" X 11" Cardstock [ 164511 ]](https://assets1.tamsnetwork.com/images/EC042017NF/164511s.jpg "Basic Beige 8 1/2\" X 11\" Cardstock [ 164511 ]")
![Early Espresso 8-1/2" X 11" Cardstock [ 119686 ]](https://assets1.tamsnetwork.com/images/EC042017NF/119686s.jpg "Early Espresso 8-1/2\" X 11\" Cardstock [ 119686 ]")
![Cajun Craze 8-1/2" X 11" Cardstock [ 119684 ]](https://assets1.tamsnetwork.com/images/EC042017NF/119684s.jpg "Cajun Craze 8-1/2\" X 11\" Cardstock [ 119684 ]")
![Crumb Cake 8-1/2" X 11" Cardstock [ 120953 ]](https://assets1.tamsnetwork.com/images/EC042017NF/120953s.jpg "Crumb Cake 8-1/2\" X 11\" Cardstock [ 120953 ]")
![Mossy Meadow 8-1/2" X 11" Cardstock [ 133676 ]](https://assets1.tamsnetwork.com/images/EC042017NF/133676s.jpg "Mossy Meadow 8-1/2\" X 11\" Cardstock [ 133676 ]")
![Crushed Curry 8-1/2" X 11" Cardstock [ 131199 ]](https://assets1.tamsnetwork.com/images/EC042017NF/131199s.jpg "Crushed Curry 8-1/2\" X 11\" Cardstock [ 131199 ]")
![Pecan Pie 8 1/2" X 11" Cardstock [ 161717 ]](https://assets1.tamsnetwork.com/images/EC042017NF/161717s.jpg "Pecan Pie 8 1/2\" X 11\" Cardstock [ 161717 ]")
![Early Espresso Classic Stampin' Pad [ 147114 ]](https://assets1.tamsnetwork.com/images/EC042017NF/147114s.jpg "Early Espresso Classic Stampin' Pad [ 147114 ]")
![Pecan Pie Classic Stampin' Pad [ 161665 ]](https://assets1.tamsnetwork.com/images/EC042017NF/161665s.jpg "Pecan Pie Classic Stampin' Pad [ 161665 ]")
![Cajun Craze Classic Stampin' Pad [ 147085 ]](https://assets1.tamsnetwork.com/images/EC042017NF/147085s.jpg "Cajun Craze Classic Stampin' Pad [ 147085 ]")
![Crumb Cake Stampin' Blends Combo Pack [ 154882 ]](https://assets1.tamsnetwork.com/images/EC042017NF/154882s.jpg "Crumb Cake Stampin' Blends Combo Pack [ 154882 ]")
![Pecan Pie Stampin’ Blends Combo Pack [ 161674 ]](https://assets1.tamsnetwork.com/images/EC042017NF/161674s.jpg "Pecan Pie Stampin’ Blends Combo Pack [ 161674 ]")
![Timid Tiger Stampin’ Blends Combo Pack [ 165291 ]](https://assets1.tamsnetwork.com/images/EC042017NF/165291s.jpg "Timid Tiger Stampin’ Blends Combo Pack [ 165291 ]")
![Peach Pie Stampin’ Blends Combo Pack [ 163827 ]](https://assets1.tamsnetwork.com/images/EC042017NF/163827s.jpg "Peach Pie Stampin’ Blends Combo Pack [ 163827 ]")
![Pumpkin Pie Stampin' Blends Combo Pack [ 154897 ]](https://assets1.tamsnetwork.com/images/EC042017NF/154897s.jpg "Pumpkin Pie Stampin' Blends Combo Pack [ 154897 ]")
![Daffodil Delight Stampin' Blends Combo Pack [ 154883 ]](https://assets1.tamsnetwork.com/images/EC042017NF/154883s.jpg "Daffodil Delight Stampin' Blends Combo Pack [ 154883 ]")
![Darling Duckling Stampin’ Blends Combo Pack [ 165288 ]](https://assets1.tamsnetwork.com/images/EC042017NF/165288s.jpg "Darling Duckling Stampin’ Blends Combo Pack [ 165288 ]")
![Old Olive Stampin' Blends Combo Pack [ 154892 ]](https://assets1.tamsnetwork.com/images/EC042017NF/154892s.jpg "Old Olive Stampin' Blends Combo Pack [ 154892 ]")
![Mossy Meadow Stampin' Blends Combo Pack [ 154890 ]](https://assets1.tamsnetwork.com/images/EC042017NF/154890s.jpg "Mossy Meadow Stampin' Blends Combo Pack [ 154890 ]")
![Streaked Dots [ 165902 ]](https://assets1.tamsnetwork.com/images/EC042017NF/165902s.jpg "Streaked Dots [ 165902 ]")
![Early Espresso & Old Olive Linen Thread Pack [ 165986 ]](https://assets1.tamsnetwork.com/images/EC042017NF/165986s.jpg "Early Espresso & Old Olive Linen Thread Pack [ 165986 ]")
![Stampin' Cut & Emboss Machine [ 149653 ]](https://assets1.tamsnetwork.com/images/EC042017NF/149653s.jpg "Stampin' Cut & Emboss Machine [ 149653 ]")
![Paper Trimmer [ 152392 ]](https://assets1.tamsnetwork.com/images/EC042017NF/152392s.jpg "Paper Trimmer [ 152392 ]")
![Bone Folder [ 102300 ]](https://assets1.tamsnetwork.com/images/EC042017NF/102300s.jpg "Bone Folder [ 102300 ]")
![Stampin' Seal [ 152813 ]](https://assets1.tamsnetwork.com/images/EC042017NF/152813s.jpg "Stampin' Seal [ 152813 ]")
![Stampin' Dimensionals [ 104430 ]](https://assets1.tamsnetwork.com/images/EC042017NF/104430s.jpg "Stampin' Dimensionals [ 104430 ]")
![Multipurpose Liquid Glue [ 110755 ]](https://assets1.tamsnetwork.com/images/EC042017NF/110755s.jpg "Multipurpose Liquid Glue [ 110755 ]")
![Adhesive Sheets [ 152334 ]](https://assets1.tamsnetwork.com/images/EC042017NF/152334s.jpg "Adhesive Sheets [ 152334 ]")