
Hello! It’s been over two weeks since my last post. Some of my readers know that I run an information consulting business and I never know when work will come my way, which is what happened shortly after that post! I was also preparing to do a business presentation last week, so had to put my blogging on a short hiatus. With that said, I’ve been busy all month since starting up in-person classes again. It has been great to see my customers once again and to meet a few new customers from 2020 in-person for the first time! I have a bunch of projects that I will be sharing in more upcoming blot posts. Today’s project is another card I made with the beautiful Artistically Inked Suite.
Here is how I made the card.
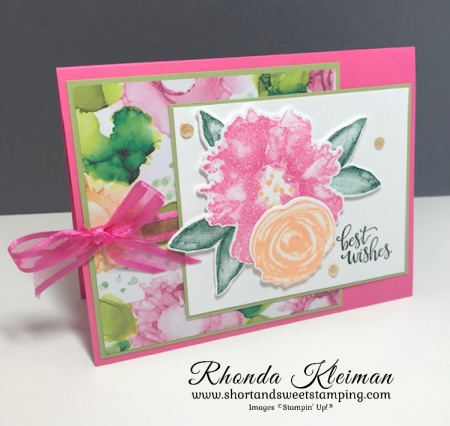
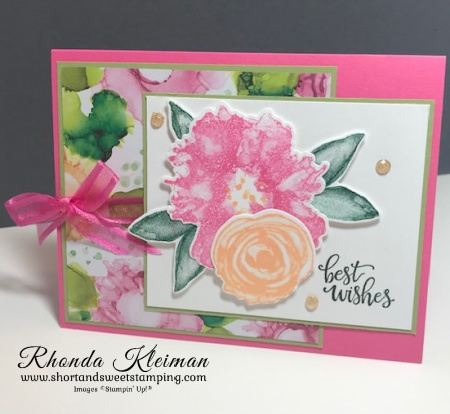
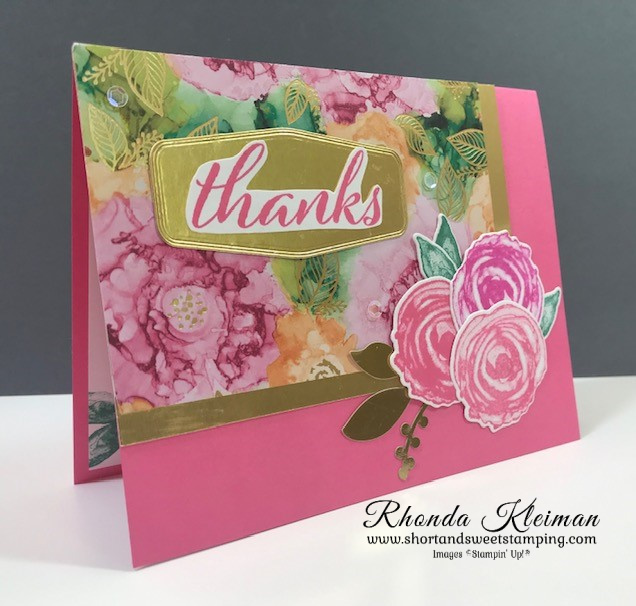
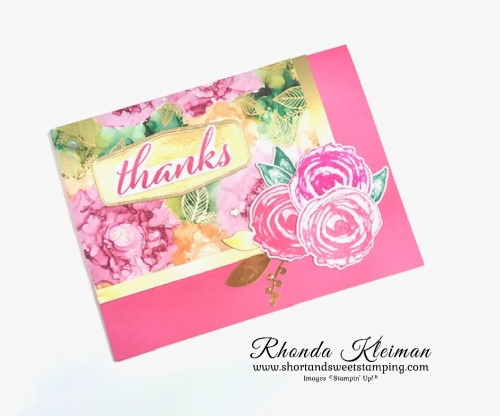
- Card base – cut piece of Polished Pink cardstock at 5 1/2″ x 8 1/2″, score at 4 1/4″, fold and crease with a bone folder.
- Cut piece of Pear Pizzazz cardstock at 4″ square. Cut piece of Expressions in Ink Designer Series Paper at 3 7/8″ square and adhere to Pear Pizzazz square.
- Cut another piece of Pear Pizzazz cardstock at 3 1/4″ x 4″. Cut piece of Basic White cardstock at 3 1/8″ x 3 7/8″. Stamp the “best wishes” greeting from the Artistically Inked stamp set with Evening Evergreen ink in bottom right corner. Adhere to Pear Pizzazz cardstock.
- Stamp all of the floral pieces on Basic White cardstock. Stamp the large flower with Polished Pink ink, stamping off once before stamping onto the cardstock. I found that the color was too intense for my liking without stamping off to tone it down a bit. Use the small stamp with the dots for the center of the flower. Stamp with Pale Papaya ink. Stamp the smaller flower with Pale Papaya ink. Stamp two double leaves and one single leaf with Evening Evergreen ink. Die cut all of the images with the Artistic Dies.
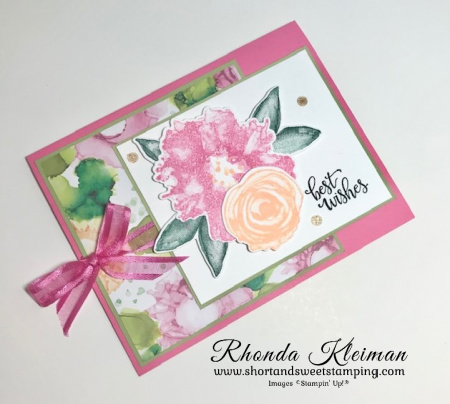
- Make the flower collage by first adhering the leaves under the Polished Pink flower with Mini Glue Dots. Adhere the Pale Papaya flower to the Polished Pink flower with liquid glue. Adhere the collage to the greeting piece with Stampin’ Dimensionals.
- Cut a 20″ piece of Polished Pink Open Weave ribbon and tie in a bow around the DSP piece. Adhere to card front. Adhere the floral piece over the DSP piece. Embellish with a few Pale Papaya Genial Gems.
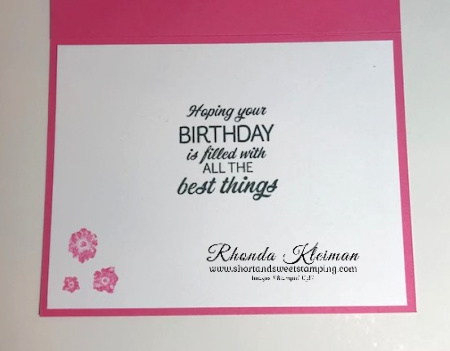
- Cut piece of Basic White cardstock at 4″ x 5 1/4″. Stamp the small flower grouping in lower left corner with Polished Pink ink, stamping off once before stamping onto cardstock. Stamp the birthday greeting from the Sunny Sentiments stamp set with Tuxedo Black Memento ink. I love the greetings in this stamp set, which can be found on page 38 in the 2021-2022 annual catalog. This has quickly become one of my new “go to” greeting sets! Adhere to inside of card.
Thanks for stopping by today!

The July-December 2021 Mini Catalog and August-September Sale-A-Bration promotion go live in just a few days on Tuesday, August 3rd! Customers that have shopped with me in the last year have already received their catalogs from me. If you do not have a demonstrator and would like copies of the catalogs please contact me and I would be happy to put them in the mail to you.


The August Paper Pumpkin, Hope Box, was designed by Shelli Gardner, cofounder of Stampin’ Up. The kit includes supplies to make nine cards with coordinating envelopes. The box is specially designed to turn into a Hope Box—a keepsake box full of cherished items to add hope to your life or in the lives of others. Coordinating colors are bright and cheery: Bermuda Bay, Blackberry Bliss, Bumblebee, Melon Mambo, Petal Pink, Pool Party, Poppy Parade. Subscribe now through August 10th. The kit will arrive in your mailbox around the 20th of August. For further information and to subscribe, click here to visit my Paper Pumpkin website.

Place an online order between $50 and $149 and use this host code for July. You will receive a free gift from me the following month. If your order is $150 or more DO NOT use the host code. You will qualify for Stampin’ Rewards.
 | ||
 | ||
 | ||
 |  | |
 |  |  |
 |  |  |
")
")
 Specialty Designer Series Paper")


 Open Weave Ribbon")


")


