Butterfly Beauty-Kylie’s International Blog Highlights

Hello! Today I’m participating in Kylie Bertucci’s International Blog Highlights. Readers get to vote on their top five favorites in the gallery and the top 10 winners will get to participate in an International Blog Hop later this month. The thank you theme is a way for us to show our appreciation to someone that has inspired, helped or supported us in some way. When I saw the Rainbow Glimmer Paper in the new annual catalog I immediately thought that it would work beautifully with the Butterfly Beauty dies and it did not disappoint! I combined it with the Artistry Blooms Designer Series Paper, which I knew I had to have the minute I laid eyes on it!
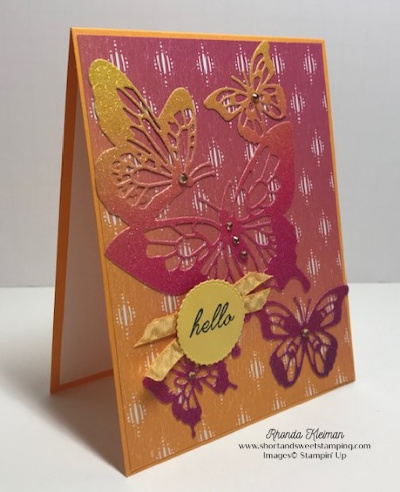
Here is how I made the card.

  • Card base – cut a piece of Mango Melody cardstock at 4 1/4″ x 11″, score at 5 1/2″ and fold in half.
  • Cut piece of Artistry Blooms DSP at 4 1/8″ x 5 3/8″ and adhere to card base. I knew I wanted to work with the orange & pink color palette so I cut the strip of DSP at the full 12″ length and then cut the piece down to show the portion of the strip that had the most Mango Melody in the gradation.
  • Cut strip of Rainbow Glimmer Paper at 4 1/2″ x 12″ and again, decide what gradation you want to use and make the final cut at 4 1’2″ x 6″. Run piece through a die cutting machine with one of the two large Butterfly Beauty dies. I chose the one that had the solid outside wings. Adhere to DSP.
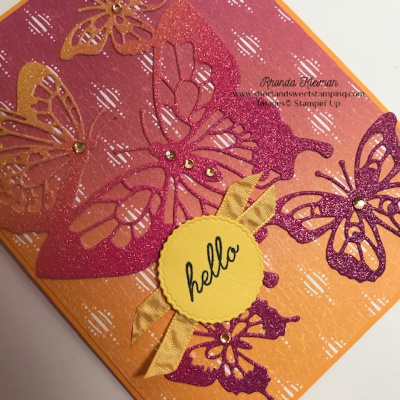
  • Stamp hello greeting from the Beauty Abounds stamp set with Tuxedo Black Memento black ink on scrap of Daffodil Delight cardstock. Cut out with the small circle die from the Tasteful Touches die set.
  • Cut two pieces of Daffodil Delight Ruched ribbon, trim ends and adhere, criss-cross to butterfly. I found that either the Tear & Tape or Stampin’ Seal+ worked best when adhering to the glimmer paper surface. Adhere stamped greeting over the center of the ribbon.
  • Adhere Champagne Rhinestones on the butterfly for some extra bling.
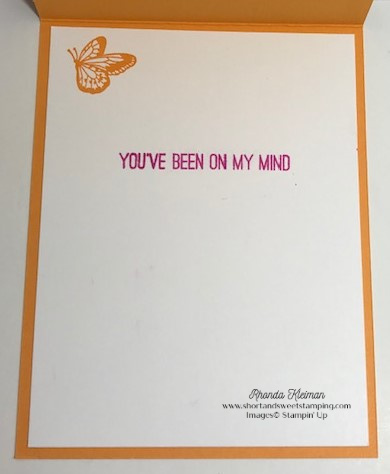
  • For the inside of the card, cut a piece of Whisper White cardstock at 4″ x 5 1/4″. Stamp greeting from Butterfly Gala stamp set with Magenta Madness ink. Stamp butterfly from Beauty Abounds stamp set with Mango Melody ink. Adhere to card.
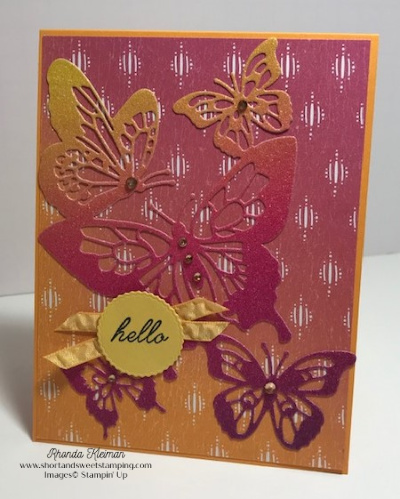
I had so much fun making this card and it turned out exactly as I had pictured it. I’d be so appreciative if you would vote for my card by clicking on the vote image below. To give a vote, once you are in the gallery, click on the heart at the top right hand side of the picture as the hearts appear.
Thanks for stopping by today!
Bonus Days are back once again! From July 1 through August 3rd, for every $50 you spend (before shipping & tax) you will receive a $5 Bonus Day coupon code that can be used from August 4th – 31st.

  • You must have an email address in order to participate because the codes can only be delivered electronically.
  • If you earn multiple coupons in a single order, all of the codes will be sent in one email. If you earn multiple coupons for multiple orders they will be sent in separate emails for each code earned.
  • There is no limit on the number of coupon codes you can earn during this promotion.
 Product List  
Paper Snips
[103579]
$10.00

Gingham Gala Card and Gift Box

Today I”m sharing a card and gift box I created with products from the Gingham Gala Suite pictured on pages 34-35 in the new Occasions catalog.  I love the Gingham Gala Designer Series Papers – the colors are so bright and cheery! For today’s projects I’m working with the Highland Heather paper.

Here is how I made the card.

  • Card base – Thick Whisper White cardstock cut at 4 1/4″ x 11″
  • Cut a piece of Highland Heather cardstock at 4 1/8″ x 5 3/8″ and attach to card base
  • Select one of the butterfly images from the Butterfly Gala stamp set and stamp onto a piece of Whisper White cardstock using black Memento ink.  You will note that each image has both a large and small butterfly on the same stamp.
  • Color butterflies with Stampin’ Blends.  For this card I used the dark and light Highland Heather and Pool Party markers and the light Old Olive marker.  It is very hard to see in the photo but I added clear Wink of Stella to both butterflies.  Stamp the middle part of the butterflies with black Memento ink.  I used the Stamparatus to line up the small stamps.
  • Punch both butterflies out with the Butterfly Duet punch, which includes both the large and small image on the same punch.  Add Mini Stampin’ Dimensionals to the backs of both butterflies
  • Cut a piece of Pool Party cardstock at 2 1/2″ x 3 1/4″.  Cut piece of Highland Heather paper from the Gingham Gala at 2 3/8″ x 3 1/8″ and attach it to the Pool Party cardstock.  Cut a piece of Highland Heather ribbon and tie around piece.  This ribbon is in the Organdy Ribbon Combo Pack in the Sale-A-Bration catalog.
  • Cut a piece of Pool Party cardstock at 2 1/2″ x 3 1/2″.  Cut a piece of Whisper White cardstock at 2 3/8″ x 3 3/8″.   Attach butterflies to Whisper White cardstock.  Stamp the “a little note” greeting in Heather Highland ink.  Attach to Pool Party cardstock.  Add a few of the smallest size of the Gorgeous Grape Glitter Enamel Dots.
  • Attach the gingham piece to the bottom right of the card and then attach the butterfly piece on top of the gingham piece.

  • For the inside of the card I cut a 1/2″ x 5 1/2″ strip of the Highland Heather Gingham Gala paper and attached it to the left side.  I carefully inked up just the small butterfly with black Memento ink and stamped it in the lower right corner.


Here is the coordinating gift box that I created using the Window Box Thinlits on page 232 of the annual catalog.


Here are the steps to make the box.

  • Cut a sheet of Highland Heather cardstock at 8 1/2″ x 11″ in half to give you two pieces at 5 1/2″ x 8 1/2″.  Using the Window Box framelit cut two pieces for the box.  This framelit cuts and scores at the same time.  Put the box together, folding at the score lines and adhering pieces together with either Tombow Multipurpose Glue or Tear & Tape.  Watch this video for complete instructions on how to put the box together.

  • Cut six 1 1/2″ squares of Highland Heather Gingham Gala DSP.  For the top of the box, trace the hexagonal shape of the framelit onto a piece of the DSP and cut out with a scissor.
  • Select one of the butterfly images from the Butterfly Gala stamp set and stamp onto Whisper White cardstock using black Memento ink.  For the box I stamped and colored two large butterflies and one small one.  I chose a different stamp for the box than what I used for the card.
  • Color butterflies with Stampin’ Blends.  I used the dark and light Highland Heather and Pool Party markers and the light Old Olive marker and added clear Wink of Stella.  Stamp the middle part of the butterflies with Black Memento ink, using the Stamparatus to line up the small stamps.
  • Punch the butterflies out with the Butterfly Duet punch.  Add Mini Stampin’ Dimensionals to the backs of the butterflies
  • Stamp a greeting of your choice with Highland Heather ink on a piece of Whisper White cardstock.  I used the “you are amazing” greeting from the Amazing Life stamp set, pictured on page 28 in the Occasions catalog.  Punch out greeting using the Classic Label punch, pictured on page 210 in the annual catalog and add a few Mini Stampin’ Dimensionals on the back.
  •   Adhere gingham pieces to box, adhere the two large butterflies to the top of the box, along with the greeting.  Adhere the small butterfly to the front of the box.

To purchase any of the products used in these projects click here.

Thanks for stopping by today!


Product List