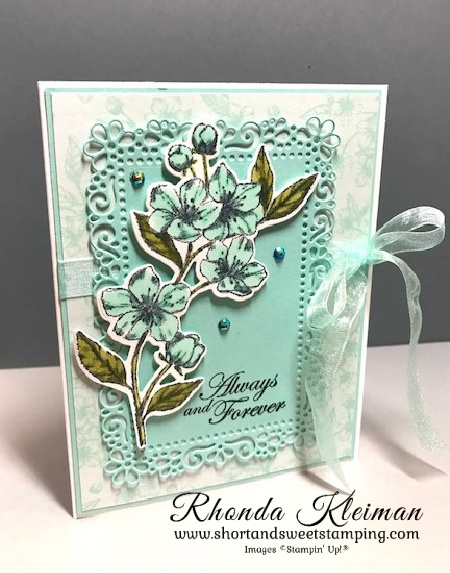
Hello! My cousin’s daughter was married two weeks ago so I needed to make a wedding card. It’s been a few years since I’ve had to make a wedding card! All of the wedding stamp sets I have are retired so I turned to Pinterest for some inspiration and saw a number of ideas for cards that use the Forever Blossoms stamp set. I own this beautiful stamp set and haven’t used it recently so decided to give it a little love.

Here’s how I made the card.
- Card base – Cut a piece of Thick Basic White cardstock at 5 1/2″ x 8 1/2″, score at 4 1/4″, fold and crease with a bone folder.
- Cut a piece of Pool Party cardstock at 4 1/8″ x 5 3/8″ and a piece of coordinating Designer Series Paper at 4″ x 5 1/4″. I used the Parisian Blossoms Specialty Designer Series Paper, which is now retired. It was part of the Parisian Blossoms Suite in the January-June 2020 Mini Catalog. Adhere the two pieces together. Cut a 24″ length of Pool Party Sheer Ribbon and tie in a bow around the piece. Adhere piece to card front.
- Run a 4″ x 5″ piece of Pool Party cardstock through your die cutting machine with the next-to-largest die in the Ornate Layers die set. Stamp the “Always and Forever” greeting from the Forever Blossoms stamp set with Tuxedo Black Memento ink in bottom right corner.
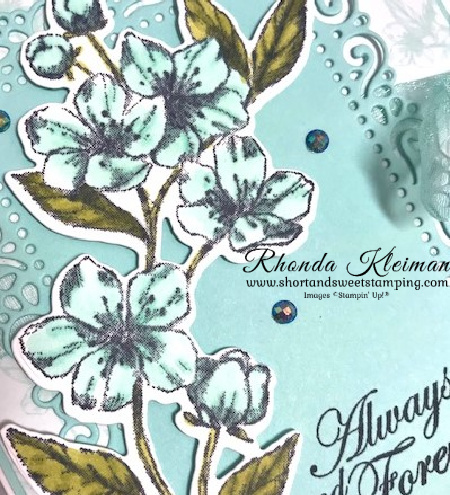
- Stamp the large floral image from the stamp set with Memento ink on piece of Basic White cardstock. Color the flowers with the light and dark Pool Party Stampin’ Blends and color the leaves with the light and dark Old Olive Stampin’ Blends. Run through your die cutting machine with the coordinating die from the Cherry Blossoms Dies.

- Adhere the Pool Party Ornate Layer piece to card front. Adhere the floral piece over the Ornate Layer piece with Stampin’ Dimensionals.
- Add a bit of bling to accent the floral piece by adhering three Night of Navy Blue Adhesive-Backed Gems.
- For the inside of the card I stamped another greeting from the Forever Blossoms stamp set with Memento ink. I also stamped a blossom in the lower left corner and colored it in with the Pool Party Stampin’ Blends.

Thanks for stopping by today!


Place an online order between $50 and $149 and use this host code for September. You will receive a free gift from me the following month. If your order is $150 or more DO NOT use the host code. You will qualify for Stampin’ Rewards.


Join Stampin’ Up! now through September 30th. You get to select $125 worth of products for only $99 and will also get a FREE bundle from the Holiday Catalog! The kit ships for free. I’d love to have you join my team. Become a happy discount shopper or build a business – the choice is yours! Click here for the benefits of joining Stampin’ Up!
Here is a list of bundles you can select from.


Experience everything the autumn season has to offer with the Haunts & Harvest Paper Pumpkin Kit! This month’s kit includes enough supplies to create 12 treat boxes—4 each of 3 designs. That means you can take your pick of apple, pumpkins, or jack-o-lantern treat boxes! Plus, the Paper Pumpkin box is designed to easily transform into a vintage wheelbarrow for you to display your harvest! The kit contains enough supplies to create 12 treat packages—4 each of 3 designs. The all-inclusive kit includes printed die-cut boxes, die-cut sheets, adhesive, and more! Finished treat box size: 2-1/2″ x 2″ (6.4 x 5.1 cm). Coordinating colors are Basic Black, Pale Papaya, Poppy Parade, Pumpkin Pie, Soft Succulent. Subscribe now through September10th. The kit will arrive in your mailbox around the 20th of the month. For further information and to subscribe, click here to visit my Paper Pumpkin website.
Product List


