Hello!
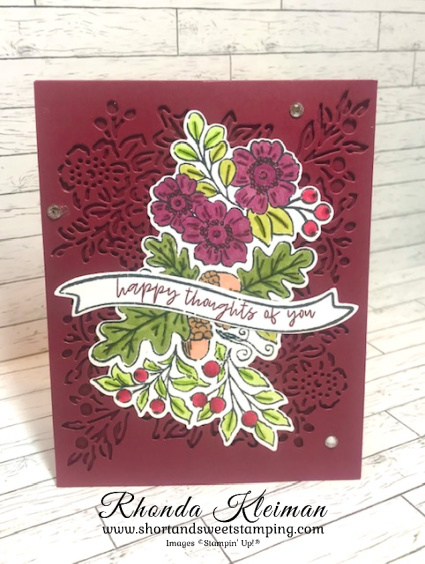
Today I’m featuring another one of the cards we recently made in my Fall Card class last month. This card uses the Fond of Autumn Stamp set and the Autumn Bouquet Dies. I decided to use Merry Merlot for the card base and detailed die cut layer. It is a color I love but don’t get to use often. I think it is a deep, rich color that goes well with many fall colors.
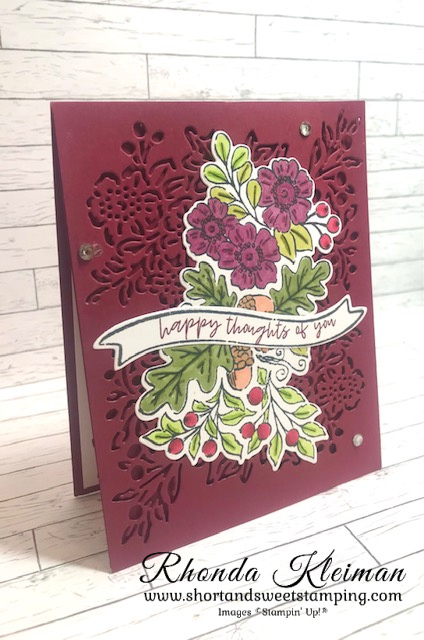
Here is how I made the card.
- Card base: Cut a piece of Merry Merlot cardstock at 4 1/4″ x 11, score at 5 1/2″, fold and crease with a bone folder.
- Cut another piece of Merry Merlot cardstock at 4 1/4″ x 5 1/2″. Run through die cutting and embossing machine with the detailed floral die. You will do this twice. First position the die at the top of the piece of cardstock. Once that is done, position the die at the bottom of the cardstock, and reverse the direction of the die. Adhere to card base with Stampin’ Dimensionals.
- Stamp full floral image with Memento Black ink on piece of Basic White cardstock cut at 3 1/2″ x 5 1/2″. Color the image with these Stampin’ Blends using both dark and light: Mossy Meadow, Old Olive, Granny Apple Green for the leaves; Blackberry Bliss for the large flowers; Cherry Cobbler for the berries; Natural Tones Medium & Medium Light for the acorns. Run through die cutting and embossing machine with the large open floral die.
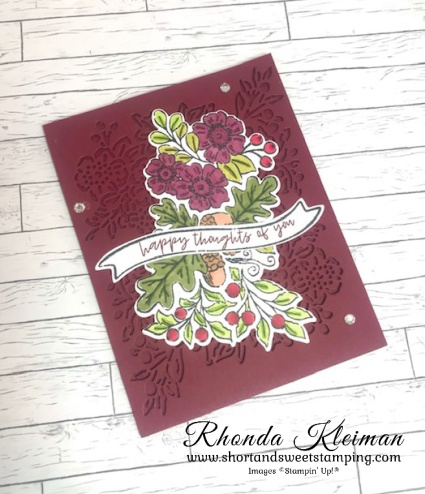
- Stamp banner image with Memento Black ink on piece of Basic White cardstock cut at 1″ x 4 1/2″. Stamp the “happy thoughts of you” greeting inside the banner. In order to get the greeting to fit in the curves, because the stamp is photopolymer, you can slightly bend it on your acrylic block. Position greeting to make sure it fits and then ink up the stamp with Merry Merlot ink and stamp the greeting. Run through die cutting and embossing machine.
- Adhere the floral piece to the card. Adhere the banner over the floral piece.
- Embellish card with a few Rhinestone Basic Jewels.
Thanks for stopping by today!


Now is also a great time to join Stampin’ Up! Between October 4-31 you will get even MORE FREE products in the starter kit. Get $155 worth of products for only $99. You can select products from the annual catalog or current mini catalog for your personalized kit. The kit ships for free. The starter kit also includes a FREE past Paper Pumpkin kit. Become a happy shopper and enjoy a discount of 20%-25% as a hobby stamper – you do NOT have to do this as a business! Click here for additional information about the benefits of joining Stampin’ Up! I’d love to have you on my team!

Place an online order between $50 and $149 and use this host code for October. You will receive a free gift from me the following month. If your order is $150 or more DO NOT use the host code. You will qualify for Stampin’ Rewards.
Product List


