Final Day for Retiring January-June Mini Catalog

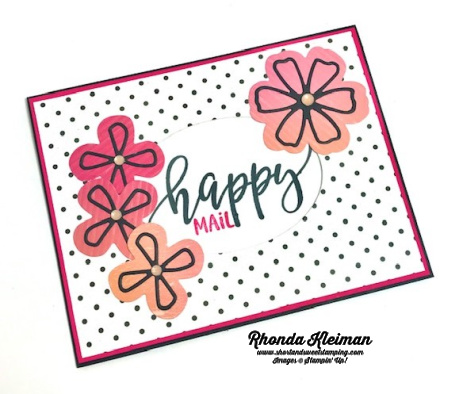
Tomorrow, June 30th is your last chance to purchase products from the January-June 2021 Mini Catalog. Click here to see the retiring list. These products are no longer available:

  • True Love Designer Series Paper #154281
  • Forever & Always Stamp Set #154343
  • Hearts & Kisses Stamp Set #154345
  • Kangaroo & Company Stamp Set #154502
  • Wrapped Bouquet Stamp Set #154550
  • Quite Curvy Stamp Set #154430
  • Dandy Laser-Cut Paper #154300
  • Happy Thoughts Stamp Set #154507
  • Treasured Medallion Stamp Set #154437
  • Friendly Flamingo Stamp Set #154386
  • Shark Frenzy Stamp Set #154388
  • Hey Girlfriend Stamp Set #154516
  • Ice Cream Corner Designer Series Paper #154567
  • Woodland Wonder Stamp Set #155321
  • Snail Mail Designer Series Paper #154577
  • Clever Clasps #154564
  • Delicate Petals Stamp Set #154475
  • Floating & Fluttering Stamp Set #154424
  • Flowering Vines Dies #154332
  • Oval Occasions Stamp Set #154477
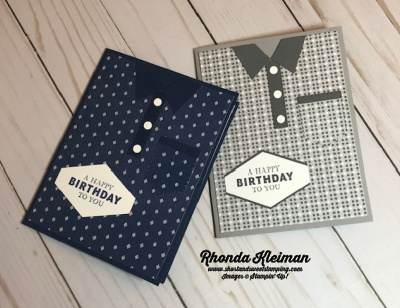
  • Well Suited Designer Series Paper #154562
  • A Cut Above Stamp Set #154448
  • Ride the Range Stamp Set #154553
  • Treasures of Life Stamp Set #154519

Starting July 1st these Designer Series Papers are on sale at 15% off.

  • Beauty of the Earth
  • Bloom Where You’re Planted
  • Hand-Penned
  • In Good Taste
  • In the Wild
  • Pansy Petals
  • Sweet Symmetry
  • Tidings of Christmas
  • You’re a Peach

Thanks for stopping by today!

Place an online order between $50 and $149 and use this host code for June. You will receive a free gift from me the following month.  If your order is $150 or more DO NOT use the host code.  Click here for instructions on using the host code.

Last Day for Best Deal to Join Stampin’ Up!

Today is the last chance to take advantage of this best deal to join Stampin’ Up! and become a Happy Shopper! You get to choose $155 worth of products for only $99, free shipping and a free Paper Pumpkin kit. These are some of the benefits of joining:

  • This is a great way to save on your crafting hobby – you will receive a 20%-25% discount on every order you place. This discount is in addition to the already discounted prices on retiring products, bundles, and clearance items! There is no obligation for you to build a business or host workshops!
  • Get early access to new catalogs and products. Demonstrators get to place pre-orders one month before they are available to customers.
  • Opportunity to attend demonstrator-only events.
  • The chance to earn a modest supplemental income, should you choose.
  • Be a part of my team.

Click here for more information. Have questions? Please feel free to send me a message.

The January-June 2021 Mini Catalog is retiring on June 30th. Starting tomorrow, June 1st, many products will be available at reduced prices from 10%-50% off! If you still have items on your wish list, now is the time to shop because these products will only be available while supplies last. Click here to see the retiring list.

Thanks for stopping by today!

Place an online order between $50 and $149 and use this host code for May. You will receive a free gift from me the following month.  If your order is $150 or more DO NOT use the host code.  Click here for instructions on using the host code.

Rainbow Glimmer Butterfly Brilliance

Hello! It’s been a while since I last posted. Sometimes I don’t know where the time goes! Today’s card is one of the projects from my May Class to Go featuring the Butterfly Brilliance bundle. It was scheduled before the pretty Butterfly Bijou Designer Series Paper sold out, so I still went ahead with the class since I had a full package of the DSP that I was able to include in several projects. However, I wanted to show possibilities for using the bundle without the coordinating paper and this is one of the cards I came up with, using the fun Rainbow Glimmer Paper.

Here is how I made the card.

  • Daffodil Delight Card base – cut at 4 ¼” x 11”, score at 5 ½”, fold and crease with bone folder.
  • Cut piece of Basic White cardstock at 4 1/8″ x 5 3/8″. Run through the Stampin’ Cut & Emboss Machine with the Tasteful Textile 3D embossing folder.  Adhere to card front
  • Cut a 3″ x 12″ strip of the Rainbow Glimmer Paper. Cut the strip into five different color sections.   Cut five pieces of Adhesive Sheet and apply to the backs of the glimmer paper. Run five different sizes of butterflies from the Brilliant Wings dies through the die cutting machine.  To adhere butterflies, pull off the backings from the adhesive sheets and arrange on card front, leaving space for a small greeting. If you don’t have adhesive sheets you can apply small dots of liquid glue on the back of each butterfly.
  • For the greeting, I used the Many Messages stamp. It is in the January-June Mini Catalog and has carried over to the 2021-2022 Annual Catalog, along with the coordinating die. I use the Stamparatus when I work with this stamp. Since all of the greetings are on the one stamp I just inked up the section with the greeting I wanted to use with Versamark, placed a scrap piece of Basic Black cardstock in the Stamparatus and stamped the greeting. After removing the cardstock sprinkle it with White Embossing Powder and set with the heat tool. To die cut greeting, position the Messages Die so that the correct part of the die matches up with the greeting. Adhere to card front with a Stampin’ Dimensional.
  • Cut a piece of Basic White cardstock at 4″ x 5 1/4″ and adhere to inside of card.  Add greeting of your choice.
  • Embellish card front by adding large and small Matte Black Dots to the centers of the butterflies.

Thanks for stopping by today!

There is less than a week remaining to take advantage of this great deal to join Stampin’ Up! and become a Happy Shopper! You get to choose $155 worth of products for only $99, free shipping and a free Paper Pumpkin kit. These are some of the benefits of joining:

  • This is a great way to save on your crafting hobby – you will receive a 20% discount on every order you place. There is no obligation for you to build a business or host workshops!
  • Get early access to new catalogs and products.
  • Opportunity to attend demonstrator-only events.
  • The chance to earn a modest supplemental income, should you choose.
  • Be a part of my team.

Click here for more information. Have questions? Please feel free to send me a message.

Product List
Messages Die
[154422]
$34.00

Place an online order between $50 and $149 and use this host code for May. You will receive a free gift from me the following month.  If your order is $150 or more DO NOT use the host code.  Click here for instructions on using the host code.

Fine Art Floral Cards

Hello! Today I’m sharing two cards I made with the Fine Art Floral Designer Series Paper and the Golden Garden Designer Specialty Acetate from the Fine Art Floral Suite. The DSP is beautiful on its own, however, the acetate adds a wow pop of gold! I used two different sheets of the DSP and the coordinating acetate sheets. I made a bunch of these cards so I could have a few extras on hand.

Here is how I made the cards.

  • For the card bases I chose a few different colors of cardstock that coordinated with the DSP. For these two cards I used Poppy Parade and Flirty Flamingo. Cut cardstock at 4 1/4″ x 11″, score at 5 1/2″, fold and crease with a bone folder.
  • Cut one piece each of Flirty Flamingo and Poppy Parade cardstock at 1″ x 4″.
  • Cut piece of Basic White cardstock at 4 1/8″ x 5 3/8″ and adhere to front of card base.
  • Overlay the acetate sheet over the DSP to make sure that the two designs line up in the right direction. Once that is done, put the acetate sheets aside and cut strips of the DSP at 4″ x 12″ and then cut the length of the strip down to 5 1/4″. You will get two full pieces per strip.
  • Cut strips of the acetate sheets at 4″ x 12″ and then cut the length of the strips down to 5 1/4″. You will get two full pieces from each strip. Match each of these pieces with the coordinating DSP pieces.
  • To adhere the acetate to the DSP adhere a few mini glue dots on the back of acetate sheet in spots where they will not show.
  • Stamp greetings from the Art Gallery stamp set on scrap pieces of Basic White cardstock with Flirty Flamingo and Poppy Parade ink. Cut with the label dies from the Floral Gallery dies. I used the thank you and birthday greetings. Adhere to the 1″ cardstock strips. Adhere strips to the DSP pieces. I didn’t want the large flowers to be covered up by the strip so for each piece I adhered them either higher up or lower down.
  • Cut a 24″ length of Fine Art Floral ribbon and tie in a bow around the DSP piece over the cardstock strip. Trim ends. This ribbon is so soft to work with and adds a touch of elegance to the cards.
  • Adhere DSP piece to the Basic White cardstock piece on the card front.
  • Cut another piece of Basic White cardstock at 4″ x 5 1/4″ and stamp a greeting or leave blank. I decided to leave the cards I made blank so I could personalize them for each recipient.

Thanks for stopping by today!

There are only five days remaining before the 2020-2021 Annual Catalog retires on May 3rd. While some products are now sold out, there are still many remaining products available at up to 75% off, while supplies last. Click here to shop for last-chance products in my online store.

The 2021-2022 Annual Catalog ordering period begins on Tuesday, May 4th!

Please use this April Host Code when you shop in my online store if your order is between $50 and $149.00 and you will receive a free gift from me. If your order is $150 or more, DO NOT use this code, as you will be entitled to Stampin’ Rewards. You will still receive the free gift from me.

Product List
Paper Snips
[103579]
$10.00

Pretty Perennials Happy Mail

Hello! Welcome to Kylie Bertucci’s Demonstrator Training Blog Hop for April. I’m part of a group of Stampin’ Up! demonstrators from around the world that participate in Kylie’s program for building our businesses. The theme for this year is thank you cards that we make as a way to show appreciation to our customers. Please be sure to click on the names in the list at the end of this post to hop around and view the beautiful projects posted by these talented stampers.

Today’s card features the Pretty Perennials bundle from the mini catalog, along with two favorite products that will be retiring on May 3rd. This is the last chance for you to purchase the fabulous Artistry Blooms Designer Series Paper and the Layering Ovals Dies. I was shocked to see that the dies were retiring – these are a staple for me!! Grab them now while you can – I just checked the inventory status and it is getting low.

Here is how I made the card.

  • Card base – cut a piece of Basic Black cardstock at 5 1/2″ x 8 1/2″, fold in half and crease with a bone folder.
  • Layering mat – cut a piece of Melon Mambo cardstock at 4 1/8″ x 5 3/8″.
  • Cut piece of polka dot paper from the True Love Designer Series Paper at 4″ x 5 1/4″. Using the third largest oval from the Layering Ovals dies, center it on the DSP and cut.
  • Cut a piece of Basic White cardstock at 3 1/2″ x 4 1/2″. Stamp the “happy” greeting from the Pretty Perennials stamp set in center with Memento Tuxedo Black Ink. Stamp “mail” with Melon Mambo ink directly under the “happy.” Adhere to the polka dot DSP piece.
  • Using the Perennial Petals Dies, cut one large and three next-to-largest flowers from the Artistry Blooms Designer Series Paper. I used two different papers that featured the pinks and oranges, and cut them out from different sections of the paper to get a variety of colors from the one sheet of paper.
  • Die cut the Basic Black petal overlays from scrap pieces that have been backed with pieces of an adhesive sheet. Adhere them to the flowers. Adhere the flowers to the polka dot DSP piece, arranging them around the outside of the oval.
  • Adhere piece to the Melon Mambo cardstock mat. Adhere this piece to the Basic Black cardbase with Stampin’ Dimensionals.
  • Adhere Elegant Faceted Gems to the flower centers. I used the Petal Pink gems.
  • Card inside – cut piece of Basic White cardstock at 4″ x 5 1/4″. I die cut two small flowers from the Artistry Blooms paper and adhered them in the lower left corner. Adhere to inside of card.

Thanks for stopping by today!

Click here to see the list of retiring products, some at prices discounted up to 60%. Products are only available while supplies last.

Product List

Hydrangea Hill-Kylie’s International Blog Highlights

Today I’m participating in Kylie Bertucci’s International Blog Highlights. Readers get to vote on their top five favorites in the gallery and the top 10 winners will get to participate in an International Blog Hop later this month. The theme is “thank you” and is a way for us to show our appreciation to someone that has inspired, helped or supported us in some way. Today’s card is a fun fold that features the beautiful Hydrangea Hill Suite.

Here is how I made the card.

  • Card base – cut a piece of Purple Posy cardstock at 4 1/4″ x 5 1/2″.
  • Cut piece of Highland Heather Mercury Glass Designer Acetate at 4″x 5 1/4″ and adhere with Stampin’ Seal+ to card base.
  • Cut piece of Basic White cardstock at 4 1/4″ x 11″, score at 1 1/2″, 3″, 5 1/2″, 8″, fold and crease sharply with a bone folder.
  • Cut three coordinating pieces of Hydrangea Hill Designer Series Paper at 1 1/4″ x 4″, 2 1/4″ x 4″, 2 3/4″ x 4″and adhere to folds.
  • Stamp two of the flower tops of the hydrangea. Stamp one with Gorgeous Grape ink on a piece of Gorgeous Grape cardstock and the other with Seaside Spray ink on a piece of Purple Posy cardstock. Stamp the leaf part of the flower with Old Olive ink on piece of Old Olive cardstock. Die cut with the coordinating Hydrangea dies. Trim away the stems. Die cut one set of flower petals with Purple Posy cardstock and two sets with Gorgeous Grape cardstock.
  • Adhere the flower petals on the two flowers. Arrange them around the flowers before adhering and then do one at a time with a tiny dot of liquid glue in the center of each petal so that you have some wiggle room to move them around to adjust how they fit. I found it very helpful to use a tweezer to hold the petals while applying the glue and then flipping to the other side to adhere.
  • Adhere the two flowers together and then adhere the leaves.
  • Stamp “For You” greeting for front of card with Gorgeous Grape ink on scrap piece of Purple Posy cardstock and cut with the tag die.
  • Cut two lengths of white bakers twine and tie in a bow.
  • Adhere the flower to the card front, making sure to only glue the left half of the piece onto the front flap so that the card can open. Adhere the tag under the bottom of the Gorgeous Grape flower. Adhere the bow with a mini glue dot.
  • For the inside of the fun folds, on the first panel, stamp the small open petal randomly with Misty Moonlight ink.
  • Stamp greeting for inside of card with Gorgeous Grape ink on scrap piece of Purple Posy cardstock. Cut with the label die from the Hydrangea Dies set. Adhere to top of the larger panel.
  • Fussy cut one of the floral clusters from the DSP and adhere under the greeting.
  • To finish off the card, add one of the Gorgeous Grape Pastel Pearls to the tag and two more around the card front.

I’d be so appreciative if you would vote for my card! Click on the vote image below. Once you are in the gallery, click on the heart at the top right hand side of the picture as the hearts appear.

Thanks so much for stopping by today!

Product List
Paper Snips
[103579]
$10.00

Handsomely Suited Polo Shirt Cards

Hello! I needed a few masculine birthday cards so I turned to the Well Suited Suite in the mini catalog. I saw a few cute cards made by Tina Zinck and Michelle Strazds on Pinterest that were made to look like polo shirts and CASEd them, making a few changes. I did one in Night of Navy and the other in Smoky Slate. They were a lot of fun and very easy to put together!

Here is how I made the cards.

  • Card base – cut piece of Night of Navy or Smoky Slate cardstock at 5 1/2″ x 8 1/2″, score at 4 1/4″, fold and crease with a bone folder.
  • Cut piece of Well Suited Designer Series Paper at 4″ x 5 1/4″. Cut a “V” in the center. I used the collar die from the Suit and Ties Dies and made the “V” by centering the die at the 2″ mark, slightly below the top of the DSP, traced with a pencil and cut out with Paper Snips.
  • Die cut collar and long strip with either Night of Navy or Basic Gray cardstock. The long strip will be used for the button placket. Trim the strip to 2″ and adhere to DSP below the center of the “V.” Adhere collar piece.
  • Die cut pocket from DSP and die cut the contrasting trip with the small strip die. Adhere to top of pocket. Adhere to DSP base.
  • Die cut Basic White buttons with the button die. There are six buttons on the one die so I used three for each card. Adhere them to the placket. I used the putty tip on the Take Your Pick tool to pick up each button, place them on Mini Glue Dots, and then onto the placket.
  • For the Night of Navy card stamp the birthday greeting from the Handsomely Suited stamp set with Night of Navy ink on scrap piece of Basic White cardstock and punch out with the Tailored Tag punch. Adhere to DSP base. Adhere DSP piece to Night of Navy card base.
  • For the Smoky Slate card stamp the birthday greeting with Basic Gray ink. Punch out with the Tailored Tag Punch. Punch another tag with a scrap piece of Basic Gray cardstock. Cut in half horizontally. Adhere one piece to top of tag and the other piece to the bottom of the tag so that it frames the Basic White tag. Adhere to DSP base and adhere entire piece to Smoky Slate card base.
  • Cut a piece of Basic White cardstock at 4″ x 5 1/4″. Leave blank or stamp a greeting and adhere to inside of card.

Thanks for stopping by today!

Product List
Paper Snips
[103579]
$10.00