
Hello!
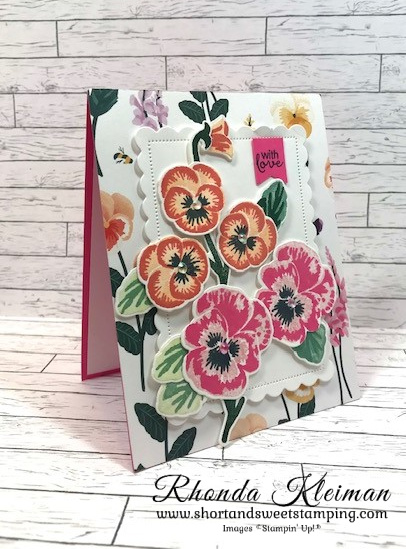
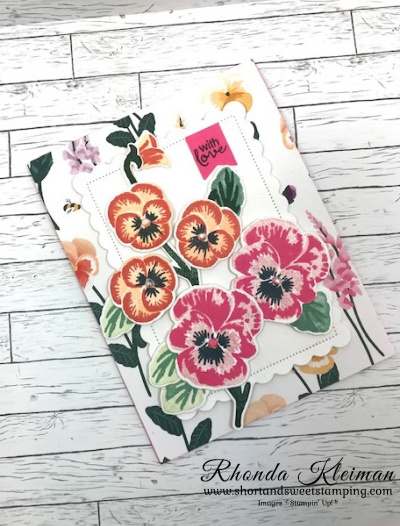
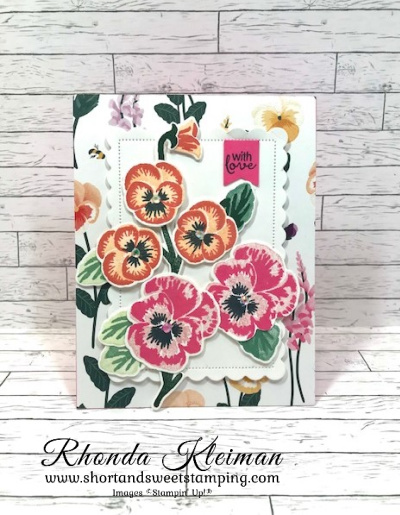
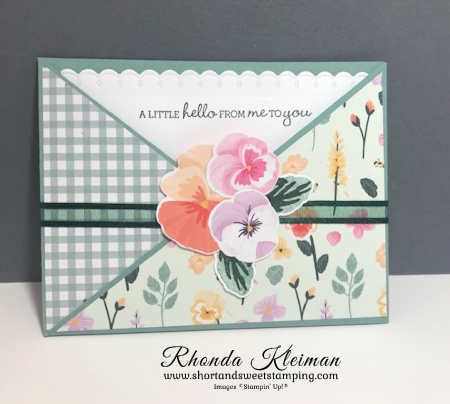
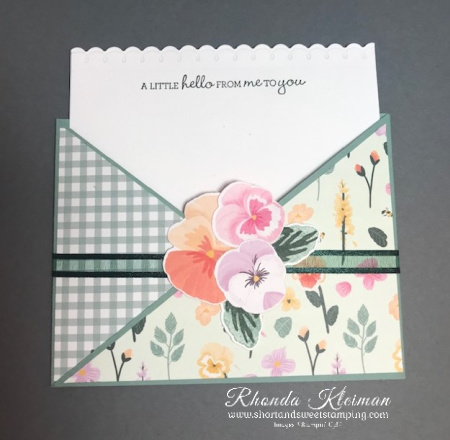
I’m finally back to posting after an absence of over two months! In the next two weeks I will be featuring a backlog of cards I’ve made during that time, mixed in with projects featuring products from the new annual catalog. Today’s card features the Pansy Patch bundle, which has carried over into the new catalog. Pansies are one of my favorite flowers so when the Pansy Petals Suite was introduced in the current catalog, I was very excited! As excited as I was, the stamp set and dies can be a little intimidating to figure out how to use them, so I didn’t do much with them until recently, when Kylie Bertucci offered a creative retreat that featured this suite. After the retreat, attendees received a tutorial with 21 exclusive projects. I CASE’d today’s card from one of Bruno Bertucci’s projects. I kept the design but totally changed up the Designer Series Paper and ink colors for a springtime feel.
Here is how I made the card.
- Card base – cut a piece of Polished Pink cardstock at 4 1/4″ x 11″, score at 5 1/2″, fold and crease with a bone folder.
- Cut a piece of Pansy Petals Designer Series Paper at 4 1/4″ x 5 1/2″ and adhere to card front. (This DSP is not carrying over into the new catalog and is now sold out.)
- Die cut a piece of Basic White cardstock at 3 1/2″ x 4 1/2″ and run through the Stampin’ Cut and Emboss Machine with the next-to-largest rectangle from the Scalloped Contours Dies. Adhere to card front with Stampin’ Dimensionals.
- This is a two-step stamp set. Stamp two of the large pansies. Stamp the base with Blushing Bride ink, stamping off once before stamping onto a piece of Basic White cardstock. Stamp the detailed stamp over the base with Polished Pink ink. Stamp the center of the flower with Blushing Bride ink, stamping off once. Stamp the beard with Tuxedo Black Memento ink. Cut out with the large pansy from the Pansy Dies.
- Stamp three of the smaller pansies. Stamp the base with Pale Papaya ink. Stamp the detailed stamp over the base with Calypso Coral ink. Stamp the beard with Tuxedo Black Memento ink. Cut out with the smaller pansy from the Pansy Dies.
- Stamp the pansy bud base with Pale Papaya ink and stamp the detailed stamp with Calypso Coral ink. Cut out with the bud from the Pansy Dies.
- Stamp one bud stem and two long stems with Evening Evergreen ink and cut out with Pansy Dies.
- Stamp three leaves from the base stamp with Soft Sea Foam ink and stamp the detail stamp with Soft Succulent ink. Stamp two leaves with Soft Succulent ink for the base and Evening Evergreen ink with the detail stamp. Use both leaf shapes. Cut out with the two different leaf dies.
- Stamp greeting with Memento ink on a 5/8″ x 3/4″ piece of Polished Pink cardstock and flag one end. I needed a small greeting to fit into the space where I wanted the greeting go, so I chose one of the greetings from the Hydrangea Haven stamp set.
- To assemble the flowers and leaves, first adhere the leaves to the flowers with Mini Glue Dots. Adhere the bud to the bud stem with a drop of liquid glue. Adhere the stems to the Basic White scalloped rectangle with Mini Stampin’ Dimensionals. Adhere the flowers to the stems with Stampin’ Dimensionals, as shown.
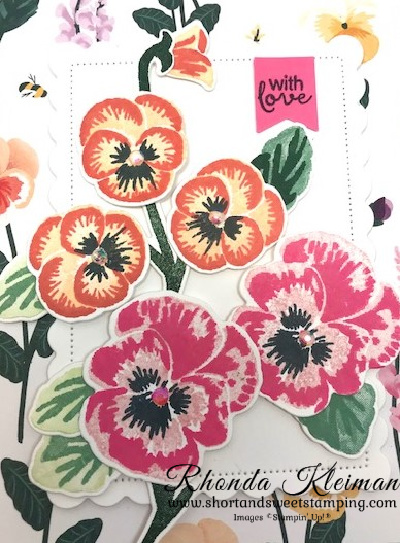
- Finish off the card by adding some bling. I used the 2021-2023 In Color Jewels for the centers of the flowers. (These jewels are on the last chance list.)
Thanks for stopping by today!


2022-2023 Annual Catalog goes live on May 3, 2022!

There are just a few days left to purchase items that will be retiring from the 2021-2022 Annual Catalog. May 2nd is the last day to order from this catalog. Click here to view the Last Chance list. Everything on the list is while supplies last, so a number of products are now sold out.

$99 Starter Kit Promotion Begins on May 3, 2022
Join Stampin’ Up! from May 3-May 31. Choose $125 worth of products for $99 plus get $66.50 in bonus 2022-2024 In Color Products for free! This includes the Ink Pad Color Collection, In Color Cardstock Collection, In Color 6″ x 6″ Designer Series Paper Collection and In Color Grid Paper. In addition, you will receive a free Paper Pumpkin Kit and free shipping. You do not have to build a business! Become a happy discount shopper and enjoy a minimum 20% discount on all future orders. For further information about joining my team, click here.
Product List ") | ||
 |  | |
 |  |  |
 |  |  |
 |  |  |
 |  |
")

 Designer Series Paper")


 Open Weave Ribbon")


