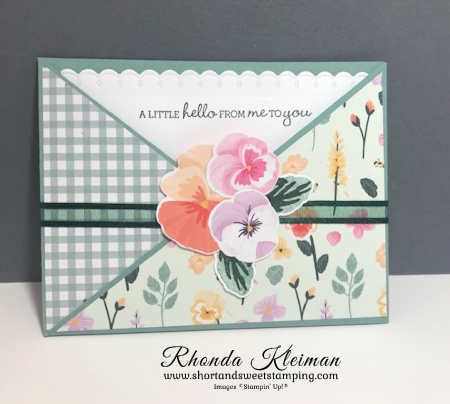
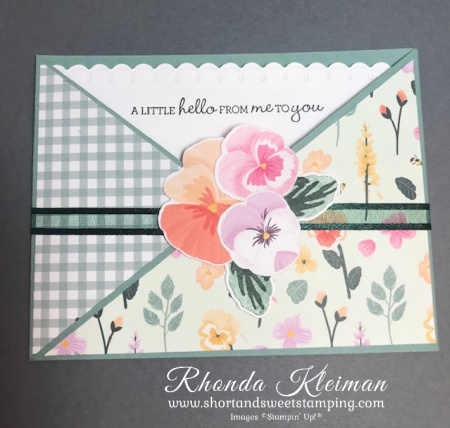
Hello! Today I’m sharing an envelope fold card that features the pretty Pansy Patch Suite. Pansies are one of my favorite flowers so I was happy to see this sweet set of products in the annual catalog. I didn’t do much stamping on this card – just the leaves and the greeting. The little pansy collage was done by die cutting the pansies from one of the sheets of the Pansy Petal Designer Series Paper that coordinates with the pansy dies.

Here is how I made the card. There are lots of steps, however, it wasn’t difficult!
- Cut two pieces of Soft Succulent cardstock at 4 1/4″ x 11″. Score at 5 1/2″.
- Place one piece in your paper trimmer and cut from the score line diagonally down to the opposite bottom corner. Repeat with other piece. You can put both pieces together and cut both at the same time if you prefer but you will have to add a little more pressure to make sure you cut evenly through both pieces. Fold on the score line and sharply crease with a bone folder. Adhere the two pieces together to form the card base. Use either Stampin’ Seal+ or Tear & Tape.
- Cut a piece of Pansy Petal DSP at 4″ x 5 1/4″ and cut on the diagonal. If you don’t want to use the reverse side of the paper you can cut two different pieces. Note: if using paper with a directional pattern, make sure you are cutting it on the diagonal in the right direction!
- Adhere DSP to the diagonal folds.
- Adhere the diagonal sides to the bottom of the card base. Decide which DSP you would like to show more of and adhere the other flap first, placing a line of Tear & Tape at the bottom inside flap. Then place a piece of Tear & Tape along the bottom of the other flap and fold over the first flap to make the pocket.

- Cut a piece of Evening Evergreen Open Weave Ribbon at 12 1/2″ and wrap around card front, with the two ends of the ribbon meeting in the front of the card. Secure with a piece of tape.
- Make the pansy collage. I punched out a circle from a scrap piece of Whisper White cardstock to use as a base to build the collage. You can also use one of the Layering Circles dies.
- Stamp two leaves from the Pansy Patch stamp set. This is a two-step set so first stamp the base with Evening Evergreen ink, stamping off once before stamping onto scrap piece of Basic White cardstock. Stamp the second leaf piece with the veins over the first leaf image with Evening Evergreen ink. Cut with coordinating die.
- Using the piece of DSP with the different sizes and colors of pansies, select three pansies, one of the large images and two of the smaller images, and cut with coordinating dies.
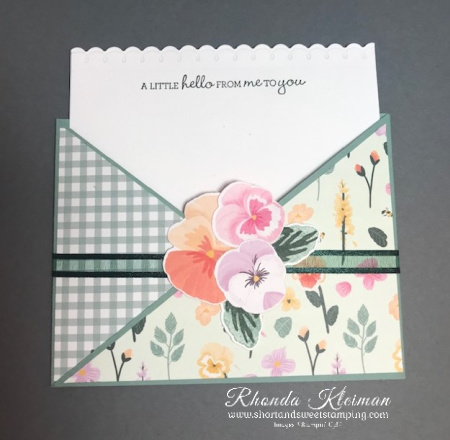
- Arrange the flowers and leaves on the circle base. Adhere the leaves first using Mini Glue Dots. Then adhere the large pansy. Adhere the two smaller pansies. Adhere the collage to the center of the envelope by adhering glue only to the bottom part of the collage so that the pocket is open in order to slide the note card into it.
- To make the note card, cut a piece of Basic White cardstock at 4″ x 5 1/2″. I used the scalloped border die from the Penned Flowers die set to create the scalloped edge. You can use any other scalloped border die you might have in your collection. Stamp the greeting from the Pansy Patch stamp set with Evening Evergreen ink. Slide note card into envelope pocket.

Thanks for stopping by today!


Place an online order between $50 and $149 and use this host code for August. You will receive a free gift from me the following month. If your order is $150 or more DO NOT use the host code. You will qualify for Stampin’ Rewards.
Product List


