Boho Beach Kit

Hello!

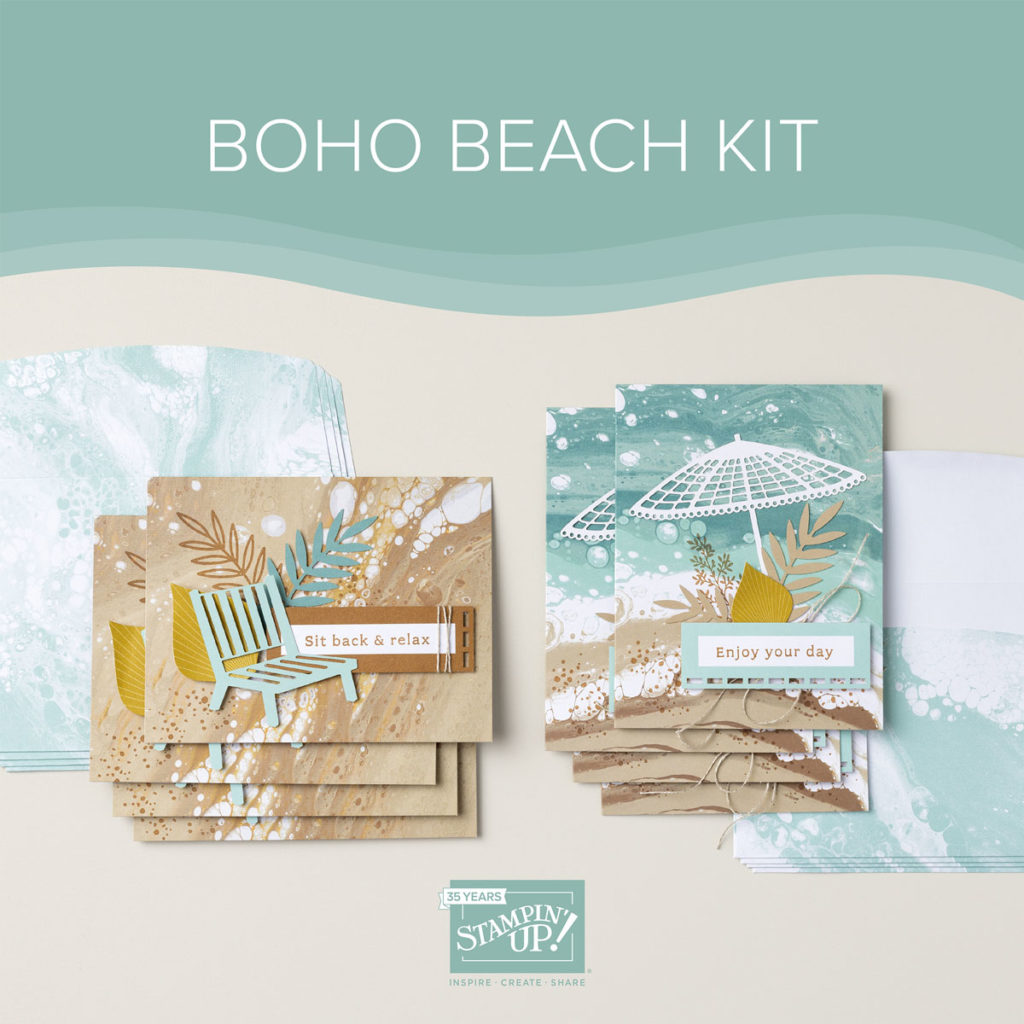
Today is the last day of the Kit Sale, with discounts up to 30% off. I usually purchase one or two kits a year and as soon as the Boho Beach Kit was introduced I purchased it right away. I think it is one of the most beautiful kits we have ever had. As I’ve mentioned in previous posts, being a Pisces, I’m drawn to beach and ocean-themed images! In all the years I’ve been a demonstrator, I never held a kit class until this kit came out and everyone loved it! We made two cards as shown in the kit instructions and then made three additional cards showing alternative options for making the cards using elements of the kit and combining them with different stamp sets, dies and papers.

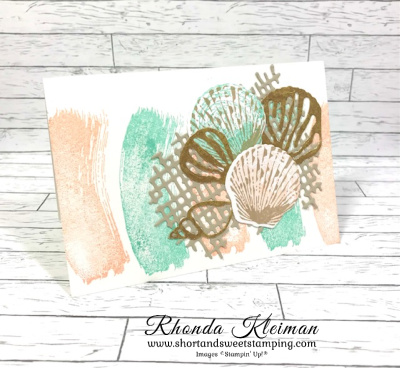
The next three cards are the alternative versions I designed.

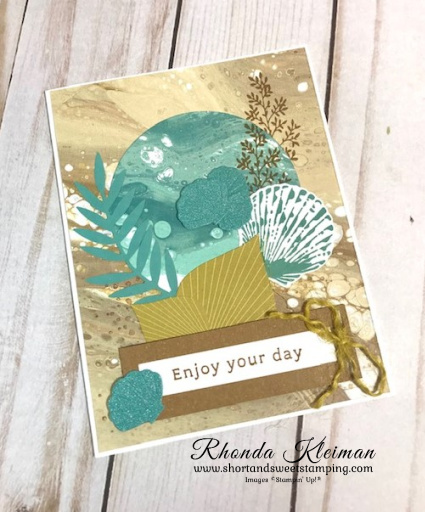
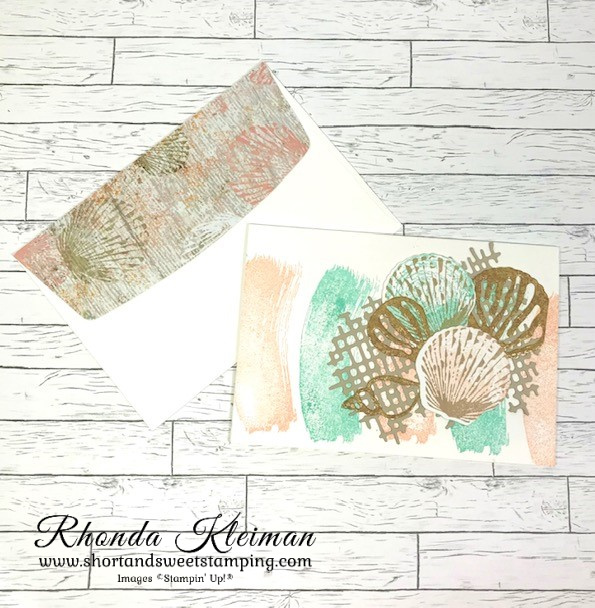
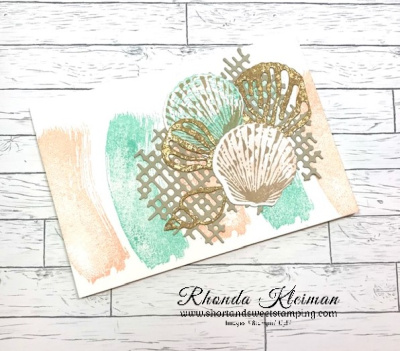
For this card I used a piece of Thick Basic White cardstock cut at 5 1/2″ x 8 1/2″ for the base and cut down one of the cards in the kit to 4 1/8″ x 5 3/8″, adhering it to the card front. I used another card front to die cut a 3″ circle. Stamp the large shell from the Season of Chic stamp set with Lost Lagoon ink and run through die cutting machine with coordinating Chic die. The smaller shells were die cut from a piece of Lost Lagoon Soft Shimmer Paper. The bow was made from a piece of Wild Wheat Jute Trim that I separated into one strand.

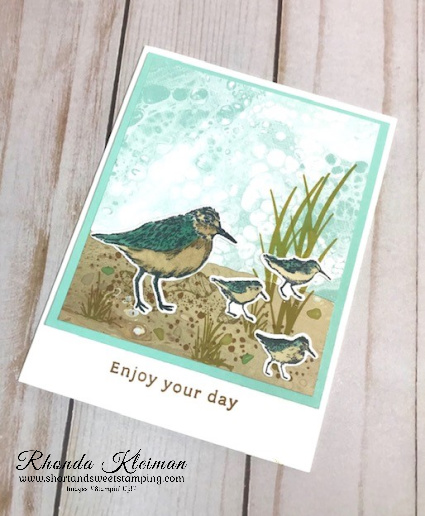
Cut a piece of Thick Basic White cardstock at 5 1/2″ x 8 1/2″ for the card base. Cut a piece of Pool Party cardstock at 4″ x 4 1/2″. Cut the front of a card base at 1 1/2″ x 3 3/4″. Cut apart one of the envelopes and trim it down to 3 3/4 x 3 1/4″. Die cut edge of the envelope piece with the torn edge die from the Seaside Bay dies and adhere to the card base. Stamp the large and small bird images from the Seaside Bay stamp set and color with Pretty Peacock, Crumb Cake and Pecan Pie Stampin’ Blends. Cut with Seaside Bay dies. Stamp grass and sand images from stamp set with Pecan Pie and Wild Wheat ink. Adhere birds to card front, adhere to Pool Party cardstock, and adhere piece to white card front with Stampin’ Dimensionals. Stamp greeting from kit.

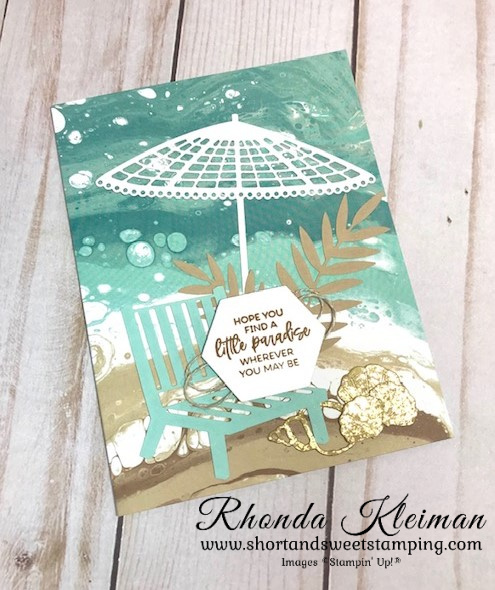
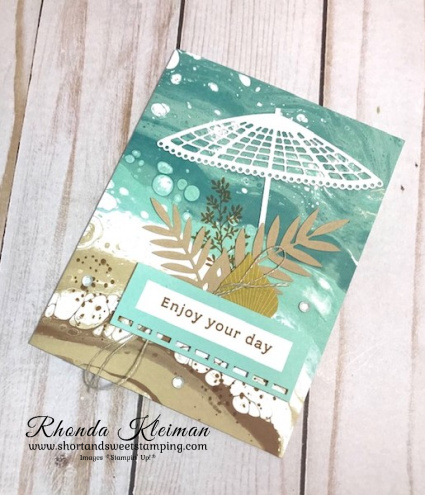
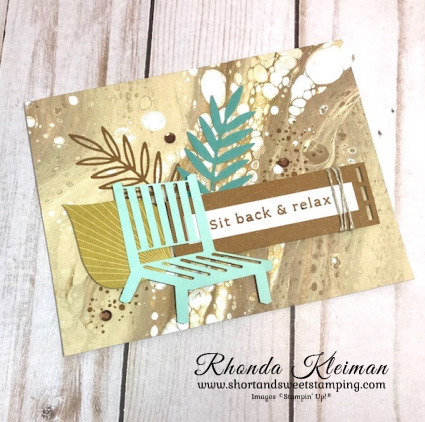
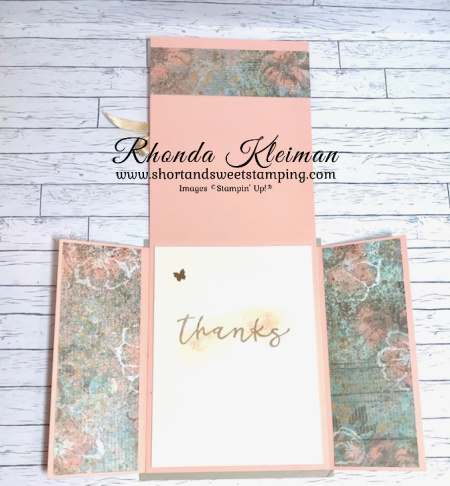
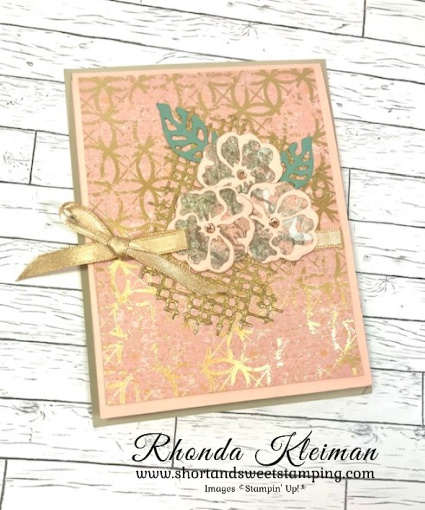
Use one of the card bases from the kit. Adhere umbrella, leaf and bench from kit. Stamp greeting from the Paradise Palms stamp set with Pecan Pie ink and run through die cutting machine using the hexagon die from the Something Fancy dies. This set is now retired but it is one I won’t part with because of the wonderful greetings in the set, which are perfect for these cards! Cut a length of the linen thread and wrap it around twice, adhere to card and adhere stamped greeting with Stampin’ Dimensionals. Using a small piece of Distressed Gold Specialty Paper, run through die cutting machine using several different shells from the Chic die set.

These are close-up photos of the two cards shown in the kit instructions.

I used Wink of Stella on all of the cards and assorted embellishments for some extra summertime glitz!

Thanks for stopping by today!

Today is the last day for the Kits Sale.  There is no limit on the number of kits you can purchase.  The discount will be applied when you check out.  Please note that this sale does not include Paper Pumpkin.  Click here to visit the kits page in my online store.

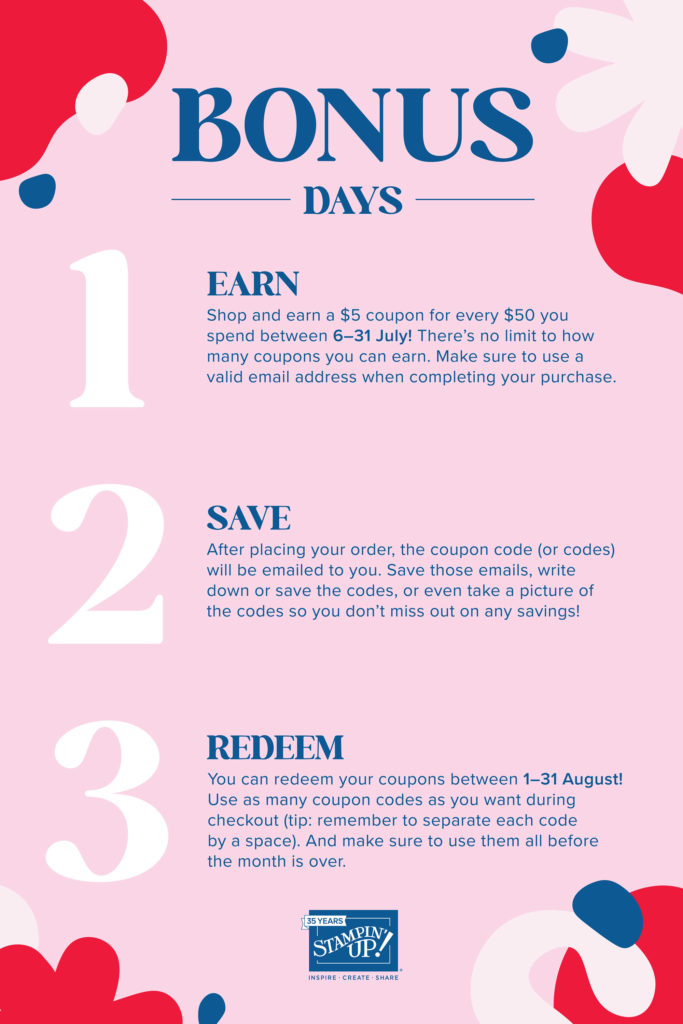
Today is the last day you can redeem any $5 bonus coupons you earned in July. You should have received one or more messages from Stampin’ Up! that included the coupon codes. You will need to enter these codes during online checkout.

Place an online order between $50 and $149 and use this host code for August. You will receive a free gift from me the following month.  If your order is $150 or more DO NOT use the host code. You will qualify for Stampin’ Rewards.

Product List
Chic Dies
[158815]
$37.00
Paper Snips
[103579]
$11.00

Texture Chic Fun Fold-Kylie’s International Blog Highlights

Hello! For those of you in the US, I hope you have been enjoying the Labor Day weekend. I can’t believe it’s been almost a year since I last participated in Kylie Bertucci’s International Blog Highlights! Readers get to vote on their top five favorites in the gallery and the top 10 winners will get to participate in an International Blog Hop later this month. The theme is “thank you”.

My card features the Texture Chic Suite from the annual catalog. It is my most favorite suite and is the first one I purchased when the new catalog was introduced. The card is a fun fold that really shows off the beautiful Designer Series Papers to their fullest. I found this fold when I was browsing through Connie Stewart’s blog and decided to give it a try for a class project I was working on last month.

Here is how I made the card.

  • Card base – Cut a piece of Sahara Sand cardstock at 4 1/4″ x 5 1/2″.
  • Cut a piece of Petal Pink cardstock at 4″ x 10 1/2″ and score at 5 1/4″. Fold and crease sharply with a bone folder
  • Cut two pieces of Petal Pink cardstock at 2 1/2″ x 5 1/2″ and score both pieces lengthwise at 1/2″. Fold and crease sharply with a bone folder. Adhere pieces to both sides to the back of the bottom half of the larger piece of Petal Pink cardstock. Adhere entire piece to the Sahara Sand card base.
  • Cut a piece of Texture Chic Specialty Designer Series paper at 3 3/4″ x 5″. Cut a piece of Gold 1/4″ Shimmer Ribbon and tie into a bow around the DSP. Adhere to card front.
  • Prepare pieces for the card front collage. Cut a piece of Distressed Gold paper to fit the grid die from the Chic Dies. Cut a piece of an Adhesive Sheet to fit and adhere to paper. Run though the Stampin’ Cut & Emboss Machine. Adhere to card front over the ribbon. This piece will be the base for the collage.
  • Die cut two different leaf shapes from scrap pieces of Soft Succulent cardstock. Back the cardstock with Adhesive Sheet before running through die cutting machine.
  • Die cut three flower bases with scrap pieces of Texture Chic Specialty Designer Series Paper. Die cut three open flower accent pieces from scrap pieces of Petal Pink cardstock. Before die cutting, adhere pieces of Adhesive Sheet to each piece. Adhere the accent pieces to the flower bases.
  • Adhere leaf pieces to top part of the Distressed Gold grid piece. Arrange the three flowers and adhere with liquid glue . Add a Champagne Rhinestone to the center of each flower.
  • Cut four pieces of DSP at 1 3/4″ x 5″ for the fun fold side flaps. Select two different pieces of DSP. Adhere one set to the front of the flaps and the other set to the inside of the flaps.
  • Cut another piece of the DSP used for the inside flaps at 1 1/4″ x 4″ and adhere to inside upper part of the Petal Pink card flap.
  • Cut a piece of Very Vanilla cardstock at 3 3/4″ x 5″. Stamp the swoosh image from the Season of Chic stamp set with Petal Pink ink, stamping off once before stamping onto the cardstock. Stamp the greeting with Sahara Sand over the swoosh image. Adhere a large Brushed Brass Butterfly to the upper left corner. Adhere piece to inside.

I’d be so appreciative if you would vote for my card! Click on the vote image below. Once you are in the gallery, click on the heart at the top right hand side of the picture as the hearts appear.

Thanks for stopping by today!

Place an online order between $50 and $149 and use this host code for September. You will receive a free gift from me the following month.  If your order is $150 or more DO NOT use the host code. You will qualify for Stampin’ Rewards.

Product List
Chic Dies
[158815]
$37.00
Paper Snips
[103579]
$11.00

Texture Chic Note Cards

Hello!

This is my first project using the Texture Chic Suite. When I saw it in the new annual catalog I knew that it would be part of my first order because not only is the Season of Chic a versatile stamp set, but also because of the beautiful color palette of the Designer Series Paper, which is so soft looking and pretty, and the Distressed Gold Specialty Paper. These are the thank you cards I sent to my customers for their June orders. I always forget that our note cards are a perfect size for quick thank you notes, so I pulled them out for this project.

Here is how I made the cards.

  • Card base – Basic White Note Cards & Envelopes- Item #159232
  • Stamp the “swoosh” image across the front of the card, alternating with Petal Pink and Pool Party ink.
  • Stamp two shells on a scrap piece of Basic White cardstock. This is a two-step stamp set so stamp the solid images first. I wanted a lighter base so for both ink colors, I stamped off once before stamping onto the scrap piece. Stamp the second shell image over the base with Sahara Sand ink. Run through die cutting machine with the shell die from the Chic Dies set.
  • Cut a piece of Sahara Sand cardstock at 3 1/4″ x 4″ and cut a piece of Adhesive Sheet the same size. Adhere to cardstock and run through die cutting machine with the large mesh die. Peel off adhesive backing and adhere to card base.
  • Cut a small piece of Distressed Gold Specialty Paper to fit the three shell dies and cut a piece of Adhesive Sheet the same size. Run through die cutting machine, peel off backings.
  • Create the shell collage by adhering the die cut pieces over the mesh. Adhere the stamped shell images with liquid glue.
  • Cut a strip of the Texture Chic Designer Series Paper with the shell design at 2 1/4″ x 5 1/2″. Run liquid glue around the front flap of the envelope. Adhere strip and cut around the bottom of the flap to remove excess DSP.

Here are a few more short videos showing products from the new July-December Mini Catalog and Sale-A-Bration Brochure.

Thanks for stopping by today!

Place an online order between $50 and $149 and use this host code for July. You will receive a free gift from me the following month.  If your order is $150 or more DO NOT use the host code. You will qualify for Stampin’ Rewards.

Product List
Chick Dies
[158199]
$32.00
Paper Snips
[103579]
$11.00