A one day 10% off sale of almost everything in the 2020-2021 Annual Catalog begins tomorrow, November 24th. This includes product suites and bundles designer paper, cardstock, inks, dies, punches, embellishments, tools and more! Note that the August-December 2020 Mini Catalog is not part of this sale. Exclusions of some products from the Annual Catalog are listed here.
If you are running low on supplies or have stamp sets or bundles on your wish list, now is a great time to take advantage of the sale. You can place orders in my online store by clicking here. If you’d like me to place an order for you, feel free to contact me and I’d be happy to help you out.
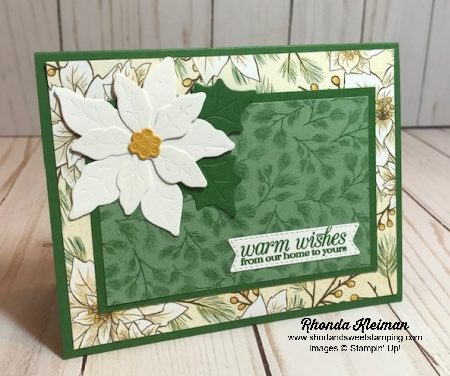
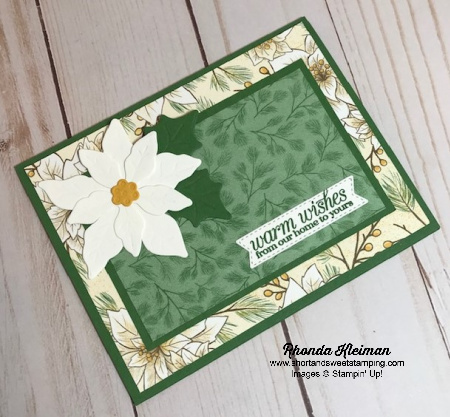
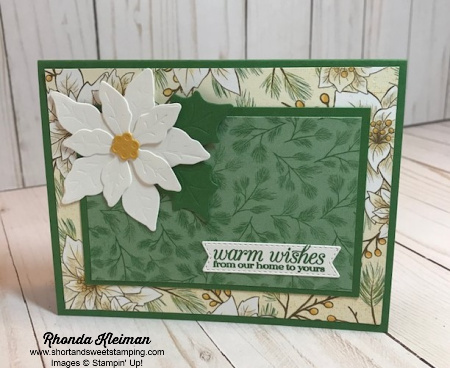
Hello! Today’s card features products from the Poinsettia Place Suite in the August-December 2020 Mini Catalog. This is one of the cards I will be including in my upcoming virtual holiday workshops. The products in this suite are so pretty! I also like that the Designer Series Paper uses the Christmas colors we all love, but the designs are not the typical stripes, plaids, checks, trees, etc. that you find in so many papers. The stamps and dies, along with beautiful sentiments and type fonts make for great versatility. Here is how I made the card.
Card base – cut piece of Garden Green cardstock at 5 1/2″ x 8 1/2″, score at 4 1/4″ and crease with a bone folder.
Cut a piece from one of the papers with white poinsettia images at 4″ x 5 1/4″ and adhere to card base.
Cut another piece of Garden Green cardstock at 3″ x 4 1/2″. Cut piece of the Garden Green DSP with the tone-on-tone pine branches at 2 3/4″ x 4 1/4″ and adhere to cardstock. Adhere to center of card front.
Die cut one small and one medium poinsettia from scrap piece of Whisper White cardstock. There are two dies for each size of poinsettia, one is open and the other fits inside and has lines for embossing the veins of the flowers. Use both pieces. Adhere the two cut pieces with a Mini Glue Dot. The leaf shapes also have two pieces for each size. Die cut two leaves from scrap piece of Garden Green cardstock and use both dies so that the leaves are embossed. Adhere the leaves to the poinsettia flower with glue dots. Die cut the flower center from a small scrap of Bumblebee cardstock. Adhere with a glue dot. Adhere entire flower to upper corner of the card with liquid glue for better positioning.
Stamp greeting with Garden Green ink on scrap piece of Whisper White cardstock. Cut with the banner die from the Tasteful Labels Dies. Adhere to card.
For the inside of the card, cut piece of Whisper White cardstock at 4″ x 5 1/4 and stamp greeting with Garden Green ink. I used the Merry Christmas greeting. Stamp one of the leaf images in the bottom left corner. Adhere to card.
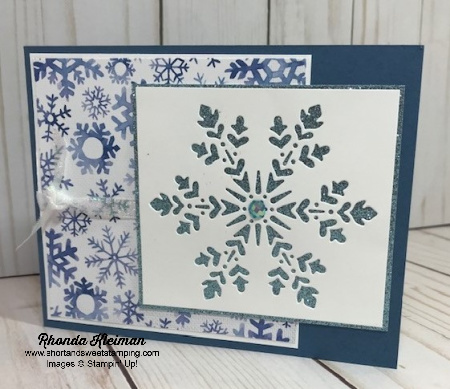
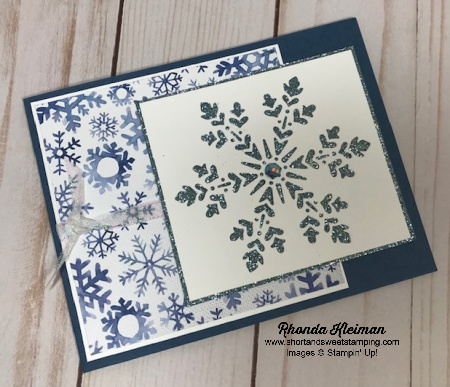
Hello! Today’s card features products from the Snowflake Splendor Suite in the August-December 2020 Mini Catalog. The non-traditional colors, paired with all of the beautiful snowflake images, can be used not only for holiday cards but also for general cards with a winter theme.
Here is how I made the card.
Card base – cut piece of Misty Moonlight cardstock at 4 1/4″ x 11″, score at 5 1/2″and crease with a bone folder. This is a landscape card.
Cut piece of Whisper White cardstock at 4″ x 4″. Cut piece of Snowflake Splendor Designer Series paper at 3 7/8″ x 3 7/8″ and adhere to Whisper White piece.
Cut piece of Snowflake Splendor 1/4″ Ribbon at 15″, tie into a knot, or bow if you prefer, around DSP piece and trim ends. Adhere piece to card base.
Cut piece of Balmy Blue Glimmer paper at 3 1/4″ x 3 5/8″. Cut piece of Whisper White cardstock at 3 1/8″ x 3 1/2″. Use the largest snowflake die in the So Many Snowflakes Dies set, center it on the cardstock piece and run through the Stampin’ Cut & Emboss Machine.
Adhere die cut piece to the gimmer paper with either Tear & Tape or Stampin’ Seal+. Adhere piece to the DSP piece. Add a large Blue Adhesive-Backed Gem to the center of the snowflake.
Cut piece of Whisper White cardstock at 4″ x 5 1/4″. Select one of the greetings from the Snowflake Wishes stamp set and stamp with Night of Navy ink. Stamp one of the smaller snowflake images in opposite corners with Misty Moonlight ink. Adhere to inside of card.
Thanks for stopping by today!
Celebrate with curvy stamps, dies, and more! Designed for a variety of special occasions, the Quite Curvy Variety Bundle includes everything you need to create one-of-a-kind crafts. Don’t let stress steal your spirit—get ahead and order this exclusive bundle for a festive and frenzy-free season! You can also purchase the Quite Curvy Bundle or the Curvy Christmas Stamp Set separately. The Quite Curvy Bundle will be in the upcoming January-June 2021 Mini Catalog. The Quite Curvy Variety Bundle, Curvy Christmas stamp set and the Classic Christmas 6×6 Designer Series Papers will only be available now through January 4th.
Quite Curvy Photopolymer Stamp Set – 154430 $17.00USD Curvy Dies – 154319 $29.00USD Quite Curvy Bundle – 156228 $41.25USD Curvy Christmas Photopolymer Stamp Set – 155364 $21.00USD Classic Christmas 6×6 Designer Series Paper – 155969 $11.50USD Quite Curvy Variety Bundle – 158396 $70.50USD
Hello! Today, November 11, is Veterans Day here in the U.S. The men in my family all served in the Army: my grandfather and his brother served in France during WW1, my father served in England during WW11 (and is still alive and well at 98 years old!), and my brother served in Germany. If either you or any of your family members are or were veterans, thank you for your service to our great country.
Last week I attended the Stampin’ Up! virtual annual convention for 2 1/2 days, along with over 10,000 demonstrators from around the world! While nothing can quite replace being together at a live event, they did a fabulous job bringing all of the things we love most about convention to the small screen. We got a first look at the upcoming January-June 2021 Mini Catalog, and once again, it doesn’t disappoint! It covers a wide variety of holidays and special occasions and there truly is something for everyone. One of the things we love best are demonstrations of new product suites, stamp sets, tools and accessories and the highlight is always the session where Shelli Gardner, founder of Stampin’ Up! and Sara Douglass, CEO (and Shelli’s daughter) stamp together. It is always a treat to see not only their creativity, but the wonderful relationship they have as well.
Another highlight of convention is the make and take sessions. This year demonstrators were given the opportunity to pre-purchase the Dandy Garden Project Collection that includes some of the products in the Dandy Garden Suite from the upcoming mini catalog. We were given measurements to cut the cardstock and DSP in advance so that we could make the projects during the session – so much fun!
As you can see from the images above, the Dragonfly Garden stamp set includes floral and dragonfly images and has a coordinating dragonfly punch. Also included in the project collection we received was a pack of 6×6 Designer Series Paper, braided twine and the cutest little ladybug embellishments.
There is another stamp set in this large suite, Garden Wishes, which has a coordinating set of dies that will be available beginning in January as well as Memories and More products and beautiful laser cut paper. Demonstrators are able to pre-order a select group of products from the new catalog for several days after the convention ends, so I have the rest of these products coming later this week and can’t wait to play with them! Stay tuned for more cards featuring this beautiful suite.
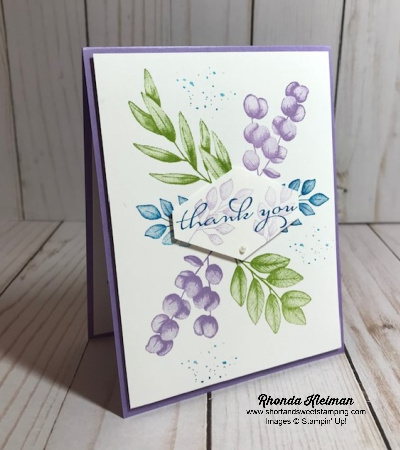
Hello! Today I’m participating in Kylie Bertucci’s International Blog Highlights. Readers get to vote on their top five favorites in the gallery and the top 10 winners will get to participate in an International Blog Hop later this month. The thank you theme is a way for us to show our appreciation to someone that has inspired, helped or supported us in some way. Today’s card features Forever Fern, one of my favorite stamp sets from the annual catalog.
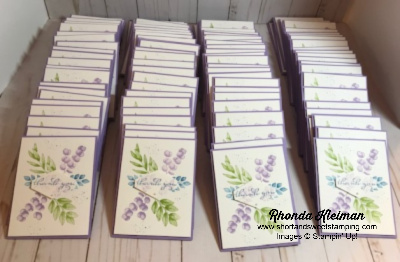
I was asked by a women’s organization I belong to, to make cards to go into 110 goodie bags that were hand-delivered to our members two weeks ago. Normally we have an annual membership dinner at a restaurant, however, due to Covid, we were unable to meet in person. We hosted a Zoom event and everyone opened up their bags at the same time. While we couldn’t be together in person, this was the next best option and it was a fun evening! Since I had to do so many cards I stuck to stamps, ink, paper and threw in a punch. Highland Heather and Pacific Point matched our logo perfectly and I added in Granny Apple Green.
Here is how I made the card.
Card base – cut Highland Heather cardstock at 4 1/4″ x 11″, score at 5 1/2″ and crease with a bone folder.
Cut piece of Whisper White cardstock at 4″ x 5 1/4″. Stamp the floral images from the Forever Fern stamp set with Highland Heather, Pacific Point and Granny Apple Green ink. Since I had to make multiple cards, I used the Stamparatus, which was a great time saver! Stamp the splatter image around the leaves with Pacific Point ink, stamping off once before stamping onto the cardstock.
On a scrap piece of Whisper White cardstock, stamp the thank you greeting from the Borders Abound stamp set. Punch out with the Tailored Tag punch. Overstamp the small leaf image twice with Highland Heather ink, first stamping off each time. I added a small pearl at the bottom of the tag.
Adhere the stamped floral piece to the card base with Stampin’ Dimensionals and then adhere the tag to the center of the floral spray with Mini Stampin’ Dimensionals.
We wanted to put a special message into the card so I ended up creating the inside of the card by using my computer printer. I selected a font that came close to matching the font on the tag and then used the RGB numbers for Pacific Point to print the messages, which I did four to a page and then cut apart with the Stampin’ Trimmer.
I’d be so appreciative if you would vote for my card by clicking on the vote image below. To give a vote, once you are in the gallery, click on the heart at the top right hand side of the picture as the hearts appear.
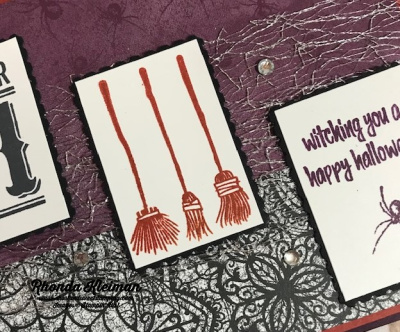
Hello and Happy Halloween! Today’s card features the Festive Post stamp set. This is a versatile set because it has images for Halloween, Christmas and Valentines Day and they can be punched out with either the Rectangular Postage Stamp punch or other punches and dies you might have in your collection. Here is how I made the card.
Card base – cut piece of Basic Black cardstock at 5 1/2″ x 8 1/2″, score at 4 1/4″ and crease with a bone folder.
Cut piece of Cajun Craze cardstock at 4 1/8″ x 5 3/8″.
Select two different pieces of Magic in the Night Designer Series Paper. Cut one piece at 2 1/2″ x 5 1/4″ and another at 1 1/2″ x 5 1/4″. Adhere both pieces to the Cajun Craze piece.
Cut three pieces of Whisper White cardstock at 1 1/4″ x 1 7/8″. Stamp the three images from the Festive Post stamp set. Stamp the October 31 image with Tuxedo Black Memento ink. Stamp the brooms with Cajun Craze ink. Stamp the greeting with Blackberry Bliss ink. Stamp the small spider from the Hallows Night Magic stamp set under the greeting.
Punch three of the Rectangular Postage Stamps from scrap pieces of Basic Black cardstock. Adhere to the stamped images.
Wrap a piece of Metallic Mesh Ribbon twice around the Cajun Craze/DSP piece and tape on the back. Adhere this piece to the card front. Use Tear and Tape or Stampin’ Seal+ to adhere the postage stamp pieces to the card front so that they stick well to the ribbon
Adhere five rhinestone basic jewels all around the card for some extra bling.
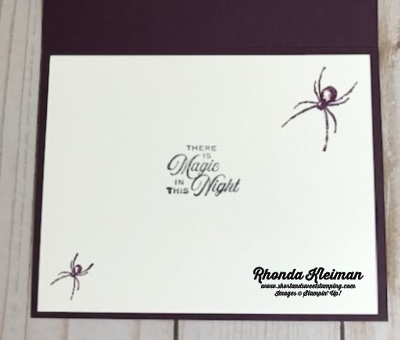
Cut piece of Whisper White cardstock at 4″ x 5 1/4″ and stamp a greeting from the Hallows Night Magic stamp set with Tuxedo Black Memento ink. Stamp large and small spider images from the set with Blackberry Bliss ink. Adhere to inside of card.
Hello! Here’s another card I created with the Hallows Night Magic Bundle. It was fun and easy to put it together. Here is how I made the card.
Card base – cut piece of Basic Black cardstock at 5 1/2″ x 8 1/2″, score at 4 1/4″ and crease with a bone folder.
Cut piece of Whisper White cardstock at 3 1/4″ x 5″.
Select three different papers from the Magic in this Night Designer Series Paper and cut at 1 1/2″ x 3″. Adhere to Whisper White cardstock and adhere piece to card front.
Stamp label image from the Hallows Night Magic stamp set on scrap piece of Whisper White cardstock with Tuxedo Black Memento ink. Color the flowers with Pumpkin Pie and Cajun Craze Stampin’ Blends and color the leaves with Old Olive Stampin’ Blends. Stamp greeting with black ink. Run through die cutting machine with the smaller label die from the Halloween Magic dies.
Die cut larger label from scrap piece of Basic Black cardstock and adhere to stamped label piece.
Cut piece of Glittered Organdy Ribbon at 6″, trim ends at an angle and adhere across the center of the card front. I used Scotch Tape to hold it down in the center. Adhere label over the ribbon.
Cut piece of Whisper White cardstock at 4″ x 5 1/4″. Stamp greeting with black ink. Cut strip of Basic Black cardstock at 1 1/2″ x 4 3/4″ and run it through the die cutting machine using the filigree edge die. Adhere to bottom of the cardstock. Adhere piece to inside of card.
Thanks for stopping by today!
There are just a few days left for the 15% discount on Designer Series Paper!


")
")


")


 Ribbon")


")


 Glittered Organdy Ribbon")