Abigail Rose Suite Cards

Hello!

Today I have two cards for you, both using the lovey Abigail Rose Suite in the annual catalog. Sadly, I’ve had to make four sympathy cards between Christmas and New Year’s Day. For some reason, I never seem to get around to using this suite so I decided to finally break it open. While I was at it, I needed to make a birthday card for a friend so made two cards with the suite as well.

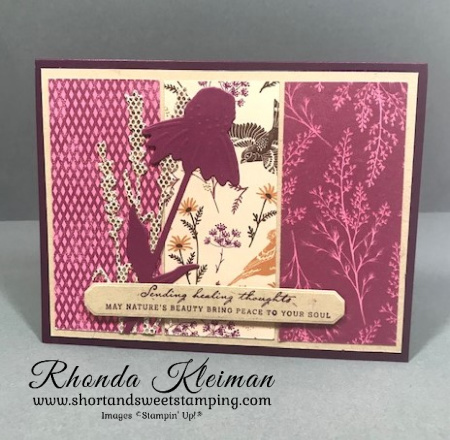
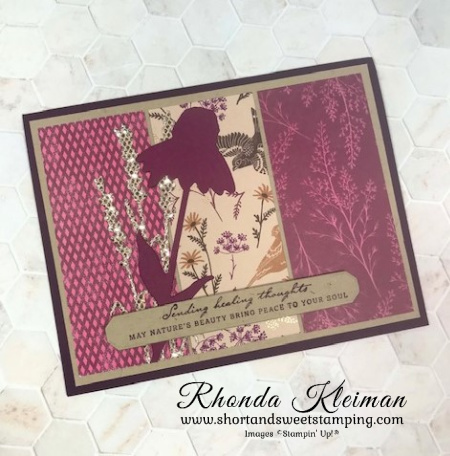
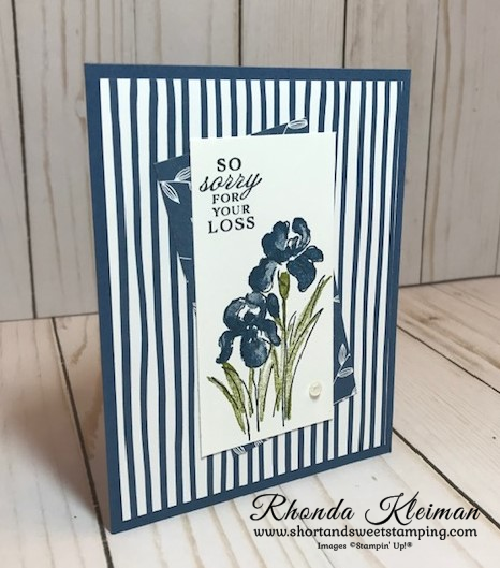
Here is how I made this sympathy card.

  • Card base – Cut a piece of Petal Pink cardstock at 5 1/2″ x 8 1/2″, score at 4 1/4″, fold and crease with a bone folder.
  • Cut a piece of the Petal Pink stripe paper from the Abigail Rose Designer Series Paper at 4″ x5 1/4″ and adhere to card front.
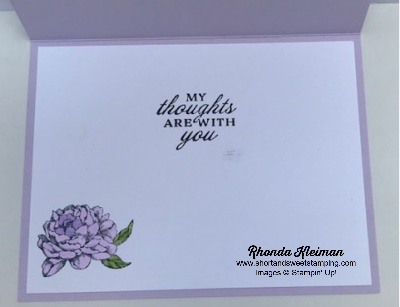
  • Cut a piece of DSP with the script on the Early Espresso background at 2 7/8″ x 4 3/8″. Lightly color in the flowers with the light and dark Petal Pink Stampin’ Blends. Color the stems with the light Mint Macaron Stampin’ Blend. Adhere to a piece of Crumb Cake cardstock cut at at 3″ x 4 1/2″.
  • Cut a piece of Crumb Cake cardstock at 1 3/4″ x 3″. Stamp sympathy greeting from the Something Fancy stamp set from the January-April 2023 Mini Catalog with Early Espresso ink. Run through die cutting machine with a label from the Something Fancy Dies.
  • Cut a piece of Natural 1/2″ Woven Ribbon at 12″. Wrap around tulip piece and tie in a knot on the left side. The ribbon is from the now-retired July-December 2022 Holiday Catalog. If you don’t have this ribbon you can substitute it with something else in your stash. Adhere greeting over the ribbon. Adhere the tulip piece to front of card.

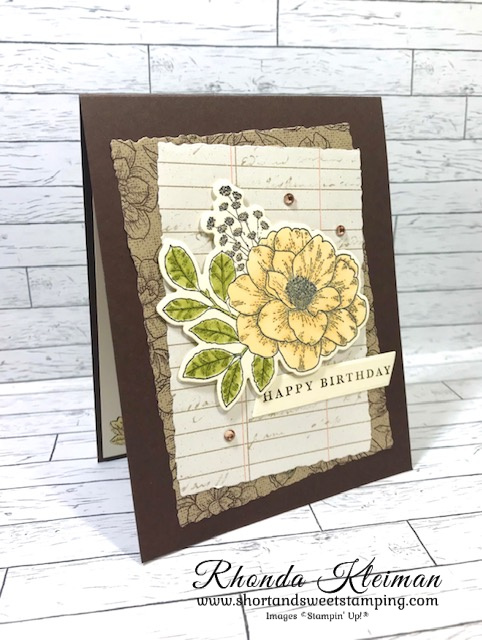
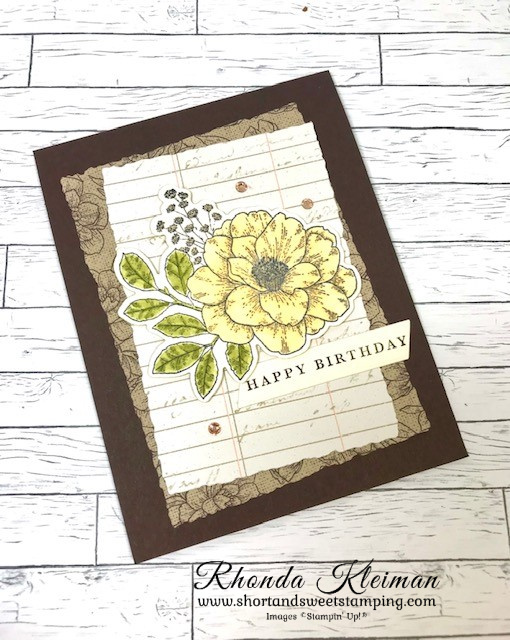
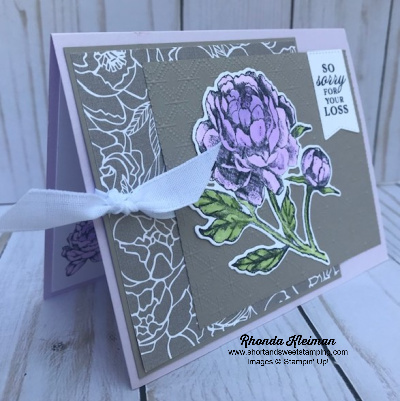
Here is how I made this birthday card.

  • Cut a piece of Early Espresso cardstock at 4 1/4″ x 11″, score at 5 1/2″, fold and crease with a bone folder.
  • Cut a piece of Abigail Rose DSP at 3 3/4″ x 5 and run through die cutting machine with the next to largest Deckled Rectangle Die. Adhere at a slight angle to card front.
  • Cut a piece of the DSP that looks like a notebook page at 3 1/4″ x 4 3/4″ and run through die cutting machine with the third largest Deckled Rectangle Die. Adhere at an opposite angle to the first piece of DSP.
  • Cut a 3 1/2″ square of Very Vanilla cardstock. Stamp floral image from the Cottage Rose stamp set with Memento Black ink. Color the large flower with light and dark So Saffron Stampin’ Blends. Color the center of the flower with dark Crumb Cake Stampin’ Blend. Add Wink of Stella to the center. Color the leaves with light and dark Old Olive Stampin’ Blends. Color the tiny flowers with light Fresh Freesia Stampin’ Blend.
  • Run piece through die cutting machine with coordinating Cottage Flowers Dies. Adhere to card front with Stampin’ Dimensionals.
  • Stamp birthday greeting with Early Espresso ink on scrap piece of Very Vanilla cardstock. Run through die cutting machine with die from the Something Fancy Dies. Adhere to card front.
  • Add some bling with a few Champagne Rhinestones.

Thanks for stopping by today!

Make cloudy days a little brighter with the Sunshine & Smiles Paper Pumpkin Kit! This kit includes nine sweet and sunny cards—three each of three designs. If someone you know is weathering a storm, this kit is just what you’ll need to create cards that are sure to brighten their day! AND for the first time ever, we’ve got a coordinating die add-on! (Stampin’ Cut & Emboss Machine sold separately).

The kit contains everything you need to make nine cards, 3 each of 3 different designs and nine coordinating envelopes; photopolymer stamp set; Mango Melody Stampin’ Spot; peek-through window scene on each card front; precut critters, labels, raindrop embellishments and more. Coordinating colors are: Balmy Blue, Cajun Craze, Coastal Cabana, Daffodil Delight, Flirty Flamingo, Mango Melody, Old Olive, Shaded Spruce.

Purchase the Sunshine & Smiles Dies as an add-on. Cost is $6.00 and includes one frog-shaped die and one flower bouquet die. You can order this from my online store using Item #162486.

Place an online order between $50 and $149 and use this host code for January. You will receive a free gift from me the following month.  If your order is $150 or more DO NOT use the host code. You will qualify for Stampin’ Rewards.

Product List

World Cardmaking Day-Blackberry Beauty Card

Hello! Today is World Cardmaking Day! This event was started by the now defunct Card Maker magazine as a way to promote cardmaking and stamping and as a way to jumpstart cardmaking for the holiday season. This event always occurs on the first Saturday of October. I wasn’t able to plan my own event this year, however, I am sharing a card we made in my quarterly club last week. Take some time today to make a card and send a card to spread sunshine and let someone know that you care about them and are thinking of them. To see what others are doing and see some projects that are being posted around the internet, enter hashtag #wcmd2021.

This card features products from the Blackberry Beauty and Harvest Beauty suites and is a quick and easy card to make. Here is how to make the card.

  • Card base – Cut piece of Blackberry Bliss cardstock at 5 1/2″ x 8 1/2″, score at 4 1/4″, fold and crease with a bone folder.
  • Cut piece of Crumb Cardstock at 4″ x 5 1/4″.
  • Cut three different pieces of Blackberry Beauty Designer Series Paper into 1 5/8″ x 4″ strips. Adhere to Crumb Cake piece.
  • Using the Harvest Dies, run the coneflower through the Stampin’ Cut & Emboss Machine with scrap piece of Rich Razzleberry cardstock. Run the stalks through the machine with the Be Dazzling Specialty Paper. This paper is now retired, as it was one of the free Sale-A-Bration items in the promotion that has now ended. Adhere both pieces to the DSP piece with liquid glue. Trim the ends of the stems down to the edge of the bottom of the piece.
  • Adhere piece to card base.
  • Cut a piece of Crumb Cake cardstock at 1″ x 4 1/2″. Stamp greeting from the Beauty of Tomorrow stamp set with Blackberry Bliss ink. Run through die cutting machine with the long label die from the Harvest Dies. Adhere to card front with Stampin’ Dimensionals.
  • Cut piece of Very Vanilla cardstock at 4″ x 5 1/4″. Stamp the bird with Blackberry Bliss ink in one of the corners of the piece and adhere to inside of card.

Thanks for stopping by today!

Place an online order between $50 and $149 and use this host code for October. You will receive a free gift from me the following month.  If your order is $150 or more DO NOT use the host code. You will qualify for Stampin’ Rewards.

Product List
Harvest Dies
[156504]
$38.00
Paper Snips
[103579]
$10.00

Inspiring Iris Sympathy Card

Hello! Today’s card features the Inspiring Iris stamp set, which will be retiring on May 3rd. I needed to make a few sympathy cards last month and turned to this set, which I must confess, I haven’t used too often. It has lovely images and sentiments. I used the Dandy Garden Designer Series Papers because I thought the designs in the Misty Moonlight color would work well for male recipients of some of the cards.

Here is how I made the card.

  • Card base – cut a piece of Misty Moonlight cardstock at 5 1/2″ x 8 1/2″, score at 4 1/4″, fold and crease with a bone folder.
  • Cut piece of the Dandy Gardens DSP at 4″ x 5 1/4″ and adhere to card front. Cut a coordinating piece of DSP at 3″x 4 1/2″.
  • Cut piece of Basic White cardstock at 2 3/4″ x 4 1/4.” This is a two-step stamp so first stamp the outline image with Memento Tuxedo Black ink. Stamp the fill-in image for the flower petals with Misty Moonlight ink. Stamp the fill-in image for the leaves with Old Olive ink.
  • Stamp greeting with Misty Moonlight ink in upper left corner. I used one of the greetings from the Prized Peony stamp set.
  • Adhere the coordinating piece of DSP to the card front, placing it at an angle. Adhere the stamped piece, centering it over the DSP. Adhere a large Opel Round at the bottom right of the stamped image.
  • For the inside of the card, cut a piece of Basic White cardstock at 4″ x 5 1/4″. Stamp the greeting from the Inspiring Iris stamp set with Misty Moonlight ink. Stamp the geometric image, centering it at the bottom of the piece. Adhere to card.

This is another version of the card I made using the same two pieces of DSP but, switching them up in the layout.

Thanks for stopping by today!

If you love baseball, the May Paper Pumpkin kit is for you, with its fun baseball themes! The kit includes everything you need to make nine cards, 3 each of 3 different designs, plus coordinating envelopes. Coordinating colors are Basic White, Bumblebee, Night of Navy, Pacific Point, Real Red, Smoky Slate, Soft Suede. Comes with the official bubble gum of the MLB—a ballpark favorite! Visit my Paper Pumpkin website to subscribe.

There are less than two weeks remaining before the 2020-2021 Annual Catalog retires on May 3rd. While some products are now sold out, there are still many remaining products available at up to 75% off, while supplies last. Click here to shop for last-chance products in my online store.

Please use this April Host Code when you shop in my online store if your order is between $50 and $149.00 and you will receive a free gift from me. If your order is $150 or more, DO NOT use this code, as you will be entitled to Stampin’ Rewards. You will still get the free gift from me.

Product List

Prized Peony-Kylie’s Training Blog Hop

Hello! Welcome to Kylie Bertucci’s Demonstrator Training Blog Hop for August. I’m part of a group of Stampin’ Up! demonstrators from around the world that participate in Kylie’s program for building our businesses. Please be sure to click on the names in the list at the end of this post to hop around and view the beautiful cards posted by so many talented stampers.

Today I’m sharing a sympathy card I made to send to a friend whose mother recently passed away. It uses products from the beautiful Peony Garden Suite. I made the original card with Petal Pink and then decided to make a few extras with Purple Posy, which I’m showing here. I used a variation on one of my favorite layouts.

Here is how I made the card.

  • Card base – Cut piece of Purple Posy cardstock at 5 1/2″ x 8 1/2″, score and fold in half.
  • First layer – cut piece of Gray Granite cardstock at 4″ x 4″. Cut piece of Gray Granite floral paper from the Peony Garden Designer Series Paper at 3 7/8″ x 3 7/8″. Adhere to cardstock piece.
  • Cut a length of Whisper White Faux Linen Ribbon from the Flowers for Every Season Ribbon Combo Pack and tie around the layered piece. Adhere to card base.
  • For the second layer cut piece of Gray Granite cardstock at 3 1/2″ x 4 1/4″. Run through embossing machine with the Dainty Diamonds 3D Embossing Folder.
  • Stamp large peony image with Tuxedo Black Memento Ink on piece of Whisper White cardstock. Color the flower with Purple Posy and Highland Heather Stampin’ Blends. For the flower I wanted a paler, softer look so didn’t go too heavy with the darker of the blends. Color leaves with Granny Apple Green Stampin’ Blends. Cut out with the coordinating Peony Dies.
  • Stamp greeting with Basic Gray ink on scrap piece of Whisper White cardstock. Cut out with the stitched banner die from the Tasteful Labels Die set.
  • Adhere peony and greeting to embossed piece. Adhere second layer to first layer.
  • Cut piece of Whisper White cardstock at 4″ x 5 1/4″. Stamp greeting with Basic Gray ink. Stamp small peony flower in bottom left of card. Color with Stampin’ Blends. Adhere to inside of card.
  • Stamp small peony flower in bottom corner of envelope and color with Blends. I slid a piece of paper into the envelope before coloring so that the ink didn’t bleed through to the other side of the envelope.

Here are the Petal Pink and Purple Posy cards shown together.

Thanks for stopping by today!


 Product List  
Peony Dies
[152701]
$40.00

Healing Vibes

Hello and for those of you in the U.S. Happy Labor Day! Today I’m participating for the first time in Kylie Bertucci’s International Stampin’ Up! Blog Highlights. Readers get to vote on their top five favorites in the gallery and the top 10 ten winners will get to participate in an International Blog Hop later this month. The theme is encouragement and I hope you like my card.

I chose to work with Healing Hugs, a stamp set in the Distinktive line of photo-realistic stamps. I love the sentiments as well as the type fonts in this set. A group of women that stamp with me a few times a year recently asked to make some get well and sympathy cards and this was one of the cards we made. As it turns out, I needed two cards shortly after we made them so they came in handy.

Here is how I made the card:

  • Cut a piece of Rococo Rose cardstock at 5 1/2″ x 8 1/2″ and fold in half.
  • Cut a piece of the handwriting paper from the Pressed Petals Designer Series Paper at 4 1/8″ x 5 3/8″ and adhere to card base.
  • Cut a piece of Whisper White cardstock at 3″ x 4 1/2″. Stamp flowers with Merry Merlot and Rococo Rose inks, slightly overlapping them. Stamp leaves with Pear Pizzazz ink. Stamp cross-hatch design with Soft Suede ink. Adhere to a piece of Merry Merlot cardstock cut at 3 1/8″ x 4 5/8″. Adhere to card.
  • On a scrap piece of Whisper White cardstock stamp sentiment with Soft Suede ink. Cut with the stitched label die from the Smooth Sailing dies. You can use any other similar dies or punches. Add a small Rococo Rose faceted dot. Adhere to card with Stampin’ Dimensionals.

Please vote for my card by clicking here: http://bit.ly/InternationalHighlightsSept2019VoteForMe. To give a vote click on the heart in the top right hand side of the picture when the hearts appear.

Thanks for stopping by today!

 Product List  

Tropical Chic Get Well Soon

I made several cards for a class I held last week that featured the Tropical Escape and Petal Promenade designer series papers.  Three of the four cards also featured fun folds.  The group I did the class for asked to use sentiments for get well, sympathy, inspirational so I had a variety of stamp sets from the current catalog that they were able to choose from.  I will be holding the class again this Saturday, August 25.  Full details are posted on my calendar of events.  This is the first of several posts to follow.

The first card uses a diagonal fold.  I’ve been seeing a number of cards lately that use this fold so wanted to give it a try.  I got the measurements and the belly band idea from Dawn Griffith in one of her recent blog posts.   I used the Tropical Chic designer paper and chose to only work with different shades of green with the thought that it is common to send plants as a get well gift, so this perfectly evoked the image of a plant.  The group also thought it also fit in the category of a masculine card and indeed one of the women in the group was going to send it to a male relative that is currently in the hospital. It uses the get well greeting from the Healing Hugs stamp set.


The card base is Shaded Spruce and the designer paper is attached to Granny Apple Green cardstock.  The belly band and greeting use Soft Sea Foam. The greeting was cut with one of the circles from the Layering Circles Framelits sets and is attached to a Shaded Spruce circle cut from the Stitched Shapes Framelits.

The inside sentiment was stamped in Soft Sea Foam and one of the leaf stamps from the Tropical Chic set was stamped in Granny Apple Green.


Cutting measurements:

  • 1 sheet of Shaded Spruce cardstock – vertical score at 4 1/4″ and horizontal score at 5 1/2″, cut on the diagonal – makes two cards
  • 2 pieces of Granny Apple Green cardstock cut at 4″ x 5 1/4″, cut on the diagonal – makes two cards
  • 2 pieces of designer series paper cut at 3 3/4″ x 5″, cut on the diagonal – be
    careful when working with directional patterned papers!
  • 1 piece of Soft Sea Foam cut at 1″ x 10″
  • 1 piece of Whisper White cardstock cut at 4″ x 5 1/4″ for inside of card

This was a fun and easy to put together card and is a great way to showcase many of Stampin’ Up!’s great designer papers!

The current Bonus Days promotion is running through August 31.  For every $50 you spend during the month you will get a $5 coupon sent to you by email that can be redeemed when you place orders from September 1-30th. There is no limit to the number of coupons you can earn per order or throughout the duration of the promotion.

Thanks for stopping by today!