Hello!
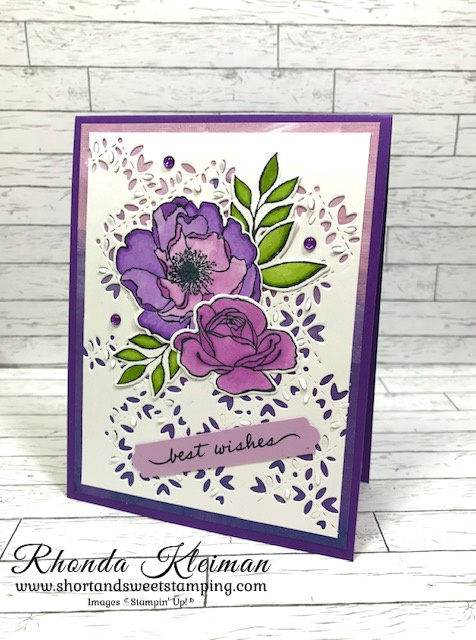
Today I have two cards for you that feature the Fancy Frames dies from the 2022-2023 Annual Catalog. I was pleased to see so many stand-alone die sets in the new catalog. I thought that the two dies in this set were so pretty and would make a nice addition to card fronts. When I first saw them in the catalog I pictured that a number of flower images in some of the stamp sets I own would fit into the center opening of the frames, but that didn’t turn out to be the case. When I received the dies it turns out that the openings were smaller than what they appeared to be in the catalog, so I was stumped as to how I would use them. Then it came to me that they would enhance the backgrounds on card fronts and that die cuts and images could be placed on top of the frames and voila! It worked like charm and I was so happy with the results of the two cards shown here.
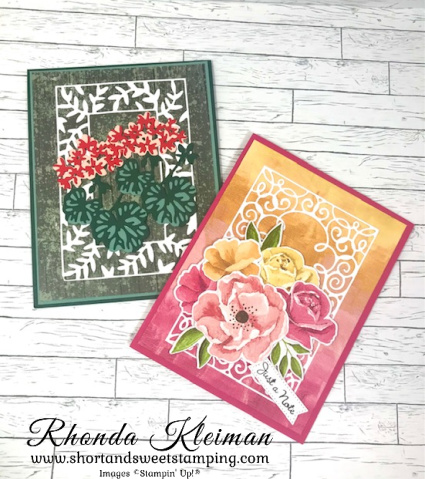
These are two of the cards we made in one of my classes last month. The projects used the Potted Geraniums Bundle and the Hues of Happiness Suite. Here are instructions for how to make both cards. cards.
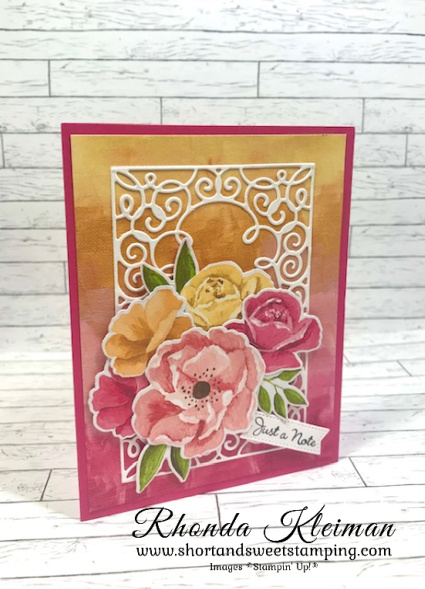
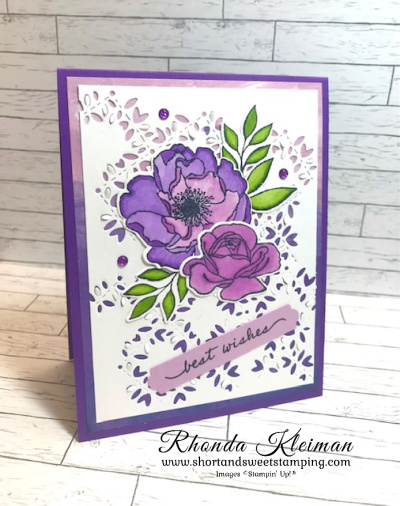
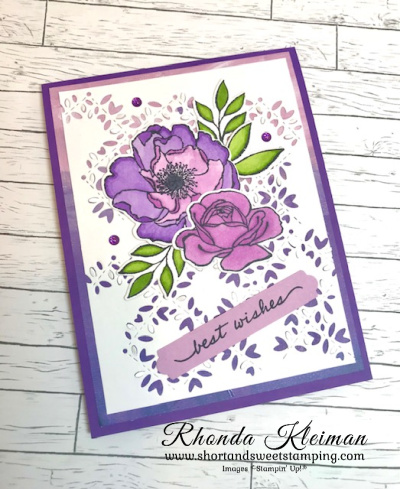
Hues of Happiness Card
- Card base – cut piece of Melon Mambo cardstock at 5 1/2″ x 8 1/2″, score at 4 1/4″, fold and crease with a bone folder.
- Cut a piece of Hues of Happiness Designer Series Paper with a variegated background at 4″ x 5 1/4″ and adhere to card front.
- For the frame, cut a piece of Basic White cardstock at 3 1/2″ x 4 1/4″. Cut a piece of an adhesive sheet to the same size, adhere to back of cardstock and run through the Cut & Emboss machine. Remove adhesive backing and adhere to DSP.
- Die cut a variety of flowers and leaves from the sheet of DSP with pink and yellow flowers that coordinate with the Blooming Happiness Dies. Arrange the collage over the frame and when you are pleased with the layout, start adhering the pieces to one another with Mini Glue Dots until you have one big floral piece. Adhere the floral piece to the card front with Stampin’ Dimensionals.
- Stamp greeting from the Go To Greetings stamp set with Tuxedo Black Memento ink on scrap piece of Basic White cardstock and run through Cut and Emboss machine with the smallest label die from the Stylish Shapes dies. Adhere with Mini Stampin’ Dimensionals, tucking one edge under the flowers.
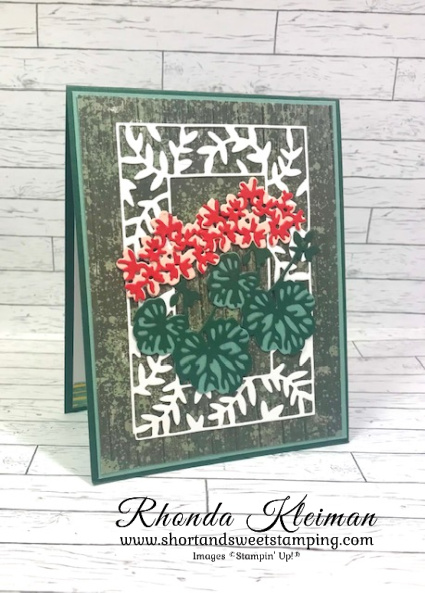
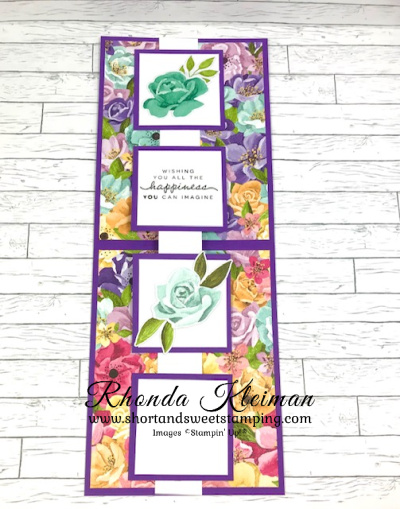
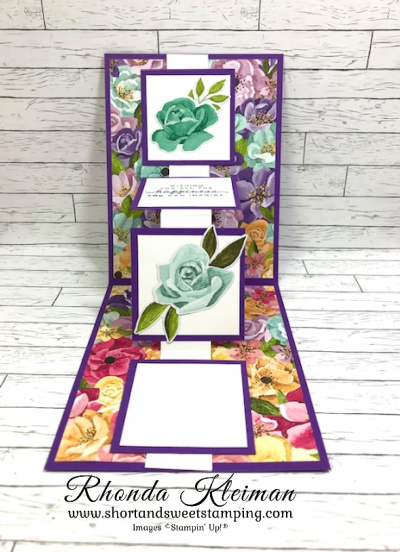
Potted Geraniums Card
- Card base – cut a piece of Evening Evergreen cardstock at 4 1/4″ x 11″, score at 5 1/2″, fold and crease with a bone folder.
- Cut a piece of Soft Succulent cardstock at 4 1/8″ x 5 3/8″ and adhere to card front.
- Cut a piece of the Evening Evergreen paper from the Texture Chic Designer Series Paper at 4″ x 5 1/4″ and adhere to Soft Succulent piece.
- For the frame, cut a piece of Basic White cardstock at 3 1/2″ x 4 1/4″. Cut a piece of an adhesive sheet to the same size, adhere to back of cardstock and run through the Cut & Emboss machine. Remove adhesive backing and adhere to DSP.
- Die cut two leaf bases from scrap pieces of Soft Succulent cardstock. Die cut two detailed leaf overlay pieces from scrap pieces of Evening Evergreen. Before die cutting, back the Evening Evergreen pieces with an adhesive sheet for easy adhering to the leaf bases.
- Die cut two flower bases from scrap pieces of Petal Pink cardstock. Die cut two detailed flower pieces from scrap pieces of Poppy Parade cardstock, backing the pieces with an adhesive sheet.
- Arrange flowers and leaves over the Fancy Frame and once you are pleased with the layout, adhere with liquid glue.
Thanks for stopping by today!


Place an online order between $50 and $149 and use this host code for August. You will receive a free gift from me the following month. If your order is $150 or more DO NOT use the host code. You will qualify for Stampin’ Rewards.

Ten new products from the annual catalog have been added as Sale-A-Bration freebies! When you place an online order that qualifies for Sale-A-Bration items, please be sure to use the item numbers listed in the flyer below in order to redeem them as SAB rewards, as they are different than the item numbers listed in the annual catalog!


This new Cozy & Bright Card Kit is now available for purchase. The kit has everything you need to make twelve 5 1/2″ x 4 1/4″ cards. It includes a photopolymer stamp set, acrylic block, adhesives, preprinted card bases, die cuts and stickers, Poppy Parade Stampin’ Spot, gold foil accents, preprinted envelopes, linen thread, as well as step-by-step instructions. Product colors: Cajun Craze, Early Espresso, Evening Evergreen, Garden Green, Poppy Parade, Pumpkin Pie. The cost of the kit is $23.00 and the item number is 160338. Click here to place your order in my online store. This kit is available only while supplies last.
Product List ") | ||
 | ") | |
 |  | |
 | ||
 | ||
 |  |  |
 |  |  |
 |  |  |
")
")
")
")
 Designer Series Paper")
 Specialty Designer Series Paper")