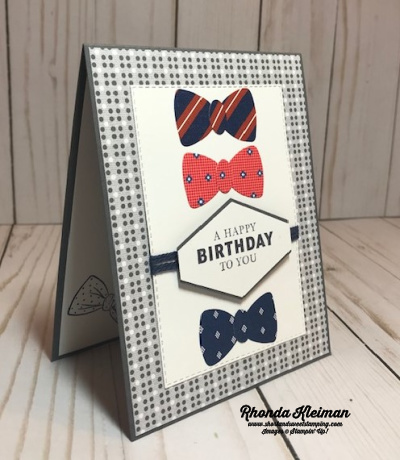
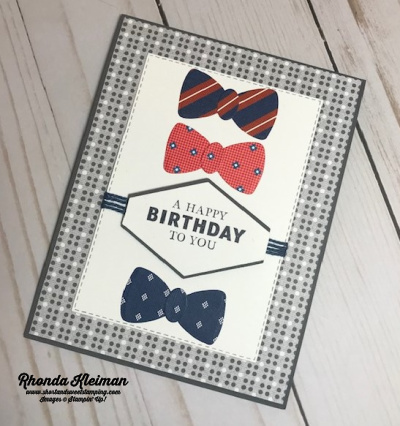
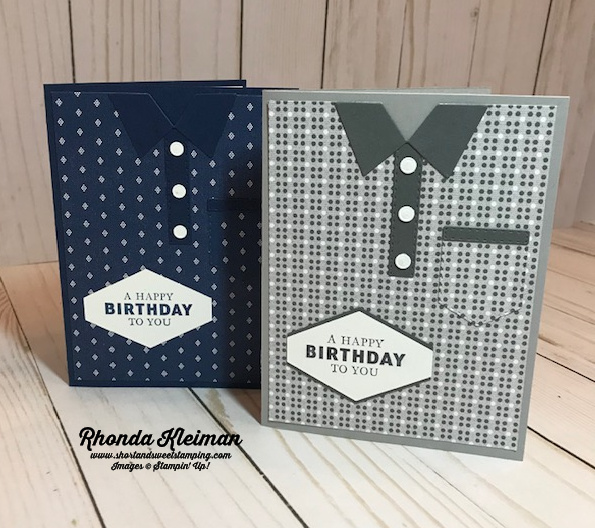
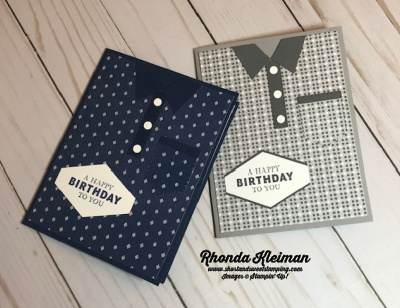
Hello! I needed a few masculine birthday cards so I turned to the Well Suited Suite in the mini catalog. I saw a few cute cards made by Tina Zinck and Michelle Strazds on Pinterest that were made to look like polo shirts and CASEd them, making a few changes. I did one in Night of Navy and the other in Smoky Slate. They were a lot of fun and very easy to put together!
Here is how I made the cards.
- Card base – cut piece of Night of Navy or Smoky Slate cardstock at 5 1/2″ x 8 1/2″, score at 4 1/4″, fold and crease with a bone folder.
- Cut piece of Well Suited Designer Series Paper at 4″ x 5 1/4″. Cut a “V” in the center. I used the collar die from the Suit and Ties Dies and made the “V” by centering the die at the 2″ mark, slightly below the top of the DSP, traced with a pencil and cut out with Paper Snips.
- Die cut collar and long strip with either Night of Navy or Basic Gray cardstock. The long strip will be used for the button placket. Trim the strip to 2″ and adhere to DSP below the center of the “V.” Adhere collar piece.
- Die cut pocket from DSP and die cut the contrasting trip with the small strip die. Adhere to top of pocket. Adhere to DSP base.
- Die cut Basic White buttons with the button die. There are six buttons on the one die so I used three for each card. Adhere them to the placket. I used the putty tip on the Take Your Pick tool to pick up each button, place them on Mini Glue Dots, and then onto the placket.
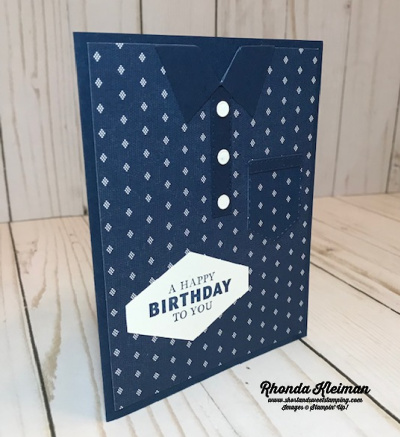
- For the Night of Navy card stamp the birthday greeting from the Handsomely Suited stamp set with Night of Navy ink on scrap piece of Basic White cardstock and punch out with the Tailored Tag punch. Adhere to DSP base. Adhere DSP piece to Night of Navy card base.
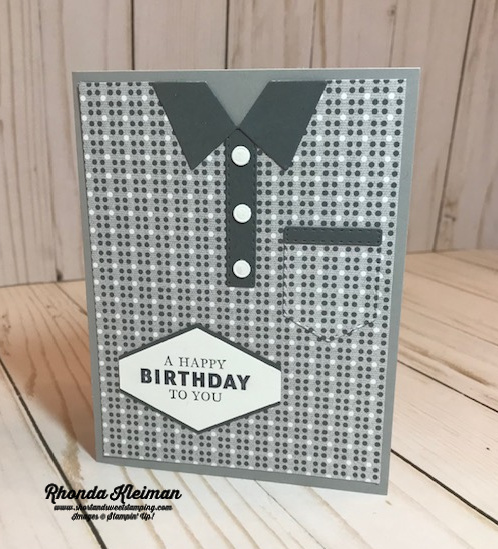
- For the Smoky Slate card stamp the birthday greeting with Basic Gray ink. Punch out with the Tailored Tag Punch. Punch another tag with a scrap piece of Basic Gray cardstock. Cut in half horizontally. Adhere one piece to top of tag and the other piece to the bottom of the tag so that it frames the Basic White tag. Adhere to DSP base and adhere entire piece to Smoky Slate card base.
- Cut a piece of Basic White cardstock at 4″ x 5 1/4″. Leave blank or stamp a greeting and adhere to inside of card.
Thanks for stopping by today!


") |  | |
 |  | |
 |  |  |
 |  |  |
 |  |
")
 Designer Series Paper")