Fine Art Floral Cards

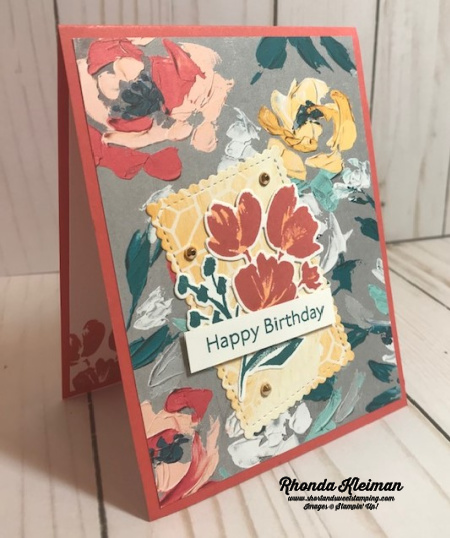
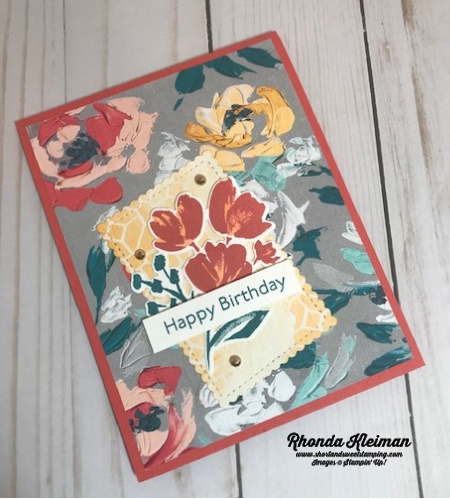
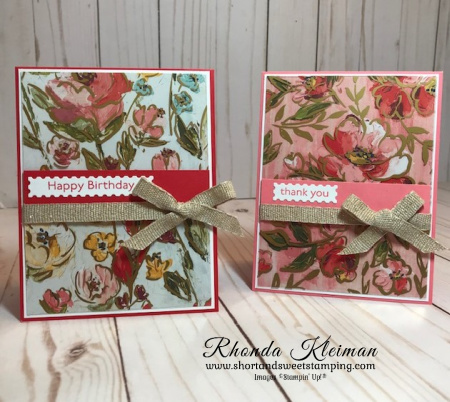
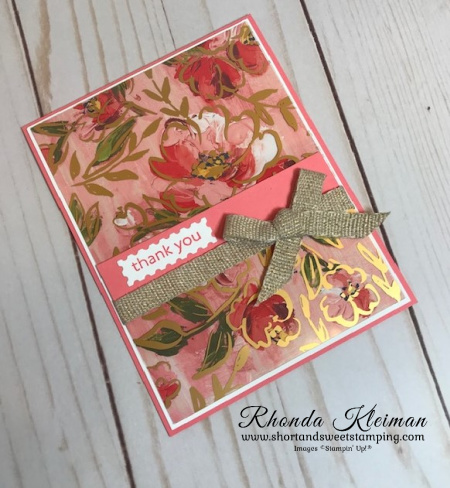
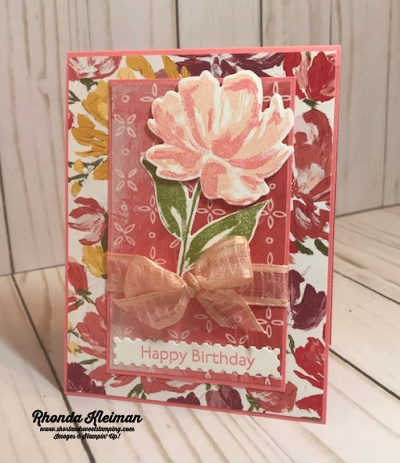
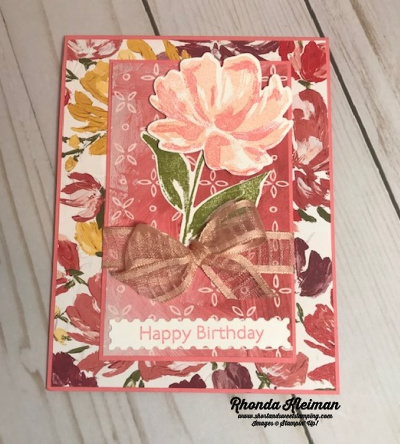
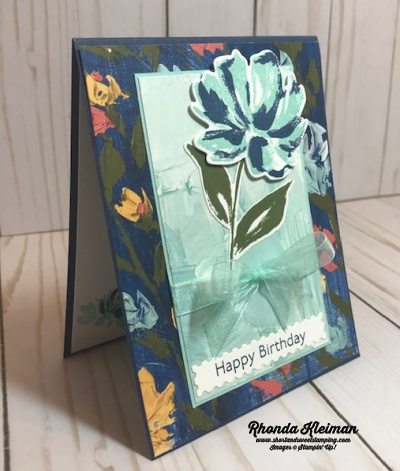
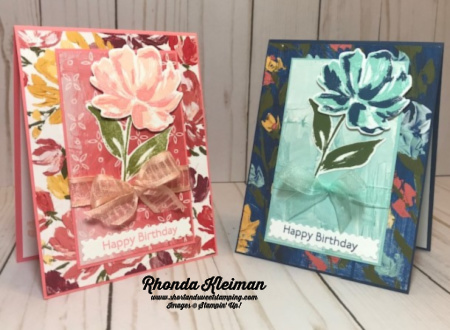
Hello! Today I’m sharing two cards I made with the Fine Art Floral Designer Series Paper and the Golden Garden Designer Specialty Acetate from the Fine Art Floral Suite. The DSP is beautiful on its own, however, the acetate adds a wow pop of gold! I used two different sheets of the DSP and the coordinating acetate sheets. I made a bunch of these cards so I could have a few extras on hand.

Here is how I made the cards.

  • For the card bases I chose a few different colors of cardstock that coordinated with the DSP. For these two cards I used Poppy Parade and Flirty Flamingo. Cut cardstock at 4 1/4″ x 11″, score at 5 1/2″, fold and crease with a bone folder.
  • Cut one piece each of Flirty Flamingo and Poppy Parade cardstock at 1″ x 4″.
  • Cut piece of Basic White cardstock at 4 1/8″ x 5 3/8″ and adhere to front of card base.
  • Overlay the acetate sheet over the DSP to make sure that the two designs line up in the right direction. Once that is done, put the acetate sheets aside and cut strips of the DSP at 4″ x 12″ and then cut the length of the strip down to 5 1/4″. You will get two full pieces per strip.
  • Cut strips of the acetate sheets at 4″ x 12″ and then cut the length of the strips down to 5 1/4″. You will get two full pieces from each strip. Match each of these pieces with the coordinating DSP pieces.
  • To adhere the acetate to the DSP adhere a few mini glue dots on the back of acetate sheet in spots where they will not show.
  • Stamp greetings from the Art Gallery stamp set on scrap pieces of Basic White cardstock with Flirty Flamingo and Poppy Parade ink. Cut with the label dies from the Floral Gallery dies. I used the thank you and birthday greetings. Adhere to the 1″ cardstock strips. Adhere strips to the DSP pieces. I didn’t want the large flowers to be covered up by the strip so for each piece I adhered them either higher up or lower down.
  • Cut a 24″ length of Fine Art Floral ribbon and tie in a bow around the DSP piece over the cardstock strip. Trim ends. This ribbon is so soft to work with and adds a touch of elegance to the cards.
  • Adhere DSP piece to the Basic White cardstock piece on the card front.
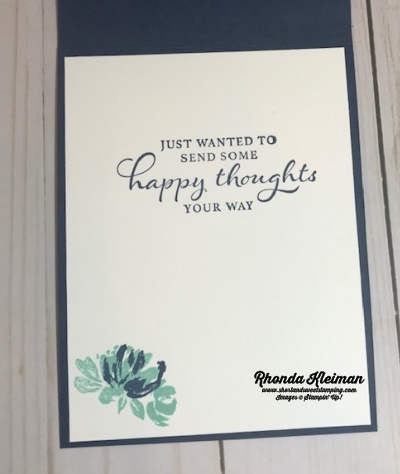
  • Cut another piece of Basic White cardstock at 4″ x 5 1/4″ and stamp a greeting or leave blank. I decided to leave the cards I made blank so I could personalize them for each recipient.

Thanks for stopping by today!

There are only five days remaining before the 2020-2021 Annual Catalog retires on May 3rd. While some products are now sold out, there are still many remaining products available at up to 75% off, while supplies last. Click here to shop for last-chance products in my online store.

The 2021-2022 Annual Catalog ordering period begins on Tuesday, May 4th!

Please use this April Host Code when you shop in my online store if your order is between $50 and $149.00 and you will receive a free gift from me. If your order is $150 or more, DO NOT use this code, as you will be entitled to Stampin’ Rewards. You will still receive the free gift from me.

Product List
Paper Snips
[103579]
$10.00

Fine Art Floral Happy Birthday

Hello! Today I have two birthday cards for you that feature the Fine Art Floral Suite. I used the same layout for both but changed up the colors. I used the pink tones for one and the blue tones for the other.

Here is how I made the card.

  • Card base – cut piece of Flirty Flamingo cardstock at 4 1/4″ x 11″, score at 5 1/2″, fold and crease with a bone folder.
  • Cut piece of Fine Art Floral Designer Series Paper at 4 1/8″ x 5 3/8″ and adhere to front of card. Cut another piece of Flirty Flamingo cardstock at 2 7/8″ x 4 5/8″. Cut a contrasting piece of Fine Art Floral DSP at 2 3/4″ x 4 1/2″ and adhere to Flirty Flamingo piece.
  • Use the Art Gallery stamp set and stamp the flower with Petal Pink and Flirty Flamingo ink. Stamp the leaves with Old Olive ink. Cut out with coordinating dies from the Floral Gallery Dies set. Stamp birthday greeting with Flirty Flamingo ink on scrap piece of Basic White cardstock. Cut out with one of the labels in the dies set.
  • Adhere greeting at bottom of the smaller card front. Arrange leaves and flower. Adhere leaves and then adhere flower with Stampin’ Dimensionals.
  • Cut a length of Organdy Striped Ribbon and tie in bow around the piece. Adhere piece to card front.

Follow the above steps to make the blue version of the card.

  • Card base – Night of Navy cardstock, Pool Party cardstock for smaller card base
  • DSP – select papers from the blue family in the set
  • Ink – Mossy Meadow for the leaves, Night of Navy and Pool Party for the flower. Night of Navy for the birthday greeting.
  • Ribbon – Pool Party Sheer Ribbon

For the inside of both cards:

  • Cut piece of Basic White cardstock at 4″ x 5 1/4″.
  • Stamp sentiment from the Happy Thoughts stamp set with Night of Navy /Flirty Flamingo ink.
  • Stamp small flower in lower left corner with either the Night of Navy/Pool Party combination or the Flirty Flamingo/Petal Pink combination of inks. Adhere to inside of card.

Which one do you like better – the pink or the blue? Please feel free to leave me a comment!

Thanks for stopping by today!

The Bouquet of Hope Paper Pumpkin Kit provides enough supplies to create nine cards and coordinating envelopes. This soft, sympathetic kit includes patterned card bases, die-cut floral elements, ribbon, embellishments, and more! The kit’s exclusive Bouquet of Hope Stamp Set features supportive sentiments centered around comfort, care, hope, and love. Such a versatile stamp set can be used throughout the year! To subscribe to Paper Pumpkin, visit my site by clicking here.

Product List
Paper Snips
[103579]
$10.00

Sneak Peek – Fine Art Floral Suite

Hello! All of my holiday stamps and papers have been put away and it is now time to break out some new products from the January-June 2021 Mini Catalog that will go live on January 5th! Today I have a card that features some of the products from the Fine Art Floral Suite. The Designer Series Papers are gorgeous. They were hand painted by Stampin’ Up! artists and were then photographed and turned into the DSP.

Here is how I made the card.

  • Card base – cut a piece of Terracotta Tile cardstock at 4 1/4″ x 11″, score at 5 1/2″, fold and crease with a bone folder.
  • Cut piece of the Fine Art Floral Designer Series Paper at 4″ x 5 1/4″ and adhere to card front.
  • Cut a contrasting piece of DSP at 2 1/2″ x 3 1/2″ and run through your die cutting machine with the third largest scalloped rectangle die from the Stitched So Sweetly die set. Adhere to card front, off center and at an angle.
  • For the stamped image use the the floral spray in the Art Gallery stamp set. In order to use more than one ink color on the image you will have to stamp it multiple times. This is a photopolymer stamp, which is hard to color on with markers the way you do with a rubber stamp. First stamp the image with Pretty Peacock ink on a scrap piece of Whisper White cardstock and then stamp the same image on a other scrap piece of cardstock with Terracotta Tile ink. For added contrast color in the white spaces with the light Pumpkin Pie Stampin’ Blend.
  • Run both stamped images through your die cutting machine with the coordinating die from the Floral Gallery Dies. Trim off the leaves from the Terracotta Tile stamped image and adhere the flower part over the flowers on the Pretty Peacock stamped image. Adhere to the die cut scalloped piece on the card front.
  • Stamp greeting with Pretty Peacock ink on 1/2″ wide scrap piece of Whisper White cardstock and trim ends with paper snips. Adhere on top of the floral image with Stampin’ Dimensionals.
  • For extra bling add three small Gilded Gems around the flower.
  • For the inside of the card cut a piece of Whisper White cardstock at 4″ x 5 1/4″. Stamp another greeting in Pretty Peacock ink. I used “Best Wishes.” Ink up the top part of the floral image stamp with Terracotta Tile ink and stamp in bottom left corner . Adhere to the inside.

There are just a few days left for you to order retiring products from the August-December 2020 Mini Catalog! Products available while supplies last!

Thanks for stopping by today!

 Product List  
Paper Snips
[103579]
$10.00