

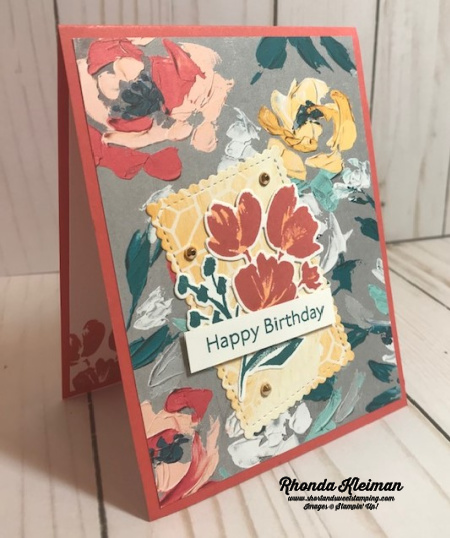
Hello! All of my holiday stamps and papers have been put away and it is now time to break out some new products from the January-June 2021 Mini Catalog that will go live on January 5th! Today I have a card that features some of the products from the Fine Art Floral Suite. The Designer Series Papers are gorgeous. They were hand painted by Stampin’ Up! artists and were then photographed and turned into the DSP.
Here is how I made the card.
- Card base – cut a piece of Terracotta Tile cardstock at 4 1/4″ x 11″, score at 5 1/2″, fold and crease with a bone folder.
- Cut piece of the Fine Art Floral Designer Series Paper at 4″ x 5 1/4″ and adhere to card front.
- Cut a contrasting piece of DSP at 2 1/2″ x 3 1/2″ and run through your die cutting machine with the third largest scalloped rectangle die from the Stitched So Sweetly die set. Adhere to card front, off center and at an angle.
- For the stamped image use the the floral spray in the Art Gallery stamp set. In order to use more than one ink color on the image you will have to stamp it multiple times. This is a photopolymer stamp, which is hard to color on with markers the way you do with a rubber stamp. First stamp the image with Pretty Peacock ink on a scrap piece of Whisper White cardstock and then stamp the same image on a other scrap piece of cardstock with Terracotta Tile ink. For added contrast color in the white spaces with the light Pumpkin Pie Stampin’ Blend.

- Run both stamped images through your die cutting machine with the coordinating die from the Floral Gallery Dies. Trim off the leaves from the Terracotta Tile stamped image and adhere the flower part over the flowers on the Pretty Peacock stamped image. Adhere to the die cut scalloped piece on the card front.
- Stamp greeting with Pretty Peacock ink on 1/2″ wide scrap piece of Whisper White cardstock and trim ends with paper snips. Adhere on top of the floral image with Stampin’ Dimensionals.
- For extra bling add three small Gilded Gems around the flower.
- For the inside of the card cut a piece of Whisper White cardstock at 4″ x 5 1/4″. Stamp another greeting in Pretty Peacock ink. I used “Best Wishes.” Ink up the top part of the floral image stamp with Terracotta Tile ink and stamp in bottom left corner . Adhere to the inside.

There are just a few days left for you to order retiring products from the August-December 2020 Mini Catalog! Products available while supplies last!

Thanks for stopping by today!

Product List
 | |
 |  |
 |  |
 |  |
 |  |


