
Hello!
Today’s card is another one I made with the By the Bay Suite. It features the W Fun Fold, which looks difficult, but is really easy to make.
Here is how I made the card.
- Card base – cut a piece of Balmy Blue cardstock at 4 1/4″ x 11″, score at 5 1/2″, fold and crease with a bone folder
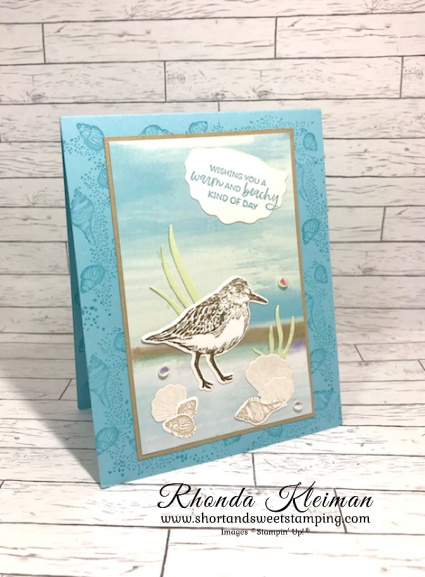
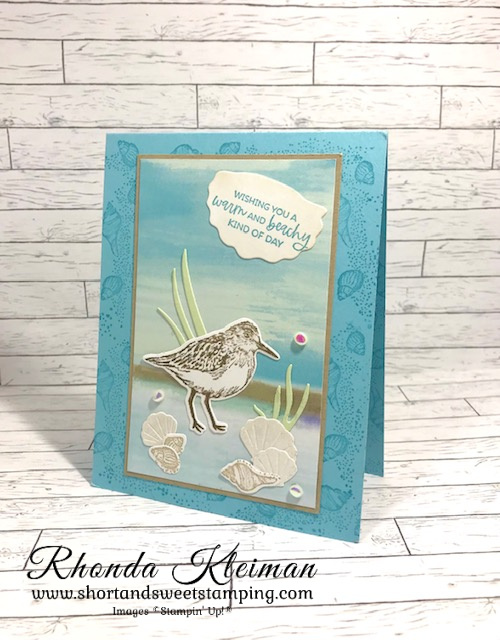
- Stamp the sea shell and sand image from the Seaside Bay stamp set with Balmy Blue ink around all four sides of the card front so that it looks like a frame.
- Cut a piece of Crumb Cake cardstock at 3 1/8″ x 4 7/8″. Cut a piece of By the Bay Specialty Designer Series Paper at 3″ x 4 3/4″. I chose one of the papers with a scene. Adhere to Crumb Cake piece and adhere to card front.
- Stamp large bird image with Soft Suede ink on a scrap piece of Basic White cardstock. Stamp the sea shell and sand image with Sahara Sand ink on the scrap piece. Run through die cutting machine with the coordinating dies from the Seaside Bay Dies.
- Cut a small piece of Pearlescent Specialty Paper and run through die cutting machine with the double small shell die and one large shell die. Cut a small piece of Soft Sea Foam cardstock and run through die cutting machine with one large and one small grass dies.
- Arrange die cut pieces on the DSP and adhere.
- Run the large shell through die cutting machine with a piece of Basic White cardstock. Cut shell in half. Stamp greeting from Paradise Palms stamp set with Balmy Blue ink on the shell and adhere to DSP. Embellish card front with several Flat Adhesive-Backed Pearls.
Here is how to make the inside of the card.
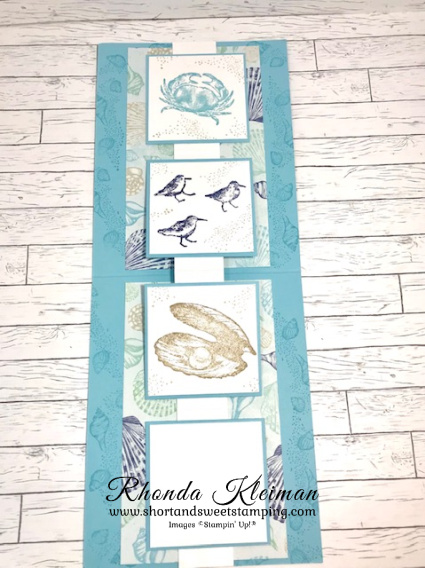
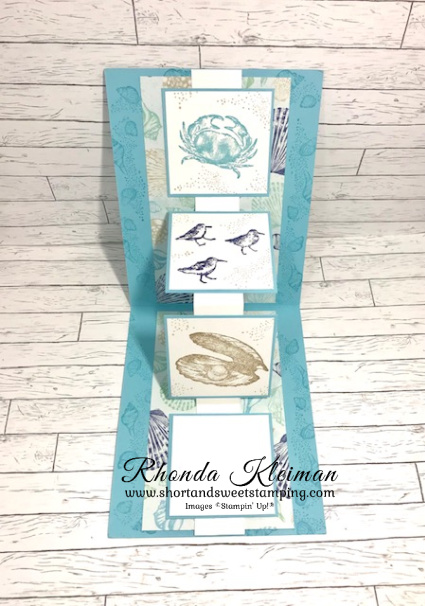
- Stamp the sea shell and sand image with Balmy Blue ink all around the sides of the Balmy Blue cardstock
- Cut two pieces of DSP at 3″ x 5 1/4″ and adhere.
- Cut four pieces of Balmy Blue cardstock at 2 1/4″ each and four pieces of Basic White cardstock at 2″ each. Stamp the large crab image with Balmy Blue ink on the first piece. Stamp the small bird images three times with Night of Navy ink on the second piece. Stamp the oyster shell with Crumb Cake ink on the third piece. Stamp the sand image with Sahara Sand ink around the images on all three pieces. Leave the fourth piece blank to write your note or stamp the greeting of your choice. Adhere white squares to Balmy Blue squares.
- Cut a piece of Basic White cardstock at 1″ x 11″ and score at 2 3/4″, 5 1/2″ and 8 1/4″. Crease all folds very sharply with a bone folder.
- Run a thin line of liquid glue at the top of the 11″ strip. Open card and center the strip in the middle. Line up the top of the strip with the top of the card and adhere. Run a thin line of liquid glue at the bottom of the strip. Line up the strip with the bottom of the card and adhere.
- Adhere the four squares to the strip, running a thin line of liquid glue in the middle of each square. Don’t apply glue to the entire square otherwise the fold won’t work properly.
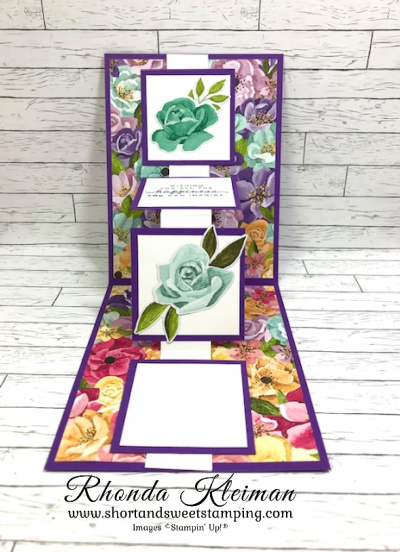
Last July I posted a W Fun Fold with the Hues of Happiness Suite. Here is the card. To view the blog post, click here.
Thanks for stopping by today!

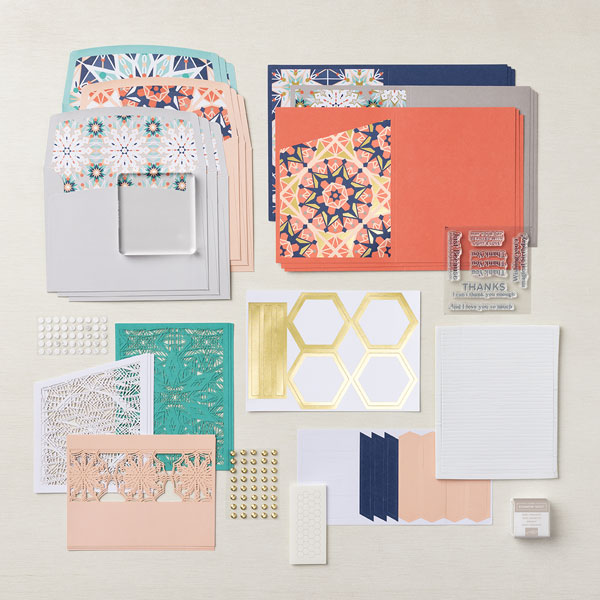
Colorful Kaleidoscope Added to Kits Collection
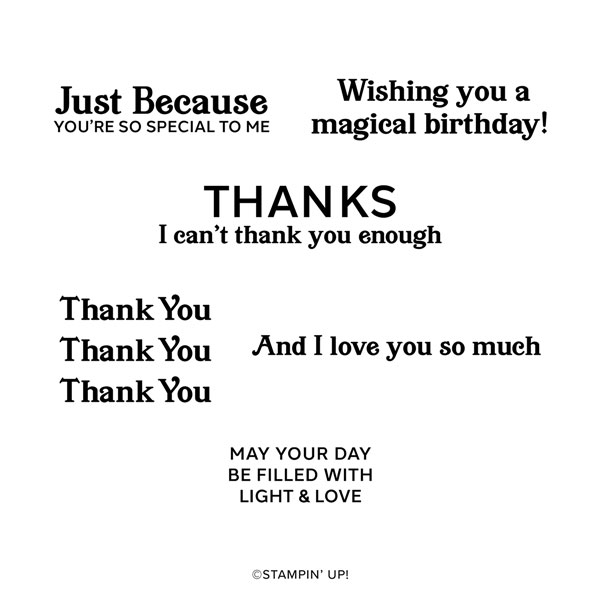
This stunning kit has just been added to the Kits Collection. It includes supplies to create 9 cards, 3 each of 3 different designs, stamp set, acrylic block, dimentionals, Gray Granite Stampin’ Spot, laser cuts, die cuts, gold and pearlescent embellishments. The colors are Bermuda Bay, Calypso Coral, Gray Granite, Night of Navy and Petal Pink. You can purchase the kit on my online store by clicking here. Item #161804 and cost is $23.00.


Place an online order between $50 and $149 and use this host code for March. You will receive a free gift from me the following month. If your order is $150 or more DO NOT use the host code. You will qualify for Stampin’ Rewards.
Product List ") | ||
 | ||
 | ||
 | ||
 |  | |
 |  |  |
 |
")
")
")
 Specialty Designer Series Paper")


 Sheer Ribbon")

