International Highlights Winners Blog Hop-Layering Leaves

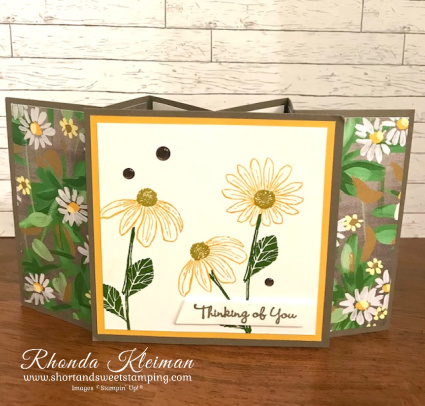
I’m very excited to be participating in Kylie Bertucci’s International Highlights Top 10 Winners Blog Hop this month! Thanks so much to everyone that voted for my card in the International Blog Highlights. It is an honor to be included in this group of talented designers from around the world! This Cheerful Daisies card won me a spot in this Blog Hop. Click here to see full directions on how to make the card.
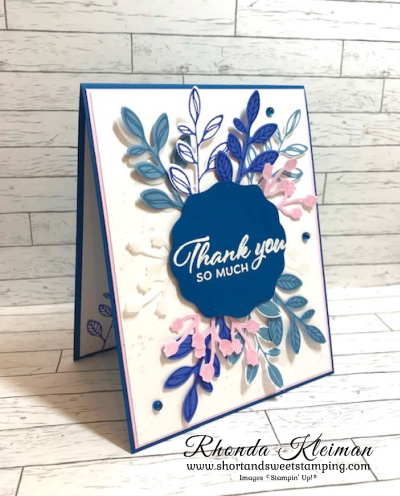
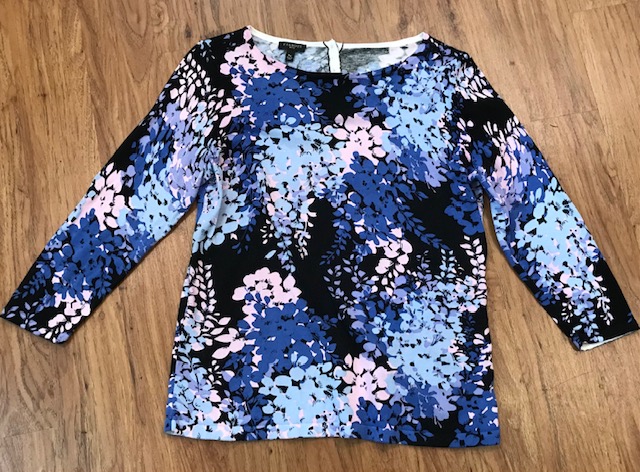
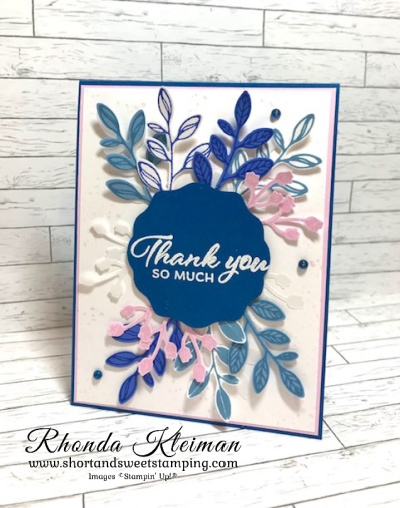
Today’s card features the Layering Leaves stamp set. It is one of the first sets I purchased from the new annual catalog because of its versatility and the fabulous greetings and font. The color palette was inspired by one of my favorite Talbots spring sweaters! The pink flowers were calling out Bubble Bath and I also selected Blueberry Bushel, Boho Blue and Orchid Oasis.
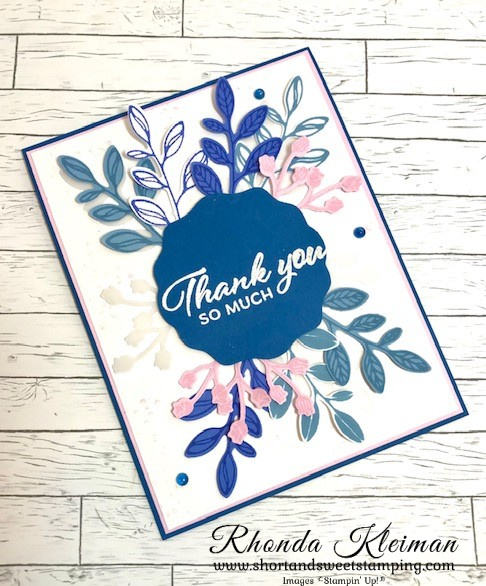
Here is how I made the card.

  • Card base – cut piece of Blueberry Bushel cardstock at 4 1/4″ x 11″, score at 5 1/2″, fold and crease with a bone folder.
  • Cut piece of Bubble Bath cardstock at 4 1/8″ x 5 3/8″ and adhere to card front.
  • Stamp seven large leaves as follows: two Boho Blue tone on tone; two Orchid Oasis tone on tone, two Boho Blue stamped with Boho Blue ink on Basic White cardstock; one Orchid Oasis stamped with Orchid Oasis ink on Basic White cardstock. Punch out with the Boughs Punch.
  • Stamp five of the smaller leaves with Bubble Bath tone on tone and punch them out.
  • Punch out three large vellum leaves and three small vellum leaves.
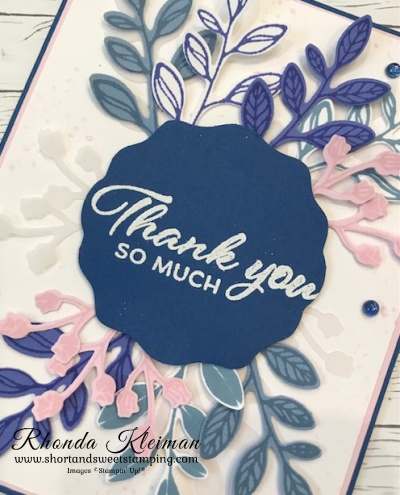
  • Punch Blueberry Bushel circle with the Decorative Circle punch. Stamp greeting with Versamark ink and heat emboss with white embossing powder. The embossing powder is one in a set of three basic Stampin’ Emboss Powders.
  • Arrange the leaves on a piece of Basic White cardstock cut at 4″ x 5 1/4″. Adhere the vellum leaves first with either a few dots of liquid glue or glue dots. I placed two large leaves at the top and one at the bottom, two small leaves at the middle left side and one at the middle right side. Adhere four large stamped leaves at the top and three at the bottom. Adhere two pink leaves at the top and three at the bottom.
  • Using the speckles stamp, fill in some of the white space around the leaves by lightly stamping with Bubble Bath ink . Adhere piece to the card front.
  • Adhere the embossed greeting with Stampin’ Dimensionals in the middle of the leaf arrangement. Embellish with a few Blueberry Bushel gems from the Tinsel Gem Four-Pack.
Please click on the links below to check out all of the projects from this month’s winners!

Thanks for stopping by today!

Product List
Bough Punch
[157711]
$22.00

Place an online order between $50 and $149 and use this host code for June. You will receive a free gift from me the following month.  If your order is $150 or more DO NOT use the host code. You will qualify for Stampin’ Rewards.

Layering Leaves Quick & Easy Card

Hello!

Today’s card features the Layering Leaves stamp set and coordinating Bough Punch. This is the customer thank you card I sent out in May. It was also one of the class projects I recently did for a group of women that had never stamped before. Layering Leaves is one of the first stamp sets I purchased when the new annual catalog went live. The lovely images and greetings are so versatile! I used the Hello, Irresistible Designer Series Paper, which is an Online Exclusive product.

Here is how I made the cards.

  • Card base: Cut a piece of Lost Lagoon cardstock at 5 1/2″ x 8 1/2″, score at 4 1/4″, fold and crease with a bone folder.
  • Cut a piece of Basic White cardstock at 4 1/8″ x 5 3/8″ and adhere to card front. Cut piece of Hello Irresistible Designer Series Paper at 4″ x 5 1/4″.
  • Stamp one of the large leaf designs with Lost Lagoon ink and one of the small leaf designs with Soft Sea Foam ink on a scrap piece of Basic White cardstock and punch out with the Boughs punch.
  • Cut a piece of Soft Sea Foam cardstock at 2″ x 3 1/2″. Stamp greeting with Lost Lagoon ink. Run through die cutting machine with the smaller oblong shaped die from the Something Fancy dies.
  • Cut a piece of Lost Lagoon 1/4″ Bordered Ribbon at 5″ and wrap sides around the DSP piece. This ribbon is so pretty when you see it in person and it is very easy to work with!
  • Adhere the leaves to the card front with mini glue dots. Slide the leaves under the ribbon. Adhere the greeting with Stampin’ Dimensionals.
  • Cut a piece of Basic White cardstock at 4″ x 5 1/4″. With the 3/4″ leftover strip of DSP, cut the width to 4″ and adhere to cardstock as a way to decorate the inside of the card. Stamp greeting of your choice and adhere to card.

Thanks for stopping by today!

There is still one week left to join Stampin’ Up! Purchase the Starter Kit for $99 and get $155 worth of the products of your of your choice. This is $56 in free product, which $30 more than usual. The kit ships for free. You will get a discount of 20%-25% on all future orders as long as you remain active as a demonstrator. As a demonstrator you get to see the annual and mini catalogs one month before they to live to customers and youget to place pre-orders in advance of the catalogs going live. You also get the opportunity to attend virtual and in-person events just for demonstrators. Become a happy discount shopper – you do not have to do this as a business! Enjoy your discount and as long as you meet the $300 quarterly minimum in sales, you will remain active. If you miss the quarterly minimum or decide you no longer wish to be a demonstrator, there is absolutely no penalty for dropping and you can go back to being a customer! To join, click here. I’d love to have you on my team!

Place an online order between $50 and $149 and use this host code for June. You will receive a free gift from me the following month.  If your order is $150 or more DO NOT use the host code. You will qualify for Stampin’ Rewards.

Product List
Bough Punch
[157711]
$22.00