Three Easy Cards with Sale-A-Bration Designer Series Paper

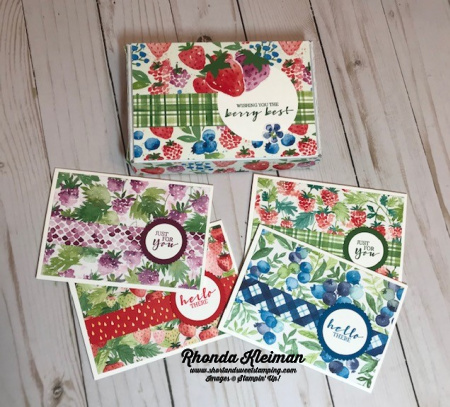
Hello! September seems to be flying by, which means that the current Sale-A-Bration promotion will be coming to an end on September 30th! You still have one week to earn free products with every $50 or $100 purchase. Today I have three cards for you that feature the Designer Series Papers you can earn with a $50 purchase. As a Stampin’ Up! demonstrator I receive Succeed Weekly in my email box each week and it is filled with business and creative inspiration. Several weeks ago they featured three cards made with a very simple layout, using the DSP, as shown here.

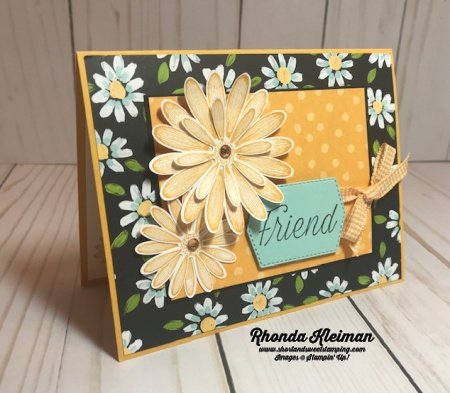
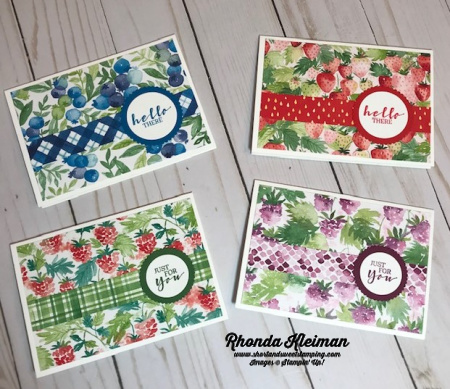
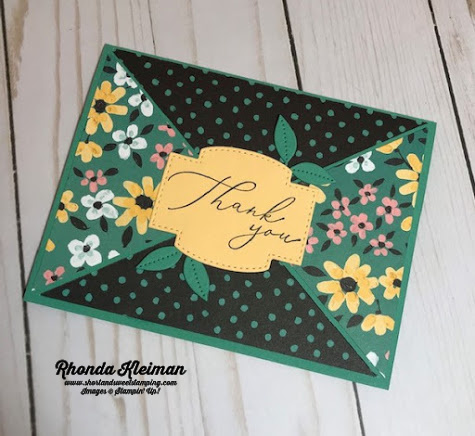
I decided to create my own cards, as shown here.

This layout makes quick and easy cards, with minimal stamping and no need for many embellishments, so it would be great for beginner stampers and crafters. It is also a great way to use up all those packages of DSP sitting on your shelf that you’ve been afraid to cut into! Cut Basic White Thick cardstock at 4 1/4″ x 11″ for the card bases or select a cardstock color that coordinates with the DSP.

This card uses the Peaceful Prints DSP. Get a jump on making some Christmas cards now with this beautiful paper. The coordinating colors are Basic Black, Cherry Cobbler, Garden Green, Real Red and Sahara Sand. I used the Perfectly Plaid stamp set to stamp the tree in Garden Green ink and cut out the circle with one of the Layering Circles Dies. You can also use a circle punch. The Joy greeting from the Whimsical Trees stamp set was stamped in Real Red ink on a scrap piece of Basic White cardstock. I used the black & white gingham ribbon in the July-December 2021 Mini Catalog as an accent and adhered it with a piece of Tear & Tape Adhesive.

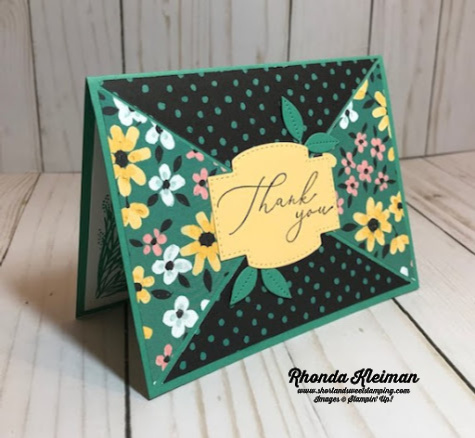
This card uses the adorable Penguin Playmates DSP. This paper coordinates with the Penguin Place bundle in the July-December 2021 Mini Catalog, however, you don’t need the bundle to create great cards, as the paper speaks for itself! The coordinating colors are Balmy Blue, Basic Black, Calypso Coral, Fresh Freesia, Just Jade, Misty Moonlight and Soft Sea Foam. I fussy cut the penguin from one of the sheets of paper, punched a circle from a contrasting piece of DSP and adhered the penguin to it. I used one of the greetings from the Sweet Ice Cream stamp set, stamped it with Tuxedo Memento Black ink on a scrap piece of Basic White cardstock and flagged one of the ends.

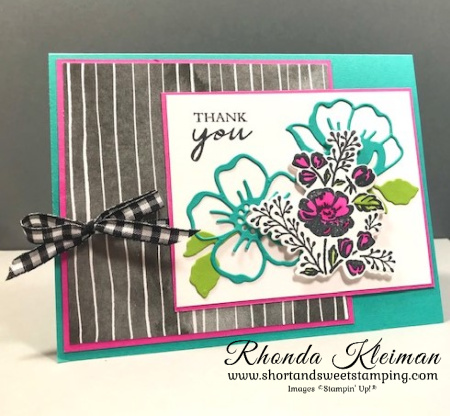
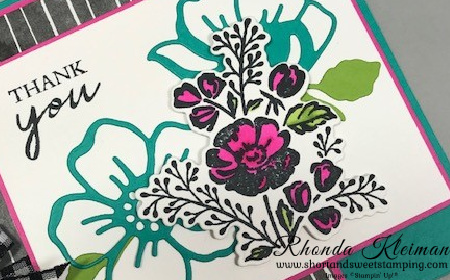
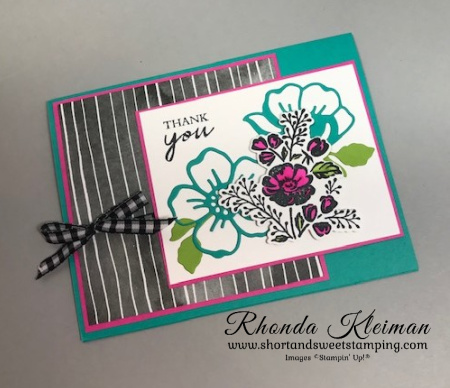
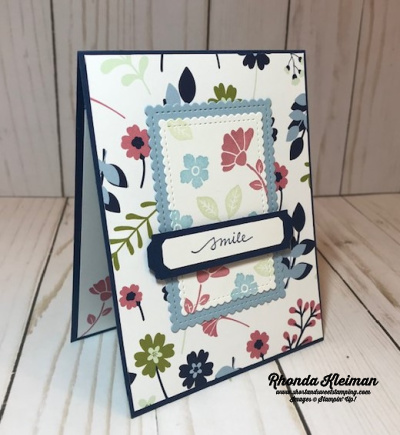
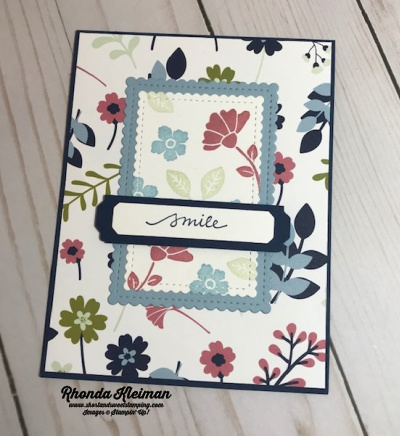
This last card uses the Beautifully Penned DSP, which coordinates with the Hand-Penned Petals Bundle in the 2021-2022 Annual Catalog, although this paper works beautifully with many other stamp sets. Who doesn’t love black and white paper – it goes with everything and you can also color it with markers, Stampin’ Blends or with ink pads and blending brushes. This set of papers includes 4 sheets each of 3 double-sided designs. I cut a circle from the paper and colored the flowers with Pale Papaya and Soft Sea Foam Stampin’ blends. The greeting was stamped on a scrap piece of Basic White cardstock. I used the hello greeting from the Timeless Tulips stamp set. I cut a 1/4″ strip of Pale Papaya cardstock to use as an accent between the two pieces of DSP.

Thanks for stopping by today!

There is only one week left to join Stampin’ Up! and get this great Sale-A-Bration deal! You get to select $125 worth of products for only $99 and will also get a FREE bundle from the Holiday Catalog! You will also earn free Sale-A-Bration products! Everything ships for free. I’d love to have you join my team. Become a happy discount shopper or build a business – the choice is yours! Click here for the benefits of joining Stampin’ Up!

Here is a list of bundles you can select from.

Place an online order between $50 and $149 and use this host code for September. You will receive a free gift from me the following month.  If your order is $150 or more DO NOT use the host code. You will qualify for Stampin’ Rewards.

Product List
Paper Snips
[103579]
$10.00

Shaded Summer Thank You-Kylie’s Training Blog Hop

Hello! Welcome to Kylie Bertucci’s Demonstrator Training Blog Hop for September. This is the last hop for the 2020-2021 year. I’m part of a group of Stampin’ Up! demonstrators from around the world that participate in Kylie’s program for building our businesses. The theme for this year is thank you cards that we make as a way to show appreciation to our customers and teams. Please be sure to click on the names in the list at the end of this post to hop around and view the beautiful projects created by so many talented stampers.

Today’s card features the Shaded Summer Stamp set in the annual catalog, along with the Summer Shadows Dies that you can earn for free with a $100 purchase during Sale-a-Bration through the end of September. The Beautifully Penned Designer Series Paper is also a Sale-a-Bration item that you can earn with a $50 purchase. I decided to go with bright colors and used Magenta Madness as one of them. As I was going through all of my cardstock recently to see what needed to be replenished, I saw that I barely made a dent with this one. As much as I love bright colors, this is way bright even for me!

Here is how I made the card.

  • Card base – cut a piece of Bermuda Bay cardstock at 5 1/2″ x 8 1/2″, score at 4 1/4″, fold and crease with a bone folder.
  • Cut two pieces of Magenta Madness cardstock, one at 4″ x4″ and one at 3 1/8″ x 3 7/8″.
  • Cut piece of Beautifully Penned DSP at 3 7/8″ x 3 7/8″ and adhere to the 4″ square piece of Magenta Madness cardstock. Tie a bow around this piece with the black & white gingham ribbon. Adhere piece to card base.
  • Cut a piece of Basic White cardstock at 3″ x 3 3/4″. Stamp thank you from the Shaded Summer stamp set with Tuxedo Black Memento ink in upper left corner.
  • Stamp the small floral image from the stamp set with the Memento ink onto a piece of Basic White cardstock. Color the flowers with the light and dark Magenta Madness Stampin’ Blends. Color the leaves with the light and dark Granny Apple Green Stampin’ Blends. Run through die cutting machine with the coordinating die from the Summer Shadows dies.
  • Back two scrap pieces of Bermuda Bay cardstock with an adhesive sheet cut to size. Run two different flowers through die cutting machine. Die cut two of the small solid leaves from scrap pieces of Granny Apple Green cardstock. Pull adhesive sheet backings off the flowers and adhere the leaf stems to the backs of each. Apply a few small dots of liquid glue to the leaves and adhere the flowers to the greeting piece.
  • Adhere the floral image over the die cut flowers with Stampin’ Dimensionals. Adhere piece to te 3 1/8″ x 3 7/8″ piece of Magenta Madness cardstock. Adhere piece to card front, overlapping the square piece.
  • For the inside of the card, cut a piece of Basic White cardstock at 4″ x 5 1/4″. Stamp the “so grateful” greeting from the Ornate Thanks stamp set with Magenta Madness ink. Stamp the sprig from the Shaded Summer stamp set with Granny Apple Green ink in lower left corner. Adhere to card.

Thanks for stopping by today!

Join Stampin’ Up! now through September 30th. You get to select $125 worth of products for only $99 and will also get a FREE bundle from the Holiday Catalog! Everything ships for free. I’d love to have you join my team. Become a happy discount shopper or build a business – the choice is yours! Click here for the benefits of joining Stampin’ Up!

Here is a list of bundles you can select from.

Place an online order between $50 and $149 and use this host code for September. You will receive a free gift from me the following month.  If your order is $150 or more DO NOT use the host code. You will qualify for Stampin’ Rewards.

Product List
Paper Snips
[103579]
$10.00

Berry Delightful Note Cards and Gift Box

Hello! Today’s project is a set of four note cards and a coordinating gift box that features the yummy Berry Delightful Designer Series Paper. This paper is part of a Sale-A-Bration bundle that also includes the Berry Blessings stamp set. You can earn this bundle for free with a $100 order, but time is running out because Sale-A-Bration ends tomorrow, February 28th. This will be your last chance to earn these products. This is one of the projects we did in my stamping club this month.

Here is how to make the note cards.

  • This project uses the Basic White Note Cards & Envelopes in the annual catalog. Use four cards and envelopes. Cards measure 5″ x 3 1/2″ folded.
  • Fold note cards and crease with bone folder.  Select four different sheets of the Berry Delightful DSP and cut them at 3 1/4″ x 4 3/4″. Adhere DSP to card fronts.
  • Cut four pieces of contrasting DSP at 3/4″ x 4 3/4″ and adhere them to the to card fronts, slightly below the middle.
  • Stamp greetings from the Sweet Strawberry stamp set. Select four ink colors that coordinate with the DSP. These cards use Poppy Parade, Blackberry Bliss, Garden Green and Pacific Point. I used two different greetings and stamped each of the two in a different color to coordinate with the cardstock for the scalloped circles.  Die cut the smaller “Just for You” greeting with the smallest circle in the Layering Circles die set.  Die cut the larger “Hello There” greeting with the second smallest circle in the die set.
  • I used the same colors of cardstock as the inks. Die cut the scalloped circles from each of the four different colors of cardstock.  For the smaller circle use the second smallest scalloped circle and for the larger circle use the third smallest scalloped circle.
  • Adhere the stamped greetings to the coordinating scalloped circle pieces and adhere to right side of card front.

The box is made with one of the Mini Paper Pumpkin Boxes from the annual catalog. Here is how I made it.

  • Make box by folding along all score lines. These boxes are food safe so one side is shiny and the other side is matte.  You want the shiny side to be the inside of the box.
  • Cut piece of DSP at 3 ¾” x 5 ½” and adhere to top of box.  Using the same sheet of DSP, cut two strips at 1″ x 5 3/4″ and two strips at 1″ x 3 3/4″. Adhere the strips to the sides of the boxes.  Cut a contrasting strip of DSP at 1″ x 5 1/2″ and adhere to the center of the top of the box.
  • Stamp greeting from the Berry Best stamp set with Garden Green Ink on a 3″ square piece of Basic White cardstock.  Die cut with the second largest circle in the Layering Circles dies, with the greeting closer to the bottom of the circle in order to leave space above to adhere punched out strawberries.  You can also punch out the circle if you own the 2 ½” circle punch, which is now retired. Adhere to right side of the top of the box.
  • From the 12” x 12” sheet of DSP with the multi-colored strawberries and flower blossoms, punch out the Poppy Parade and Rich Razzleberry strawberries with the Strawberry Builder punch.  This will cut off the stem part of the strawberry.  To add stems back, punch out from scraps of Garden Green cardstock using the Strawberry Builder punch and adhere to strawberries.  Using the builder punch, punch out the Pacific Point flower blossoms. Arrange strawberries and flower blossoms around the circle and adhere.
  • Add the four note cards and envelopes to the inside of the box and voila! You have a beautiful gift to give to someone special!

Thanks for stopping by today!

Sale-A- Bration is a great time to consider joining Stampin’ Up! This is your last opportunity to take advantage of this special promotion. During this promotion you can purchase the starter kit for only $99 and select $125 worth of merchandise from the current annual catalog or the new mini catalog. This is the BEST deal! You will also get a FREE 200 6″ x 6″ sheet assortment of our newest Designer Series Papers for five current color families, a $57.50 value! This paper will not be available for purchase until May 2021. Free shipping is also included. Become a happy shopper and enjoy a 20% discount on future orders. Click here to join.

Product List

Flower & Field-Kylie’s Training Blog Hop

Hello! Welcome to Kylie Bertucci’s Demonstrator Training Blog Hop for February. I’m part of a group of Stampin’ Up! demonstrators from around the world that participate in Kylie’s program for building our businesses. The theme for this year is thank you cards that we make as a way to show appreciation to our customers. Please be sure to click on the names in the list at the end of this post to hop around and view the beautiful projects posted by so many talented stampers.

Today’s card showcases the pretty Flower & Field Designer Series Paper, one of the Sale-A-Bration items you can earn for free with a $50 order. This is an easy layout that makes DSP the star of the show.

Here is how I made the card.

  • Card base – cut a piece of Just Jade cardstock at 5 1/2″ x 8 1/2″, fold in half and crease with a bone folder.
  • Cut a piece of Flower & Field DSP at 4″ x 5 1/4″. Cut in half on the diagonal by lining up opposite corners along the cutting track of the paper trimmer. Once you make the cut, without pulling the two pieces apart, gently turn the piece around so that you are now cutting the two other opposite corners. You have now cut out an “X” and can pull the triangles apart.
  • For this card I decided to use both sides of the DSP, however, you can mix and match with other contrasting pieces of DSP. You would just cut another piece of DSP at 4″ x 5 1/4″ and repeat the cutting process for making the “X.”
  • Adhere one set of triangles , matching the points in the center of the card front. Adhere the second set of triangles and space them so that some of the card base shows in between.
  • Stamp greeting from the Heal Your Heart stamp set, another Sale-A-Bration item, with Tuxedo Black Memento Ink on scrap piece of So Saffron cardstock. Run through your die cutting & embossing machine with one of the labels from the Stitched So Sweetly Dies.
  • Die cut two sets of the smallest set of leaves from the Pierced Blooms Dies, a fabulous set of dies in the January-June 2021 Mini Catalog. Adhere the leaves to opposite sides of the label with glue dots. Adhere label to center of card front.
  • Cut a piece of Basic White cardstock at 4″ x 5 1/4″. Stamp the smaller image from the Corner Bouquet stamp set with Just Jade ink in the lower left corner and adhere to inside of card. I chose not to stamp a greeting in order to write a personalized note.

Thanks for stopping by today!

Product List

The Bouquet of Hope Paper Pumpkin Kit provides enough supplies to create nine cards and coordinating envelopes. This soft, sympathetic kit includes patterned card bases, die-cut floral elements, ribbon, embellishments, and more! The kit’s exclusive Bouquet of Hope Stamp Set features supportive sentiments centered around comfort, care, hope, and love. Such a versatile stamp set can be used throughout the year! To subscribe to Paper Pumpkin, visit my site by clicking here.

Lovely You Meets Paper Blooms

Hello! Today’s card features the pretty Paper Blooms Designer Series Paper, one of the Stampin’ Up! free Sale-A-Bration items you can earn with a $50 purchase. When I first saw this paper, I immediately thought that it would work beautifully with the Lovely You stamp set, so I’ve paired up these two products.

The card layout is from Sunday Stamps Challenge. I haven’t participated in a challenge for a long time and when I came across this sketch I thought it would be a fun one to do so decided to give it a go! Here is the sketch for SSC248.

Here is how I made the card.

  • Card base – Night of Navy cardstock cut at 4 1/4″ x 11″. Score at 5 1/2″, fold and crease with a bone folder.
  • Cut piece of Paper Blooms DSP at 4 1/8″ x 5 3/8″ and adhere to card front.
  • Cut piece of Seaside Spray cardstock at 2 3/4″ x 3 3/4″ and run through die cutting machine with the second largest rectangle from the Stitched so Sweetly dies.
  • Cut piece of Basic White cardstock at 2 1/2″ x 3 1/2″ and run through die cutting machine with third largest rectangle from the Stitched so Sweetly dies. Randomly stamp flowers and leaves from Lovely You stamp set with Rococo Rose, Seaside Spray and Soft Sea Foam inks. Adhere to Seaside Spray rectangle. Adhere piece to center of card front.
  • Cut scrap piece of Basic White cardstock at 1/2″ x 2 3/4″, stamp greeting with Night of Navy ink and punch both ends with the Lovely Labels Pick a Punch. Cut scrap piece of Night of Navy cardstock at 3/4″ x 3 1/4″ and punch both ends. Adhere labels together. Adhere to stamped piece with Stampin’ Dimensionals.
  • Cut piece of Basic White cardstock at 4″ x 5 1//4″. Stamp flower with Rococo Rose ink. Stamp greeting from Happy Thoughts stamp set with Night of Navy ink. Adhere to inside of card.

Thanks for stopping by today!

Product List

Daisy Lane- Kylie’s International Blog Highlights

Hello and Happy New Year! I hope that 2021 will be brighter for everyone. Today I’m participating in Kylie Bertucci’s International Blog Highlights. Readers get to vote on their top five favorites in the gallery and the top 10 winners will get to participate in an International Blog Hop later this month. The theme is “thank you” and is a way for us to show our appreciation to someone that has inspired, helped or supported us in some way.

This card uses the Flowers and Field Designer Series Paper, one of the free products you will be able to earn with a $50 purchase during Sale-A-Bration, which begins tomorrow, January 5th. I paired it with the Daisy Lane stamp set and coordinating daisy punches. The second I laid eyes on this paper in the SAB brochure it immediately brought me back to the first dress I made in my Junior High School sewing class back in the mid-1960’s! I grew up in Brooklyn, New York so my mother and I took the subway to 34th Street in Manhattan to go to Macy’s department store. At the time they had an entire floor devoted to sewing and fabrics, now long gone. After perusing thousands of bolts of fabrics, many which had flowers on black backgrounds, I selected one with a daisy print. The dress was a simple shift with a tie belt, which was very in-style at the time. I saved the dress and went up to my attic this weekend to take a few pictures. The yellow in the fabric is an exact match to the Bumblebee In Color. Everything old is new again!

Here is how I made the card.

  • Card base – Cut a piece of Bumblebee cardstock at 5 1/2″ x 8 1/2″, score at 4 1/4″, fold and crease with a bone folder.
  • Cut piece of daisy print from the Flower & Field DSP at 4 1/8″ x 5 3/8″ and adhere to card front.
  • Cut piece of Basic Black cardstock at 3″ x 4″. Cut piece of Bumblebee polka dot print DSP at 2 7/8″ x 3 7/8″ and adhere to cardstock.
  • Stamp the daisy images from the Daisy Lane stamp set. On scrap piece of Whisper White cardstock, use Bumblebee ink to stamp the large daisy image twice and stamp the small daisy image three times. Punch out with the large and medium daisy punches. For the large flower, adhere two of the large daisies together and then adhere one small daisy. For the small flower adhere the two remaining small daisies together. Adhere with either glue dots or a small amount of liquid glue on the flower centers. Curl the tips of the large daisy with a bone folder. Add a champagne rhinestone to the center of each flower.
  • Stamp the greeting with Memento Tuxedo Black ink on scrap piece of Pool Party cardstock. Cut out with one of the dies from the Tasteful Labels die set. This is one of my “go to” sets for cutting out greetings.
  • Cut an 18″ piece of Bumblebee gingham ribbon and tie into a bow around the polka dot piece. Adhere piece to center of card front. Adhere large daisy with Stampin’ Dimensionals in upper left corner and adhere smaller daisy under the larger flower. Adhere greeting with Stampin’ Dimensionals.

I’d be so appreciative if you would vote for my card! Click on the vote image below. Once you are in the gallery, click on the heart at the top right hand side of the picture as the hearts appear.

Thanks for stopping by today!

This is the last day you will be able to place orders for items in the August-December 2020 Mini Catalog. The new January-June Mini Catalog goes live tomorrow!

 Product List  
Daisy Punch
[143713]
$18.00
Paper Snips
[103579]
$10.00