Forever Fern-Kylie’s International Blog Highlights

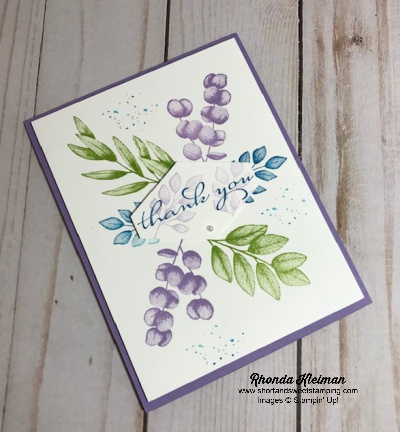
Hello! Today I’m participating in Kylie Bertucci’s International Blog Highlights. Readers get to vote on their top five favorites in the gallery and the top 10 winners will get to participate in an International Blog Hop later this month. The thank you theme is a way for us to show our appreciation to someone that has inspired, helped or supported us in some way. Today’s card features Forever Fern, one of my favorite stamp sets from the annual catalog.
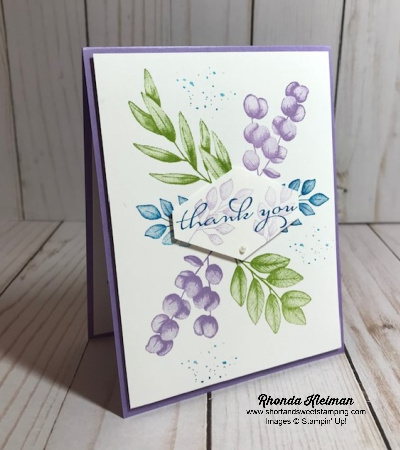
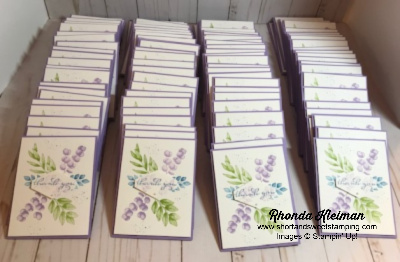
I was asked by a women’s organization I belong to, to make cards to go into 110 goodie bags that were hand-delivered to our members two weeks ago. Normally we have an annual membership dinner at a restaurant, however, due to Covid, we were unable to meet in person. We hosted a Zoom event and everyone opened up their bags at the same time. While we couldn’t be together in person, this was the next best option and it was a fun evening! Since I had to do so many cards I stuck to stamps, ink, paper and threw in a punch. Highland Heather and Pacific Point matched our logo perfectly and I added in Granny Apple Green.
Here is how I made the card.

  • Card base – cut Highland Heather cardstock at 4 1/4″ x 11″, score at 5 1/2″ and crease with a bone folder.
  • Cut piece of Whisper White cardstock at 4″ x 5 1/4″. Stamp the floral images from the Forever Fern stamp set with Highland Heather, Pacific Point and Granny Apple Green ink. Since I had to make multiple cards, I used the Stamparatus, which was a great time saver! Stamp the splatter image around the leaves with Pacific Point ink, stamping off once before stamping onto the cardstock.
  • On a scrap piece of Whisper White cardstock, stamp the thank you greeting from the Borders Abound stamp set. Punch out with the Tailored Tag punch. Overstamp the small leaf image twice with Highland Heather ink, first stamping off each time. I added a small pearl at the bottom of the tag.
  • Adhere the stamped floral piece to the card base with Stampin’ Dimensionals and then adhere the tag to the center of the floral spray with Mini Stampin’ Dimensionals.

We wanted to put a special message into the card so I ended up creating the inside of the card by using my computer printer. I selected a font that came close to matching the font on the tag and then used the RGB numbers for Pacific Point to print the messages, which I did four to a page and then cut apart with the Stampin’ Trimmer.
I’d be so appreciative if you would vote for my card by clicking on the vote image below. To give a vote, once you are in the gallery, click on the heart at the top right hand side of the picture as the hearts appear.

Thanks for stopping by today!

 Product List  
Stamparatus
[146276]
$49.00
November 5-7

Season of Thanks SIP Card

Today I have a SIP card (Stamps, Ink, Paper), #stampsinkpaper, that features the Gather Together stamp set. I’ve been a long-time member of a local chapter of the American Business Women’s Association and recently hosted a mini-mixer at my home for a small group of members. In addition to the socializing and refreshments, I designed two cards for the women to make that will be donated to the Cards for Soldiers organization. One card is for the recipient to keep and the other is for them to send to a friend or loved one back home. Since not everyone knew how to stamp and there was a limited amount of time to do the projects I had to keep the cards easy to make. I think it turned out to be simple yet elegant. I also used this project at my stamping club last week. All of the club members are avid crafters and they loved making this card too!

Here is how I made the card.

  • Card base – cut piece of Cajun Craze cardstock at 4 1/4″ x 11″ and fold in half.
  • Cut piece of the woodgrain paper from the Come to Gather Designer Series Papers at 4″ x 5 1/4″ and adhere to card base.
  • Cut piece of Whisper White cardstock at 3 1/4″ x 4 1/2″. Using the leaf image from the Gather Together stamp set, stamp two leaves with Cajun Craze ink and then fill in the blank spots by stamping the leaves with Blackberry Bliss. Attach to a piece of Blackberry Bliss cardstock cut at 3 3/8″ x 4 5/8″ and attach to card front
  • Stamp greeting with Blackberry Bliss ink on piece of Whisper White cardstock and use circle punch or circle die to cut out. Punch a larger circle with a piece of Blackberry Bliss cardstock and adhere to the greeting. Attach to the card.
  • Cut piece of Whisper White cardstock at 4″ x 5 1/4″ for inside of card. Stamp leaf in left corner and stamp greeting of your choice or leave blank.

Thanks for stopping by today!

 Product List  

Floral Essence SIP Card

Today’s card features the Floral Essence stamp set and was designed as a SIP (Stamps, Ink, Paper) card, so it is an easy card to create for both beginner crafters as well as avid crafters with a limited amount of time for cardmaking.

  • The color combination for the card is Rococo Rose, one of the new InColors, Smoky Slate and Balmy Blue. Here is how I made the card.
  • Card base – cut piece of Balmy Blue cardstock at 4 1/4″ x 11″ and fold in half.
  • Cut piece of Smoky Slate cardstock at 4 1/8″ x 5 3/8″ and attach to card base. Cut piece of Whisper White cardstock at 4″ x 5 1/4″.
  • Stamp the sentiment with Balmy Blue ink at bottom right on the piece of Whisper cardstock. To create the background, stamp the large floral image with Smoky Slate ink multiple times on piece of the Whisper White cardstock.
  • Stamp the three-petal image with Rococo Rose ink six times on a piece of Rococo Rose cardstock. Punch the petals out with the Perennial Flower Punch. Attach two of the petals together with a mini glue dot to make one flower. Repeat two more times.
  • Adhere stamped background piece to card front. Attach the punched flowers to card with Stampin’ Dimensionals.
  • Cut piece of Whisper White cardstock at 4″ x 5 1/4″ for inside of card. Stamp large floral image at bottom corner of card using one of the three colors from the card and adhere.
Use this host code when placing online orders between $50-$149 to receive a free gift from me.  DO NOT use this code if your order is $150 or more, as you will automatically receive Stampin’ Rewards.

Thanks for stopping by today!

 Product List