Pick of the Patch Card

Hello and Happy Halloween!

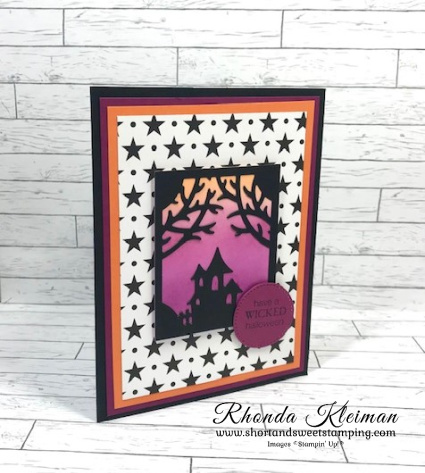
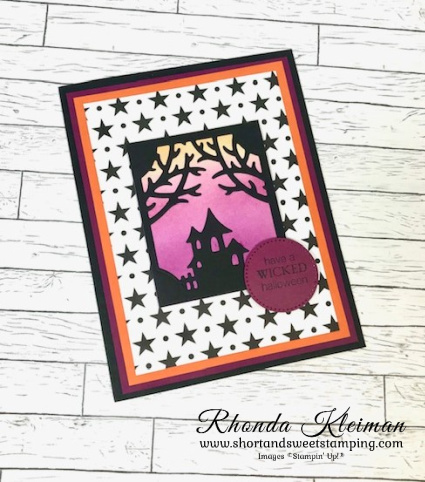
Today’s card features the cute Pick of the Patch bundle. Halloween has always been one of my favorite holidays since I was a small child. Alas, this year, this is the only card I got to make! After many months, my dining room and living room renovation is mostly finished as of yesterday, with the delivery of new furniture and electricians hanging brand new light fixtures, I’m now in the final inning! I still have to purchase a rug and window coverings and some new accessories, so I will hold off posting pictures of my new space for now. No more contractors and days and days having to leave the house for hours at a time, which greatly cut into my business. I held my first in-person classes last week since July and it was great to get back to stamping with my wonderful customers! This is one of the cards we made.

Here is how I made the card.

  • Card base – cut a piece of Pumpkin Pie cardstock at 4 1/4″ x 11″, score at 5 1/2″, fold and crease with a bone folder.
  • Cut a piece of DSP at 4″ x 5 1/4″ and adhere to card front. Since I knew I wouldn’t have time to make many Halloween cards this year, I used paper from the retired Gingham Cottage pack. Them Bones DSP from this year’s holiday mini catalog is what I would have used!
  • Cut a piece of Basic Black cardstock at 3 3/4″ x 5″ and run through Stampin’ Cut & Emboss Machine with the third largest Deckled Rectangle die. Cut a length of Black & White 1/4″ Gingham Ribbon and tie into a bow around the cardstock. Adhere at an angle to card front.
  • Cut a piece of Basic White cardstock at 2 5/8″ x 4 1/4 to use for the focal piece. Cut a strip of Basic White cardstock to use to stamp and punch out some of the images. Stamp the large, medium and small pumpkins with Pumpkin Pie ink. Stamp the pumpkin face onto the medium pumpkin. Punch out the large and medium pumpkin and fussy cut the small pumpkin.
  • Stamp three stems with Early Espresso ink and one leaf with Old Olive ink. Adhere to pumpkins with mini glue dots.
  • Stamp greeting with Early Espresso ink in the upper right corner of the Basic White focal piece. Stamp the elongated pumpkin below it with Cajun Craze ink and stamp the stem onto the piece with Early Espresso ink.
  • On the left side of the focal piece, stamp the branch with Pecan Pie ink. Stamp the dot image with Old Olive ink onto the branch limbs. Stamp the bird with Memento Black Ink at the top of the branch.
  • Adhere the focal piece over the Basic Black piece with Stampin’ Dimensionals. Add a few Copper Clay dots from the 2023-2025 In Color Dots for a bit of bling.
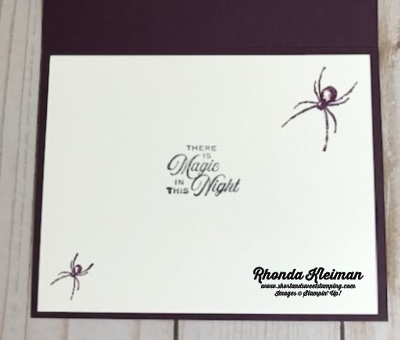
  • Cut a piece of Basic White cardstock at 4″ x 5 1/4″ and stamp a pumpkin in one of the lower corners. Adhere to inside of card.

Thanks for stopping by today!

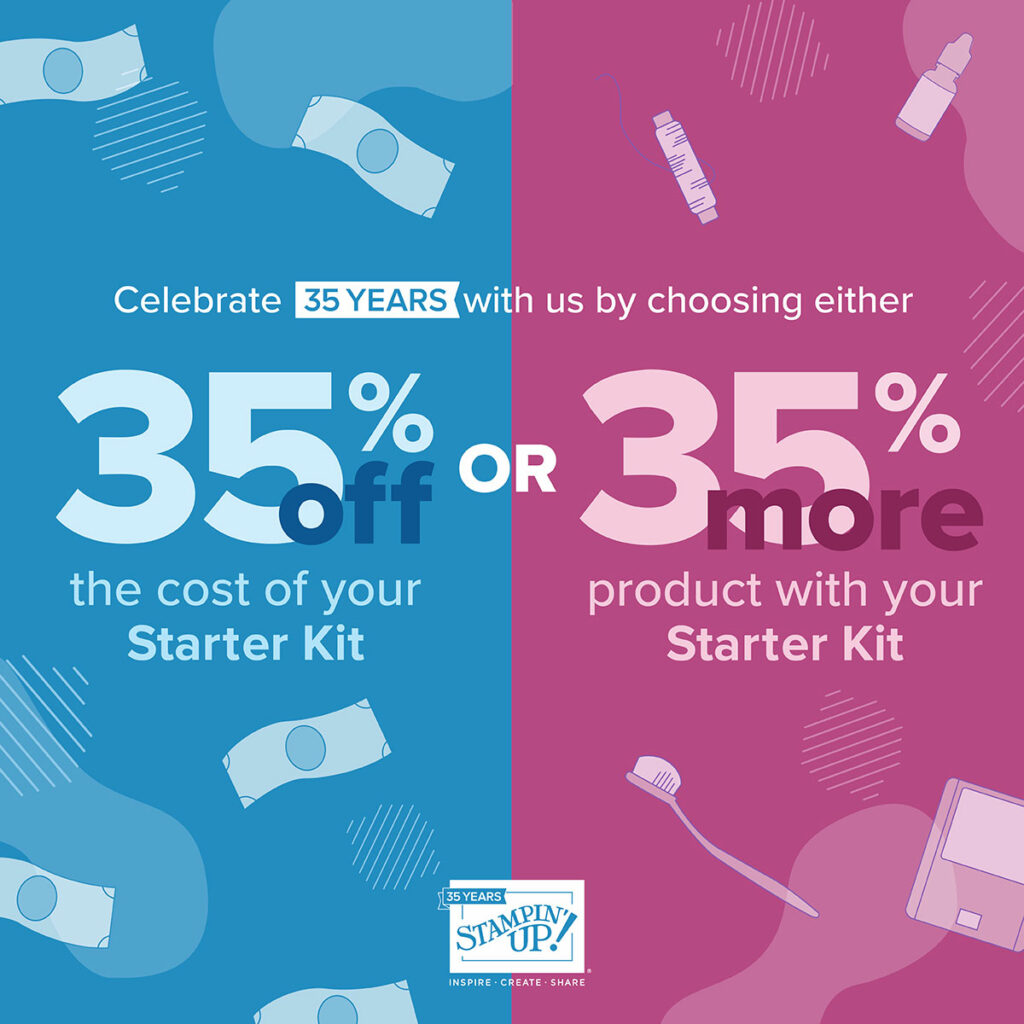
Today is the last day to take advantage of this great deal to join Stampin’ Up!

If you choose to the 35% off the cost of the Starter Kit you will only pay $64.35 and will receive $125 in merchandise.  If you choose the 35% more product with your Starter Kit you will receive $168.75 worth of product by spending $99.

You do not have to do Stampin’ Up! as a business!  You can join as a happy discount shopper!  Either way, you get perks such as: minimum of 20% off on all orders view new catalogs one month in advance of release placing pre-orders attending virtual and in-person events exclusively for demonstrators When you join, your monthly minimum doesn’t take effect until three months after your join date, so you actually have six months to meet your quarterly minimum.  If you decide at any time that you would like to drop as a demonstrator, there is absolutely no penalty – you will go back to being a customer.  I’d love to have you on my team and am happy to answer any questions you might have.  Click here for further information about joining or feel free to contact me directly.
 

Make a 25 day paper advent calendar with the new Rustic Christmas Countdown Kit.  It includes 25 individual envelopes, printed die cuts, printed labels, adhesives, embellishments, clothespins and twine.  The folded envelope size is 4″ x 3″.  Coordinating colors are Cherry Cobbler, Crumb Cake, Mossy Meadow, Old Olive. You can order the kit in my online store.  Item #163114, Price $19.00.

Place an online order between $50 and $149 and use this host code for October. You will receive a free gift from me the following month.  If your order is $150 or more DO NOT use the host code. You will qualify for Stampin’ Rewards.

Product List
Paper Snips
[103579]
$11.00

Bewitching Slimline Card

Hello and Happy Halloween! Today’s card features the Bewitching stamp set and coordinating Witches Hat Builder Punch. This is another one of the cards we made in my recent Halloween Card class and everyone loved making it! Sadly, the punch proved to be so popular that it is no longer available.

Here is how I made the card.

  • Card base: Cut a piece of Gorgeous Grape cardstock at 7″ x 8 1/2″, score at 3 1/2″, fold and crease with a bone folder.
  • Cut a piece of the Black & White Designs Designer Series Paper with the diamonds at 3 1/4″ x 8 1/4″ and adhere to card front.
  • Cut three pieces of Basic Black cardstock at 3″ square and run them through a die cutting machine with the 3rd largest circle in the larger set of Layering Circles Dies. Adhere to card front as pictured.
  • Cut three pieces of Basic White cardstock at 2 1/2″ and run through a die cutting machine with the 3rd largest circle in the smaller set of Layering Circles Dies. Stamp the spiderweb from the Bewitching stamp set on one of the circles. Adhere the circles to the Basic Black circles.
  • On a scrap piece of Basic White cardstock stamp the spiderweb hat with Memento Black ink, color the spiderweb with Parakeet Party Stampin’ Blends and Basic Black Stampin’ Blends for the rest of the hat. Punch out the hat with the Witches Hat Builder Punch. Cut a scrap piece of Parakeet Party Glimmer Paper from the 2022-2024 In Color paper and punch out the hatband from the punch. Adhere to hat. Adhere hat to circle with Stampin’ Dimensionals.
  • On a scrap piece of Basic White cardstock, stamp the hat with the polka dots with Pumpkin Pie ink. Color in the dots with a Gorgeous Grape Stampin’ Write marker. Color hatband with Basic Black Stampin’ Blends. Punch out hat and adhere to Basic White circle with Stamin’ Dimensionals.
  • On a scrap piece of Basic White cardstock, stamp hat with buckle with Gorgeous Grape ink. Color buckle with Parakeet Party Stampin’ Blends. Punch out hat and adhere to Basic White Circle with Stampin’ Dimensionals. Punch out the stars from the hat punch with a scrap piece of Basic Black cardstock. I used a piece of retired Black Glimmer Paper for some extra bling. Adhere with either Mini Glue Dots or liquid glue.
  • Stamp greeting with Memento Black ink on a scrap piece of Parakeet Party cardstock and run through die cutting machine with the label die from the Scary Silhouettes Dies. Adhere to circle with the Pumpkin Pie hat.
  • Cut a piece of Basic White cardstock at 3 1/4″ x 8 1/4″. Stamp spider and spiderweb with Memento Black ink. Stamp greeting with Gorgeous Grape ink. I used greetings for the front and inside of the card that are from retired Halloween stamp sets. The spiderweb is also from a retired set. I like to hold onto some of my favorite retired holiday stamp sets because they have some favorite images that I like to bring out from year to year to use on my personal cards.

Wishing you a frightfully, delightful Halloween!

Thanks for stopping by today!

Today is the last day to take advantage of this great offer – when you purchase the Starter Kit you get to pick $155 worth of product for only $99 plus free shipping! You also get a free past Paper Pumpkin kit. Join as a happy discount shopper or as a business – the choice is yours! You might want to consider adding the beautiful new Fitting Florets Collection to the kit! A few other benefits of joining are: enjoy a 20%-25% discount on all orders as an active demonstrator, get to see new catalogs early and place pre-orders, attend in-person and virtual Stampin’ Up! events. I’d love to have you on my team! Click here for further information and to join.

Place an online order between $50 and $149 and use this host code for October. You will receive a free gift from me the following month.  If your order is $150 or more DO NOT use the host code. You will qualify for Stampin’ Rewards.

Product List

Scary Silhouettes Card

Hello!

Today’s card features the Scary Silhouettes Dies from the holiday mini catalog. I’ve loved celebrating Halloween ever since I was a small child. I have made Halloween cards for years, but hadn’t offered a class for several years because my customers didn’t seem interested. However, I decided to offer a class this year and I got a great response, so was able to hold two sessions last week. This one of the cards we made and everyone had fun playing with the die cuts!

Here is how I made the card.

  • Card base – cut a piece of Basic Black cardstock at 5 1/2″ x 8 1/2″, score at 4 1/4″, fold and crease with a bone folder.
  • Cut a piece of Rich Razzleberry cardstock at 4″ x 5 1/4″. Cut a piece of Pumpkin Pie cardstock at 3 3/4″ x 5″. Cut a piece of the Black & White Designs Designer Series Paper with the stars at 3 1/2″ x 4 3/4″ and adhere to the Pumpkin Pie piece. Adhere to Rich Razzleberry piece and adhere to card front.
  • Cut a piece of Basic White cardstock at 2 3/8″ x 2 7/8″. Color the piece with blending brushes. Color the top of the piece with Pumpkin Pie ink. Color the middle with Rich Razzleberry and then color the bottom with Blackberry Bliss ink. Go over each color as many times as you need with the blending brushes until you get the depth of color that you like.
  • Cut a piece of Basic Black cardstock at 2 3/8″ x 2 7/8″ and run it through a die cutting & embossing machine with the tree branch die. Adhere to the piece colored with the blending brushes. Run a scrap piece of Basic Black cardstock through the machine with the haunted house die. Adhere house to bottom of the tree branch piece. Adhere to front of card with Stampin’ Dimensionals.
  • Run a scrap piece of Rich Razzleberry cardstock through a die cutting machine with the second smallest circle from the Stylish Shapes Dies. Stamp greeting with Memento Black ink. I used a greeting from Wicked Cool, a long-retired stamp set that I kept because it is one of my favorite Stampin’ Up! Halloween stamp sets! Adhere to lower right corner of the tree branch piece with Stampin’ Dimenionals.
  • Cut a piece of Basic White cardstock at 4″ x 5 1/4″. Stamp with greeting and adhere to inside of card.

Thanks for stopping by today!

Sneak Peek

Stampin’ Up! has released a collection of products, Fitting Florets, that will be available for purchase beginning on November 1. Several of the products will only be available until January 4th, while supplies last: Fitting Florets DSP, Framed & Festive Stamp Sets, Gold Adhesive Backed Swirls. The following products are also available for purchase in the Mini Catalog starting January 2023: Framed Florets Bundle, Framed Florets Stamp Set, and Framed Florets Dies. Add just the right touch of elegance to any occasion, including Christmas and seasonal celebrations, with the sweet Fitting Florets Collection. From color schemes to sentiments and embellishments to dies, these unique products blend together so that your cards and crafts fit whatever occasion you might need. Send birthday wishes, express your gratitude, or spread Christmas cheer—with so many options to mix and match you’ll be set no matter the celebration all year!

Place an online order between $50 and $149 and use this host code for October. You will receive a free gift from me the following month.  If your order is $150 or more DO NOT use the host code. You will qualify for Stampin’ Rewards.

Product List

Festive Post for Halloween

Hello and Happy Halloween! Today’s card features the Festive Post stamp set. This is a versatile set because it has images for Halloween, Christmas and Valentines Day and they can be punched out with either the Rectangular Postage Stamp punch or other punches and dies you might have in your collection. Here is how I made the card.

  • Card base – cut piece of Basic Black cardstock at 5 1/2″ x 8 1/2″, score at 4 1/4″ and crease with a bone folder.
  • Cut piece of Cajun Craze cardstock at 4 1/8″ x 5 3/8″.
  • Select two different pieces of Magic in the Night Designer Series Paper. Cut one piece at 2 1/2″ x 5 1/4″ and another at 1 1/2″ x 5 1/4″. Adhere both pieces to the Cajun Craze piece.
  • Cut three pieces of Whisper White cardstock at 1 1/4″ x 1 7/8″. Stamp the three images from the Festive Post stamp set. Stamp the October 31 image with Tuxedo Black Memento ink. Stamp the brooms with Cajun Craze ink. Stamp the greeting with Blackberry Bliss ink. Stamp the small spider from the Hallows Night Magic stamp set under the greeting.
  • Punch three of the Rectangular Postage Stamps from scrap pieces of Basic Black cardstock. Adhere to the stamped images.
  • Wrap a piece of Metallic Mesh Ribbon twice around the Cajun Craze/DSP piece and tape on the back. Adhere this piece to the card front. Use Tear and Tape or Stampin’ Seal+ to adhere the postage stamp pieces to the card front so that they stick well to the ribbon
  • Adhere five rhinestone basic jewels all around the card for some extra bling.
  • Cut piece of Whisper White cardstock at 4″ x 5 1/4″ and stamp a greeting from the Hallows Night Magic stamp set with Tuxedo Black Memento ink. Stamp large and small spider images from the set with Blackberry Bliss ink. Adhere to inside of card.

Thanks for stopping by today!

 Product List  
November 5-7

Hallows Night Magic – Another Card Idea

Hello! Here’s another card I created with the Hallows Night Magic Bundle. It was fun and easy to put it together. Here is how I made the card.

  • Card base – cut piece of Basic Black cardstock at 5 1/2″ x 8 1/2″, score at 4 1/4″ and crease with a bone folder.
  • Cut piece of Whisper White cardstock at 3 1/4″ x 5″.
  • Select three different papers from the Magic in this Night Designer Series Paper and cut at 1 1/2″ x 3″. Adhere to Whisper White cardstock and adhere piece to card front.
  • Stamp label image from the Hallows Night Magic stamp set on scrap piece of Whisper White cardstock with Tuxedo Black Memento ink. Color the flowers with Pumpkin Pie and Cajun Craze Stampin’ Blends and color the leaves with Old Olive Stampin’ Blends. Stamp greeting with black ink. Run through die cutting machine with the smaller label die from the Halloween Magic dies.
  • Die cut larger label from scrap piece of Basic Black cardstock and adhere to stamped label piece.
  • Cut piece of Glittered Organdy Ribbon at 6″, trim ends at an angle and adhere across the center of the card front. I used Scotch Tape to hold it down in the center. Adhere label over the ribbon.
  • Cut piece of Whisper White cardstock at 4″ x 5 1/4″. Stamp greeting with black ink. Cut strip of Basic Black cardstock at 1 1/2″ x 4 3/4″ and run it through the die cutting machine using the filigree edge die. Adhere to bottom of the cardstock. Adhere piece to inside of card.

Thanks for stopping by today!

There are just a few days left for the 15% discount on Designer Series Paper!

 Product List  
 

Hallows Night Magic

Today’s card features products from the Magic in this Night suite. When I saw this suite in the August-December 2020 mini catalog I knew right away that I would purchase some of the products because as much as I enjoy the more traditional Halloween stamps and papers, the ones this year are more sophisticated or elegant and it is a nice change of pace! I decided to showcase the die cut labels by making a gatefold card. It is one of the cards we made in my stamping club this month.

Here is how I made the card.

  • Card base – cut piece of Basic Black cardstock at 5 1/2″ x 8 1/2″. Score at 2 1/8″ on both ends, fold and crease sharply with a bone folder.
  • Cut four strips of Magic in the Night Designer Series Paper at 1 7/8″ x 5 1/4″. Adhere two of the strips to the front flaps and the remaining two strips to the inside flaps.
  • Stamp “Happy Halloween” greeting from the Hallows Night Magic stamp set with Cajun Craze ink on scrap piece of Whisper White cardstock. Run through die cutting machine with the smaller label die from the Halloween Magic dies.
  • Cut piece of Black Glitter paper with the larger die from the Halloween Magic dies. Adhere the stamped greeting to this piece with either Tear and Tape or Stampin’ Seal+. Adhere entire label piece to the left flap on the card front. Make sure that you only apply glue to the left part of the label so that the card can be opened!
  • From the sheet of Magic in the Night DSP with the bats, cut out both the large and small bats with the coordinating die from the Halloween Magic dies. Both shapes are included on the one die. Adhere bats to label.
  • Cut piece of Whisper White cardstock at 4″ x 5 1/4″. Stamp another greeting from the Hallows Night Magic stamp set with Cajun Craze ink. Stamp small bat images with Memento Tuxedo Black ink in opposite corners. Adhere to inside of card.
  • Cut length of Metallic Mesh ribbon, tie into a bow and adhere to corner of label with a glue dot.

Thanks for stopping by today!

 Product List  

Happy Halloween!

Hello! Today I’m sharing my last Halloween project with you, featuring the adorable Mini Curvy Keepsakes Box Dies. I attended an American Business Women’s Association local chapter mixer last evening and rather than bring a bottle of wine, I thought it would be a nice touch to bring treat boxes filled with candies for all of the attendees. They looked very nice placed on either side of the table centerpiece. Everyone oohed and aahed and were delighted when I told them they each got to take one home!

I ended up using mostly retired products because they worked really well and it was an opportunity for me to continue to use them up. I used some of the Monster Bash Designer Series Papers in the current Holiday catalog a as well as papers from Halloween DSP from previous years that had more small-scale prints. I also used Basic Black Bakers Twine and the pumpkin on the tag came from a very old set, Halloween Frights. I tend to keep many holiday sets after they retire.

Here is how I made the boxes.

  • Cut your selected Designer Series Papers into 6″ squares. Cut box shape with die from the Mini Curvy Keepsakes Box Dies by running through your die cutting machine. Fold box on all of the score lines.
  • Place candies in open box before closing it up. The box holds 4-5 Hershey Kisses or 2-3 Miniatures or other similar-sized candies.
  • Die cut tags using the oval-shaped die in the set. Stamp a greeting or image on scraps of Whisper White card stock. I stamped the pumpkin image with Pumpkin Pie ink.
  • Thread bakers twine or other ribbon through the tag and then thread it through the box handles and tie in a bow.

Thanks for stopping by today!

Product List